Step-by-Step Guide to Installing an Air Conditioner Line Set

Installing an air conditioner line set installation correctly is very important. It helps your system work well and last longer. Did you know small refrigerant lines can lower cooling power by 5% or more? For instance, using a 3/4-inch suction line for 40 feet can cut efficiency by 1%. Over time, bad air conditioner line set installation can also cause dirt to harm your system.
This guide is great if you like DIY projects but lack technical skills. It’s simple to follow and helps you avoid expensive errors. Also, installing your air conditioner safely protects you and saves money on repairs. Whether it’s a split system or another type, these steps make the job easier and more satisfying.
Key Takeaways
Installing an air conditioner line set correctly is very important. Even small errors can waste a lot of energy.
Safety comes first when installing. Wear safety gear, turn off power, and follow rules to stay safe.
Use good materials like copper pipes and thick insulation. This helps it work better and need fewer repairs.
Preparation for Air Conditioner Line Set Installation
Tools and materials you’ll need
Get all your tools and materials ready before starting. Being prepared makes the job easier and saves time. Here’s a simple list:
Copper tubing: Use strong, high-quality copper. It lasts long and keeps your system working well.
Pipe insulation: Stops energy loss and keeps refrigerant at the right temperature.
Vacuum pump: Removes air and moisture from the system.
Refrigerant gauges: Check pressure levels during the setup process.
Wrenches and screwdrivers: Basic tools to tighten and secure parts.
Nitrogen tank: Tests pressure to find any leaks.
Using good materials, like top-grade copper tubing, helps your air conditioner work better and last longer.
Staying safe while working
Safety is very important when installing a line set. You’ll handle refrigerants, wires, and heavy tools. Follow these safety tips:
Wear gloves and safety goggles to protect yourself.
Turn off the power before you begin.
Use tools carefully to avoid getting hurt.
Follow local rules, like NFPA 70, to stay compliant.
Set up a special electrical circuit with the right breaker size.
HVAC systems can be dangerous if not handled right. These steps keep you safe and make the job safer.
Knowing the line set parts
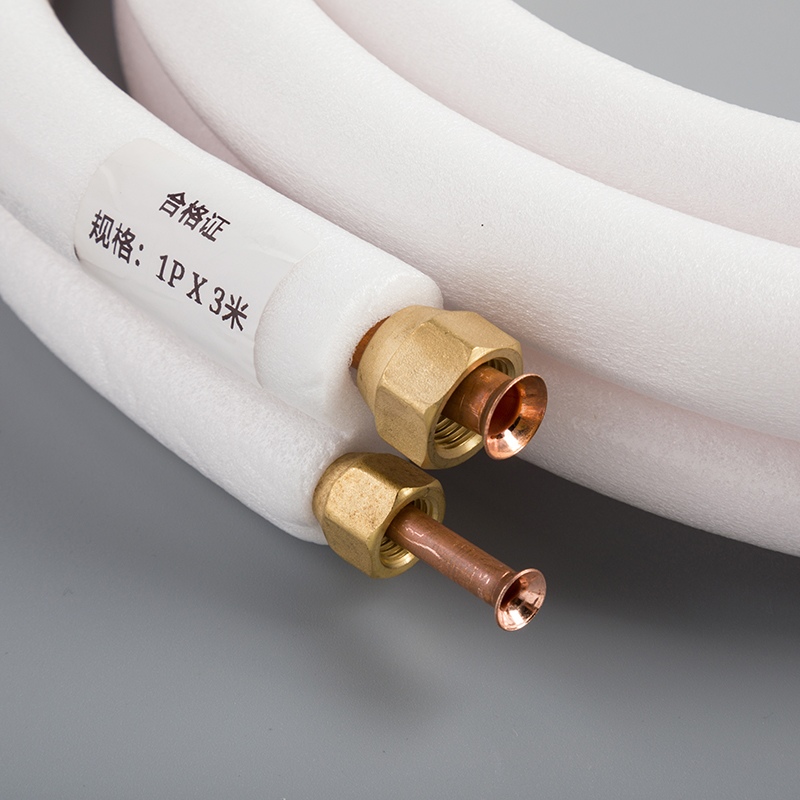
The line set is a key part of your air conditioner. It links the indoor and outdoor units so refrigerant can move between them. Here’s what each part does:
Suction line: The bigger pipe carries low-pressure refrigerant to the compressor.
Liquid line: The smaller pipe moves high-pressure refrigerant to the indoor unit.
Insulation: Wraps around the suction line to stop condensation and save energy.
Modern line sets are built to last and work well. They use strong materials and sealed parts to reduce maintenance. Knowing these parts helps you install them right and avoid mistakes.
Step-by-Step Process for Installing the Indoor Unit
Placing and mounting the indoor unit
Placing your indoor unit correctly is very important. It helps with better cooling and smooth operation. Follow these steps:
Choose a spot on the wall with no blockages. Make sure air can flow freely, and avoid areas with direct sunlight or heat.
Mount the unit about 7 feet (2.1 meters) high. Leave 6–12 inches (15–30 cm) of space around it for airflow.
Use a stud finder to find wall studs. These will hold the unit’s weight securely.
Keep the unit at least 3.3 feet (1 meter) away from antennas or power lines. This avoids signal problems.
Stay away from places with gas leaks, oil mist, or sulfur. These can harm the unit over time.
Pick a central spot in your home. This helps air spread evenly in the room.
Pro Tip: Check the wall for hidden pipes or wires before drilling. This can save you from costly mistakes later.
Attaching refrigerant lines to the indoor unit
After mounting the indoor unit, connect the refrigerant lines. This step needs care to make sure the system works well. Follow these steps:
Plan the shortest and straightest path for the refrigerant lines. This reduces energy loss.
Measure and cut the copper tubing to the right length. Use a pipe cutter for clean cuts.
Flare or swage the tubing ends for tight connections with the unit.
Use brazing or soldering to attach the lines to the unit. This seals them tightly.
Wrap insulation around the lines to stop heat transfer and condensation.
Seal wall holes where the lines pass through. This prevents air leaks.
Test for leaks using nitrogen gas. This ensures the connections are sealed.
Use a vacuum pump to remove air and moisture from the lines. This gets the system ready for refrigerant.
Note: Always follow the manufacturer’s instructions for installing refrigerant lines. This ensures the system works properly.
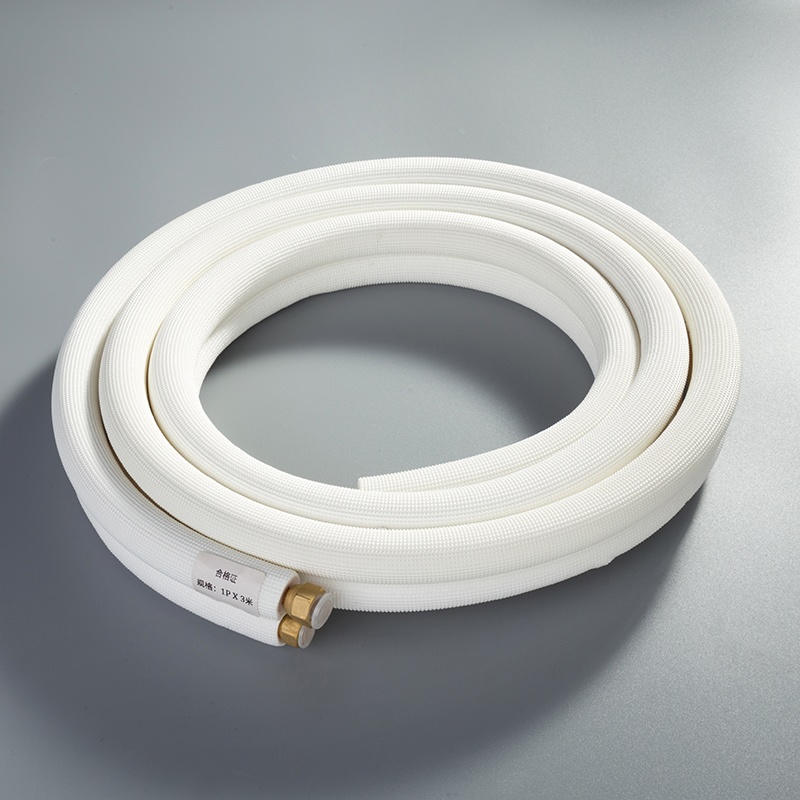
Insulating and securing the line set
Insulating and securing the line set is key to saving energy and avoiding damage. Here’s how to do it:
Use strong duct liner adhesives to stick insulation to the suction line. These adhesives come in water-based, solvent-based, or pressure-sensitive types.
Strengthen the insulation with cements or mastics to stop cracks and make it last longer. Use materials that match the insulation type.
Apply sealants to all joints and connections. This keeps moisture out and protects the insulation.
Secure the line set with supports like studs, pins, or staples. These hold the lines in place and prevent wear.
Quick Tip: Check the insulation often for damage or wear. Replace damaged insulation quickly to avoid bigger problems later.
By following these steps, your split system air conditioner will work well and last a long time. Taking time to place, connect, and insulate the line set properly will save energy and reduce repairs.
Step-by-Step Process for Installing the Outdoor Condenser
Picking the best spot for the outdoor unit
Choosing the right place for your outdoor unit is important. It helps the system work well and last longer. Keep these tips in mind:
Find a shaded spot: Put the unit where it won’t get sunlight all day. Too much heat makes the system work harder and less efficient.
Allow good airflow: Leave 2–3 feet of open space around the unit. This lets air move freely and keeps the condenser cool.
Avoid blockages: Keep the unit away from walls, fences, or plants. Trim bushes or trees nearby to keep the area clear.
Reduce noise: Place the unit far from bedrooms or living rooms. This keeps the noise from bothering you inside.
Raise the unit: Use a strong pad or platform to lift it off the ground. This protects it from water during heavy rain.
Pro Tip: Check local rules before installing. Some places have rules about where outdoor units can go.
Hooking up refrigerant lines to the condenser
After placing the outdoor unit, connect the refrigerant lines. These lines move refrigerant between the indoor and outdoor units. Follow these steps:
Get the lines ready: Measure and cut the copper tubing to the right size. Make sure the cuts are smooth and even.
Flare the ends: Use a flaring tool to make tight connections. This helps the lines fit securely with the condenser.
Connect the lines: Attach the suction and liquid lines to the correct ports. Tighten them with a wrench, but don’t overdo it.
Seal the joints: Use thread sealant or Teflon tape to stop leaks. This step is key for keeping the system efficient.
Check for leaks: Pressurize the system with nitrogen gas to find leaks. Fix any leaks before moving forward.
Quick Tip: Label the refrigerant lines as you install them. This makes future repairs or maintenance easier.
Setting up drainage and securing the line set
Good drainage and securing the line set are very important. They help the system last longer and work better. Here’s how to do it:
Add a drain pan: Place a pan under the condenser to catch water. This stops puddles from forming around the unit.
Check the slope: Make sure the drain line tilts downward. This helps water flow out easily and avoids clogs.
Secure the line set: Use clamps or brackets to hold the line set steady. This stops it from moving and wearing out.
Protect the insulation: Cover the suction line with strong insulation. This keeps the refrigerant cool and saves energy.
Here’s a simple table showing how professionals handle these tasks:
Example Installation | Key Features |
|---|---|
Two new Trane split systems | Disconnect, whip, surge protector, sealed connections |
Two 3-ton Trane attic furnaces | Pad, disconnect, whip, surge protector, sealed ductwork |
3.5-ton Trane attic heat pump | Disconnect, whip, surge protector, sealed ductwork |
Note: Check the drain line often for clogs or damage. A blocked drain can cause water damage and expensive repairs.
By picking the right spot, connecting the lines, and setting up drainage, your outdoor unit will work its best. These steps improve efficiency and help your air conditioner last longer.
Connecting the Line Set and Vacuum Pump
Attaching the line set to both units
Connecting the line set to your indoor and outdoor units is very important. It lets the refrigerant move smoothly between them. Follow these steps:
Unpack the indoor unit: Put it on a wall inside your home. Connect it to the refrigerant and power lines.
Install the mounting bracket: Use a level to make sure it’s straight. Drill holes and attach the bracket to the wall.
Drill the lineset hole: Make a hole in the wall at a slight downward angle. This helps water drain out.
Mount the indoor unit: Push the line set through the hole. Keep the drain line at the bottom. Secure the unit to the bracket.
Seal the lineset hole: Use caulk or neoprene to close gaps around the pipe. This stops air from leaking.
Attach the refrigerant lines: Take off the condenser cover. Screw the lines onto the connections and tighten them carefully.
Tip: Check all connections twice to make sure they’re tight. Loose fittings can cause leaks and lower efficiency.
Using a vacuum pump to remove air and moisture
Getting rid of air and moisture is very important for your system. A vacuum pump helps with this job. Here’s why it’s needed:
Air and moisture can harm your system. They cause rust and make cooling less effective.
Removing them ensures only refrigerant and oil stay in the system. This keeps it working well.
How to use the vacuum pump:
Hook the pump to the service ports on the line set.
Turn it on and let it run until the gauge shows a steady reading.
Watch the gauge to make sure no moisture is left inside.
Evidence Description | Key Points |
|---|---|
Importance of Evacuation | Removing air and moisture is necessary. |
Impact of Moisture | Moisture can ruin vacuum pump oil. |
System Operation | Only refrigerant and oil should remain. |
Pro Tip: Use nitrogen gas to clean the system before using the vacuum pump. This helps get rid of moisture faster.
Checking for leaks with a nitrogen pressure test
Before finishing, you need to check for leaks. A nitrogen pressure test is the best way to do this.
Fill the system with nitrogen gas. This helps you find weak spots in the connections.
Use soapy water or a leak detector to check the joints. Look for bubbles or listen for hissing sounds.
If you find a leak, tighten the connection or replace the broken part.
Note: Don’t skip this step. Leaks can cause refrigerant loss and expensive repairs later.
By following these steps, your air conditioner will work better and last longer. Taking time to connect the line set, remove air and moisture, and check for leaks will save you trouble later.
Testing and Sealing the Air Conditioning Installation
Testing the system for functionality
Before finishing your air conditioner setup, test the system. Turn it on and check if the indoor and outdoor units work together. Listen for strange sounds or vibrations. These might mean parts are loose or not connected right.
Experts use special tools to find problems. For example:
Diagnostic Tool/Methodology | What It Does |
|---|---|
Adaptable FDD Algorithms | Finds issues in air conditioners and heat pumps. |
Performance Metrics | Checks energy use and avoids false alerts. |
AC/HP FDD Tester/Evaluator | Tests how well the heat pump works. |
Cloud-based FDD Methods | Uses smart tech to spot problems faster. |
Testing makes sure air flows evenly and heat moves properly. Skipping this step can cause uneven cooling or heating. This might make your home uncomfortable and raise energy costs.
Tip: If rooms feel too hot or cold, check refrigerant levels and airflow settings.
Sealing connections and insulating the line set
Sealing and insulating the line set is very important. It keeps the system efficient and stops refrigerant leaks. Wrap the suction line with good insulation to keep it cool and dry. Use tape or glue to hold the insulation in place.
Follow these rules for sealing:
Section | What to Do |
|---|---|
120.3(a) | Cover all pipes in cooling systems with insulation. |
120.3(b) | Protect insulation from weather damage. |
120.3(c) | Use insulation with the right thickness and R-value. |
A sealed system saves energy and helps your air conditioner work better.
Pro Tip: Check the insulation every year for damage. Replace worn parts quickly to keep efficiency high.
Performing final safety checks
Safety checks are the last step to finish your installation. Make sure all wires are tight and the thermostat works. Look at the drain line to see if water flows out properly. Also, check for any leaks in the system.
Here’s a simple safety checklist:
Checklist Item | What to Check |
|---|---|
Thermostat Installation | Test modes and settings. |
Customer Communication | Explain how the system works. |
Safety Precautions | Turn off power, ensure good airflow, and lift safely. |
Doing these checks makes sure your system is safe and works well.
Reminder: Always turn off the power before checking wires to stay safe.
Putting in an air conditioner line set can feel hard. But, step-by-step instructions make it easier to handle. Testing and sealing help your system work safely and well. Remember to take care of it often! Clean the filters, check refrigerant levels, and look at the insulation every year.
Tip: Keeping your system in good shape saves energy and keeps your home comfy all year.
FAQ
1. Can I install an air conditioner line set by myself?
Yes, you can do it! This guide is easy to follow for DIY fans. Just take your time and stay safe.
2. How can I check if my line set is leaking?
Try a nitrogen pressure test or use soapy water. Watch for bubbles or listen for hissing noises at the joints.
3. What tools do I need for this job?
You’ll need copper pipes, a vacuum pump, pressure gauges, wrenches, and pipe insulation. These tools help make the job easier and better.
Tip: Always check your work twice to avoid big problems!
See Also
Simple Methods To Professionally Install Copper Tubes For AC
A Comprehensive DIY Manual For Repairing AC Copper Tubes
Five Essential Steps For Safely Installing Copper Pipe Coils

© Copyright 2024 Dongguan Baoyuan Refrigeration Parts Co.,Ltd - All Rights Reserved.