How to Bend Mini Split Copper Pipes Without Damage

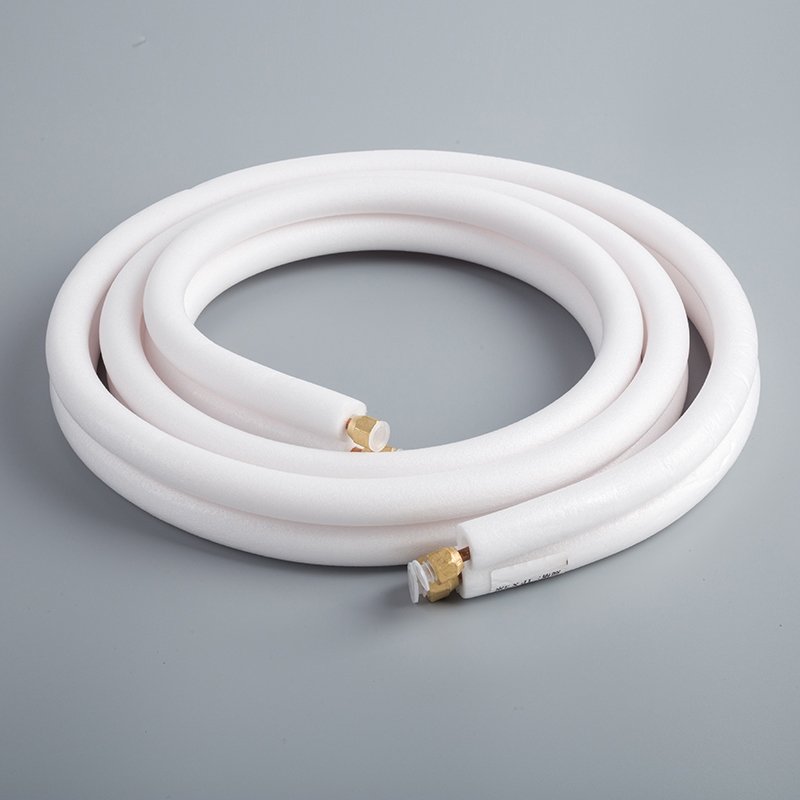
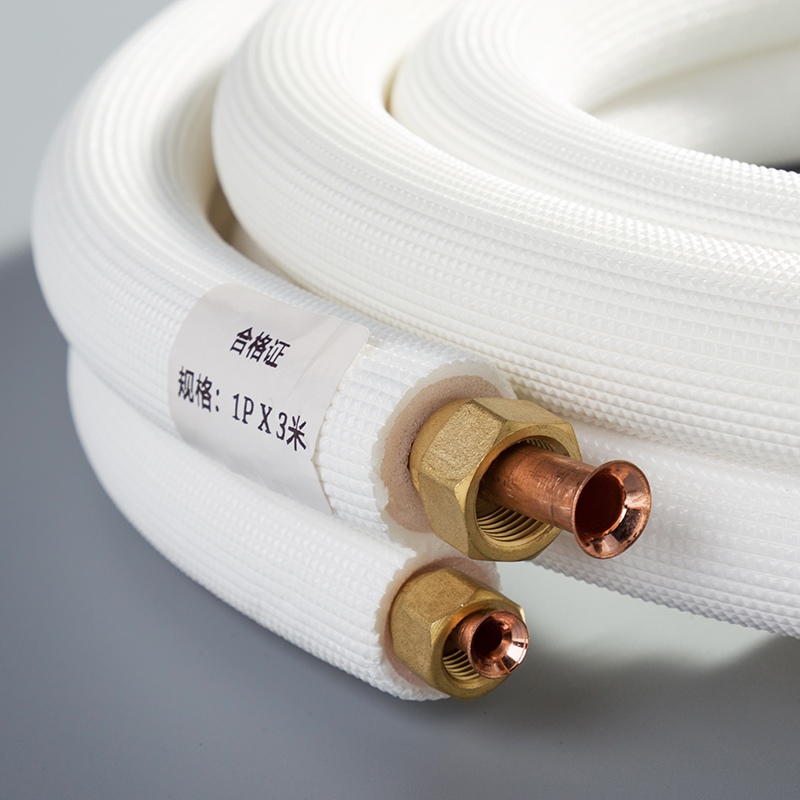
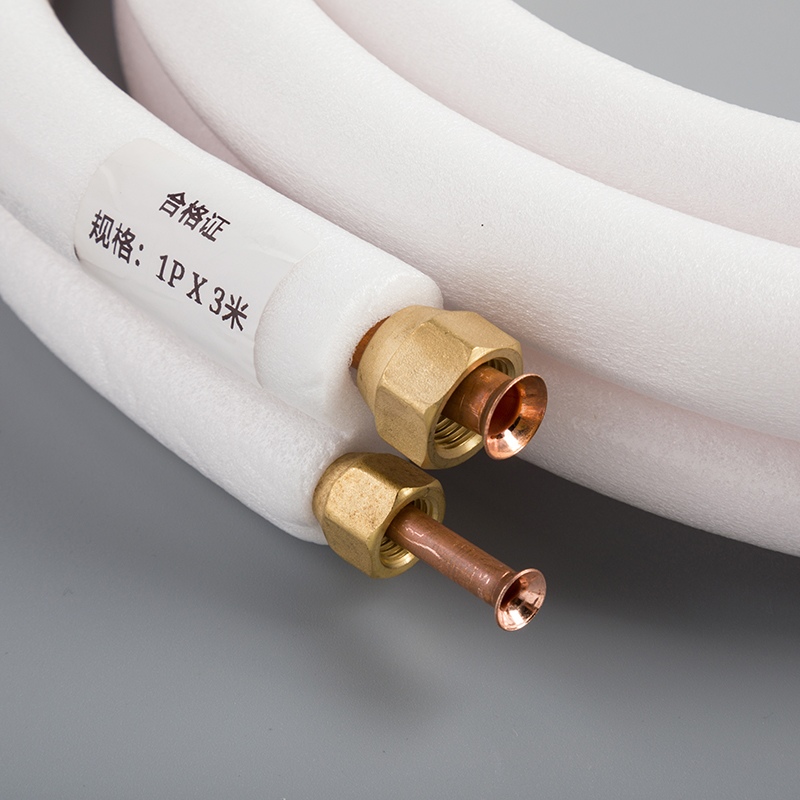
The Original Factory 1/4" X 3/8" Pre Insulated Copper Pipe Mini Split AC Copper Pipe is a crucial component for your split AC unit. Known for its durability and anti-corrosion properties, this copper pipe ensures reliability, but proper care is essential when bending it. The malleable nature of copper allows for easy shaping, but using incorrect techniques can result in kinks or cracks. Maintaining a smooth surface on the pipe is key to achieving professional results. With the right tools and methods, you can bend the Original Factory 1/4" X 3/8" Pre Insulated Copper Pipe Mini Split AC Copper Pipe without compromising its performance or structural integrity.
Key Takeaways
Use the right tools, such as a pipe bender or bending spring, to ensure smooth and accurate bends without damaging the copper pipe.
Always inspect and clean the copper pipe before bending to avoid compromising its integrity and functionality.
Measure and mark the bending point clearly to prevent mistakes and ensure precision during the bending process.
Apply gradual and even pressure when bending to avoid kinks or cracks; patience is key to achieving professional results.
Consider using sand or salt as a filler for manual bending if you lack specialized tools, but ensure the ends are sealed to maintain shape.
Practice on scrap pieces of copper pipe to build confidence and refine your technique before working on your actual project.
Know when to seek professional help, especially for complex bends or when dealing with old or damaged pipes to avoid costly mistakes.
Tools and Materials Needed
To bend mini split copper pipes without causing damage, you need the right tools and materials needed. These items ensure precision, safety, and ease during the process.
Essential Tools for Bending Copper Pipes
Pipe bender for precise bends
A pipe bender is your go-to tool for achieving smooth and accurate bends. It applies even pressure, preventing kinks or cracks in the copper pipe.
Pipe bending spring for internal support
A pipe bending spring slides inside the copper pipe to provide internal support. It distributes the bending force evenly, reducing the risk of deforming the pipe. This tool is especially useful for manual bending by hand.
Tube cutter for clean cuts
A tube cutter helps you make clean, precise cuts on the copper pipe. Clean edges are crucial for maintaining the pipe’s integrity and ensuring proper connections. Avoid using hacksaws, as they can leave jagged edges.
Measuring tape for accurate measurements
A measuring tape ensures you mark the exact spot where the bend is needed. Accurate measurements prevent errors and save you from wasting valuable materials.
Marker or pencil for marking bending points
A marker or pencil is essential for marking the bending points on the pipe. Clear markings guide you during the bending process, ensuring precision and consistency.
Additional Materials
Sand or salt for manual bending
If you don’t have a pipe bender, you can use sand or salt to fill the pipe. This prevents the pipe from collapsing or kinking during manual bending. It’s a simple yet effective method for achieving smooth bends.
Safety gloves and goggles for protection
Always wear safety gloves and goggles while working with copper pipes. Gloves protect your hands from sharp edges, while goggles shield your eyes from debris or accidental splinters.
Cleaning cloth or rag to remove debris
A cleaning cloth or rag is handy for wiping down the copper pipe. Removing dirt and debris ensures a smooth surface, which is essential for accurate bending and proper functionality.
Pro Tip: Investing in high-quality tools like a pipe bender or tube cutter can save you time and effort. These tools not only make the job easier but also help you achieve professional-grade results.
With these tools and materials, you’re well-equipped to bend copper pipes effectively. Preparation is key, so gather everything you need before starting the process.
Preparation Steps
Before you start bending copper pipes, preparation is key. Taking the time to inspect, measure, and organize ensures a smoother process and reduces the risk of mistakes. Let’s dive into the steps you need to follow.
Inspect the Copper Pipe
Check for any pre-existing damage or cracks.
Begin by carefully examining the copper pipe. Look for visible cracks, dents, or other imperfections. Damaged pipes can weaken further during bending, leading to leaks or breakage. If you spot any issues, replace the pipe before proceeding.
Ensure the pipe is clean and free of debris.
Wipe down the pipe with a clean cloth or rag to remove dirt, grease, or debris. A clean surface ensures smooth bends and prevents blockages that could affect the pipe’s performance later. Skipping this step might lead to uneven bends or compromised functionality.
Quick Tip: Hold the pipe up to the light to spot any hidden imperfections or debris.
Measure and Mark the Bending Point
Use a measuring tape to determine the exact location of the bend.
Accurate measurements are crucial. Use a measuring tape to determine where the bend should occur. Double-check your measurements to avoid errors that could waste materials or require rework.
Mark the bending point clearly with a marker or pencil.
Once you’ve measured, use a marker or pencil to clearly mark the bending point. Make the mark bold enough to see easily during the bending process. This step ensures precision and helps you stay on track.
Pro Tip: If you’re planning multiple bends, label each mark with numbers or notes to keep everything organized.
Prepare the Workspace
Ensure the workspace is clean and free of obstructions.
A clutter-free workspace makes the job easier and safer. Clear away any unnecessary tools, materials, or debris. A clean area gives you room to maneuver and reduces the risk of accidents.
Gather all tools and materials within easy reach.
Place all your tools and materials—pipe bender, bending spring, measuring tape, and safety gear—within arm’s reach. Having everything ready saves time and keeps you focused on the task.
Reminder: Good organization not only speeds up the process but also minimizes mistakes.
By following these preparation steps, you set yourself up for success. A well-inspected pipe, precise measurements, and an organized workspace make the bending process smoother and more efficient.
Methods for Bending Copper Pipes
When it comes to bending copper pipes, using the right method ensures smooth results and prevents damage. Whether you’re working with tools or using manual techniques, each approach has its own advantages. Let’s explore the three most effective methods for bending copper pipes.
Using a Pipe Bender
A pipe bender is one of the most reliable tools for achieving precise bends. It’s designed to apply even pressure, which helps maintain the structural integrity of the pipe.
Position the Pipe: Place the original factory 1/4" x 3/8" pre insulated copper pipe mini split ac copper pipe into the pipe bender. Align the marked bending point with the tool’s designated bending groove.
Apply Pressure Gradually: Slowly pull the handle or lever to bend the pipe. Keep an eye on the angle as you work to ensure accuracy. Avoid rushing, as sudden movements can cause kinks.
Expert Tip: According to professionals in tube bending, specialized tools like pipe benders are essential for safe and cost-effective results. They help you achieve smooth curves without compromising the pipe’s durability.
Using a pipe bender is ideal for beginners and professionals alike. It’s quick, efficient, and minimizes the risk of errors.
Using a Pipe Bending Spring
If you don’t have access to a pipe bender, a pipe bending spring is a great alternative. This tool provides internal support, making it easier to bend copper pipe by hand.
Insert the Spring: Slide the bending spring into the copper pipe. Make sure it fits snugly to provide adequate support during the bending process.
Bend the Pipe by Hand: Hold the pipe firmly at both ends. Apply gentle, even pressure to bend the pipe along the marked point. Take your time to avoid overbending or deforming the pipe.
Pro Tip: Copper’s malleable nature makes it easy to shape by hand. However, using a bending spring ensures the force is evenly distributed, reducing the risk of damage.
This method works well for minor adjustments or when you need more control over the bending process.
Manual Bending with Sand or Salt
For those without specialized tools, manual bending with sand or salt is a practical solution. This technique prevents the pipe from collapsing during the bend.
Fill the Pipe: Pour sand or salt into the copper pipe until it’s completely full. This internal filler provides resistance and keeps the pipe’s shape intact.
Seal the Ends: Use tape or caps to seal both ends of the pipe. This step ensures the filler stays in place while you work.
Bend Carefully: Hold the pipe firmly and apply steady pressure to bend it along the marked point. Work slowly to achieve a smooth curve.
Quick Reminder: Practicing on scrap pieces of copper pipe can help you perfect this technique before working on your actual project.
Manual bending is a budget-friendly option that delivers excellent results when done correctly. It’s especially useful for DIY enthusiasts who want to avoid investing in tools.
Mastering these methods gives you the flexibility to handle various bending tasks with confidence. Whether you use a pipe bender, a bending spring, or manual techniques, the key is to work carefully and methodically. By following these steps, you can bend copper pipes like a pro while preserving their functionality and appearance.
Tips for Avoiding Damage
Bending copper pipes can feel tricky, but with the right approach, you can avoid damage and get smooth, professional results. Here are some practical tips to help you bend copper pipe effectively while keeping it in top shape.
Avoid Overbending
Overbending is one of the most common mistakes when working with copper pipes. To prevent this, follow these steps:
Bend the pipe gradually: Apply pressure slowly and evenly. Rushing the process can cause the pipe to crack or kink. Copper is malleable, but it still needs careful handling to maintain its shape.
Use a protractor or angle guide: These tools help you measure the bend angle accurately. Precision ensures that your bends are smooth and consistent, which is especially important for installations requiring exact angles.
Quick Tip: If you're unsure about the angle, practice on a scrap piece of copper pipe first. This helps you perfect your technique without risking damage to the actual pipe.
Use the Right Tools
The tools you use can make or break your project. Using improper tools often leads to unnecessary damage. Here’s what you should keep in mind:
Always use tools designed specifically for copper pipes: A pipe bender or bending spring is essential for achieving smooth curves.
Avoid makeshift tools: Using random objects to bend the pipe might seem convenient, but it often results in uneven bends or even cracks. Investing in proper tools saves you time and frustration.
Pro Tip: High-quality tools not only protect the pipe but also make the bending process easier and more efficient.
Work Slowly and Carefully
Patience is key when bending copper pipes. Rushing through the process increases the chances of mistakes. Here’s how to stay on track:
Apply steady, even pressure: Consistency is crucial. Uneven pressure can lead to wrinkling on the inner radius or disfiguration on the outer radius of the pipe. Take your time to ensure a uniform bend.
Take breaks if needed: If you’re working on multiple bends, pause between each one. This helps you stay focused and prevents fatigue, which can lead to errors.
Reminder: Copper’s malleability makes it easy to work with, but it still requires careful handling to avoid damage.
By following these tips, you can bend copper pipe like a pro. Gradual pressure, the right tools, and a patient approach ensure that your bends are smooth and damage-free. Whether you’re a beginner or an experienced DIYer, these strategies will help you achieve excellent results every time.
Common Mistakes to Avoid
When bending copper pipes, even small mistakes can lead to big problems. By understanding common mistakes, you can avoid unnecessary damage and ensure smooth, professional results.
Skipping the Preparation Steps
Skipping these steps often leads to costly errors.
Failing to inspect or clean the pipe can lead to damage.
Before you start, always inspect the pipe for cracks, dents, or other imperfections. These flaws can worsen during the bending process, causing leaks or even complete failure. Cleaning the pipe is equally important. Dirt or debris on the surface can create uneven bends, which may compromise the pipe’s functionality. A quick wipe with a clean cloth ensures a smooth surface and better results.
Imagine spending hours creating perfect bends, only to discover a hidden crack that ruins the entire project. Taking a few minutes to inspect and clean the pipe saves you from this frustration.
Neglecting to mark the bending point can result in inaccurate bends.
Marking the bending point might seem like a small detail, but it’s crucial. Without clear markings, you risk bending the pipe in the wrong spot, wasting both time and materials. Use a marker or pencil to make bold, visible marks. If you’re working on multiple bends, label each one to stay organized.
Pro Tip: Double-check your measurements before marking. A little extra effort upfront can prevent major headaches later.
Using Excessive Force
Copper pipes are malleable, but they still require careful handling. Applying too much force is a common mistake that can cause irreversible damage.
Applying too much pressure can cause the pipe to crack.
When you bend a copper pipe, gradual pressure is your best friend. Rushing or forcing the bend can lead to cracks, which weaken the pipe and may result in leaks. Instead, let the tools do the work. Whether you’re using a pipe bender, a bending spring, or manual techniques, steady and controlled movements ensure a smooth curve.
A plumber once shared a story about creating beautiful bends for a laundry area. Unfortunately, excessive force caused cracks, and the entire setup had to be redone. This highlights the importance of patience and precision.
Always let the tools do the work rather than forcing the bend.
Using the right tools makes all the difference. A pipe bender applies even pressure, reducing the risk of damage. A bending spring provides internal support, ensuring the pipe maintains its shape. Avoid makeshift solutions, as they often lead to uneven or damaged bends. Trust your tools and take your time.
Quick Reminder: Practice on scrap pieces of copper pipe before working on your actual project. This helps you get a feel for the tools and techniques, boosting your confidence and accuracy.
By avoiding these common mistakes, you can achieve smooth, precise bends without damaging the pipe. Preparation, patience, and the right tools are your keys to success. Keep these tips in mind, and you’ll handle copper pipes like a pro.
When to Seek Professional Help
Sometimes, bending copper pipes can feel overwhelming. Certain situations demand expertise that goes beyond basic skills or tools. Knowing when to call a professional can save you time, effort, and potential damage.
Complex Bends or Tight Spaces
If the bend requires precision beyond your skill level.
Some bends need extreme accuracy, especially for intricate installations. If you find yourself struggling to achieve the exact angle or shape, it’s better to seek help. Professionals have the experience and tools to handle complex bends with ease. They can ensure the pipe maintains its structural integrity while achieving the desired result.
Tip: Attempting a challenging bend without the right skills can lead to kinks or cracks. Don’t risk damaging the pipe or compromising the system.
When working in confined areas where tools cannot fit.
Tight spaces can make bending copper pipes nearly impossible. If your workspace limits movement or tool access, a professional can step in. They know how to navigate these tricky spots without damaging the pipe or surrounding components. Their expertise ensures the job gets done efficiently and safely.
Reminder: Forcing a bend in a cramped area can weaken the pipe. Professionals use specialized techniques to avoid such issues.
Damaged or Old Pipes
If the pipe shows signs of wear or corrosion.
Old or damaged pipes present unique challenges. Corrosion weakens the material, making it more prone to cracks during bending. If you notice discoloration, rust, or other signs of wear, it’s best to consult an expert. They can assess the pipe’s condition and recommend the safest course of action.
Quick Note: Replacing a worn-out pipe is often more cost-effective than repairing one that fails after bending.
To avoid further damage, consult a professional.
Attempting to bend a compromised pipe can lead to leaks or complete failure. Professionals have the tools and knowledge to handle fragile pipes carefully. They can also advise whether the pipe needs reinforcement or replacement before proceeding.
Pro Tip: Don’t wait until a damaged pipe causes a bigger problem. Addressing the issue early can save you from costly repairs later.
Knowing your limits is key to a successful project. If you encounter complex bends, tight spaces, or damaged pipes, don’t hesitate to call a professional. Their expertise ensures the job gets done right, giving you peace of mind and a reliable system.
Bending mini split copper pipes, like the original factory 1/4" x 3/8" pre insulated copper pipe mini split ac copper pipe, becomes a straightforward task when you follow the right steps. By using proper tools and techniques, you ensure smooth bends that maintain the pipe’s integrity. Take your time, measure carefully, and work methodically to avoid mistakes. Each bend you make contributes to the efficiency of your split ac unit. With this guide, you can confidently bend copper pipe without compromising its performance or durability.
FAQ
How can you bend copper pipes accurately?
To bend copper pipes accurately, start by understanding the basics of pipe bending. Learn how different tools, like pipe benders or bending springs, work and why they’re essential. Always measure and mark the bending point clearly before starting. Using the right tools ensures smooth bends without damaging the pipe. If you’re new to this, practice on scrap pieces first to build confidence.
Tip: Precision comes from preparation. Take your time to measure, mark, and use the correct tools for the job.
Can you bend copper pipes without a pipe bender?
Yes, you can bend copper pipes without a pipe bender. Use a pipe bending spring or fill the pipe with sand or salt for support. These methods prevent the pipe from kinking or collapsing during the bend. However, manual techniques require patience and steady pressure. If you’re aiming for professional results, investing in a pipe bender is worth considering.
Pro Tip: When using sand or salt, seal the pipe ends securely to keep the filler in place.
What’s the best tool for bending copper pipes?
A pipe bender is the best tool for bending copper pipes. It applies even pressure, ensuring smooth and precise bends. For smaller adjustments, a pipe bending spring works well. Both tools are designed to protect the pipe’s integrity while making the process easier. Avoid makeshift tools, as they can damage the pipe.
Quick Reminder: High-quality tools save time and reduce the risk of errors.
Why does my copper pipe kink when I try to bend it?
Copper pipes kink when they lack proper support during bending. This often happens if you’re not using the right tools or applying uneven pressure. To avoid kinks, use a pipe bender or insert a bending spring for internal support. Filling the pipe with sand or salt also helps maintain its shape during manual bending.
Solution: Always work slowly and apply steady pressure to prevent kinking.
Is heating copper pipes necessary for bending?
Heating copper pipes isn’t always necessary, but it can help with tight bends. Heat softens the copper, making it easier to shape without cracking. Use a heat source like a propane torch, but be cautious to avoid overheating. This method is more common for advanced projects or when working with thicker pipes.
Safety Note: Always wear gloves and goggles when using heat to bend pipes.
How do you avoid overbending copper pipes?
To avoid overbending, apply gradual and steady pressure. Use tools like a protractor or angle guide to measure the bend angle accurately. Overbending can weaken the pipe or cause cracks, so take your time. Practicing on scrap pieces helps you perfect your technique before working on the actual pipe.
Tip: Stop frequently to check the bend angle and make adjustments as needed.
Can old or corroded pipes be bent safely?
Bending old or corroded pipes is risky. Corrosion weakens the pipe, making it prone to cracks or leaks during bending. Inspect the pipe carefully before starting. If you notice significant wear or damage, replace the pipe instead of bending it. Consulting a professional is a safer option for handling compromised pipes.
Advice: Don’t risk further damage. Replace old pipes to ensure a reliable system.
What should you do if the pipe cracks during bending?
If the pipe cracks during bending, stop immediately. A cracked pipe can’t maintain its structural integrity and may lead to leaks. Replace the damaged section with a new pipe. To prevent future cracks, ensure you’re using the right tools and techniques. Work slowly and avoid applying excessive force.
Reminder: Cracks often result from rushing or using improper tools. Take your time and follow best practices.
How do you handle tight spaces when bending copper pipes?
Tight spaces can make bending copper pipes challenging. Use compact tools like a mini pipe bender or a bending spring. If the space is too confined, consider pre-bending the pipe before installation. For extremely tight areas, hiring a professional ensures the job gets done without damaging the pipe or surrounding components.
Pro Tip: Plan your bends in advance to minimize the need for adjustments in tight spaces.
When should you call a professional for pipe bending?
Call a professional if the bend requires extreme precision or if you’re working in tight spaces where tools can’t fit. Also, seek help when dealing with old or damaged pipes. Professionals have the expertise and equipment to handle complex situations, ensuring the pipe’s integrity and functionality.
Key Takeaway: Knowing your limits saves time and prevents costly mistakes. Don’t hesitate to get expert help when needed.
See Also
5 Simple Steps for Connecting Compression Fittings to Copper
Simple DIY Tips for Repairing a Broken Copper Pipe
Soldering Made Simple: Helpful Hints for 1 1/2 Copper

© Copyright 2024 Dongguan Baoyuan Refrigeration Parts Co.,Ltd - All Rights Reserved.