How to Bend Mini Split Copper Pipes Without Damaging Insulation

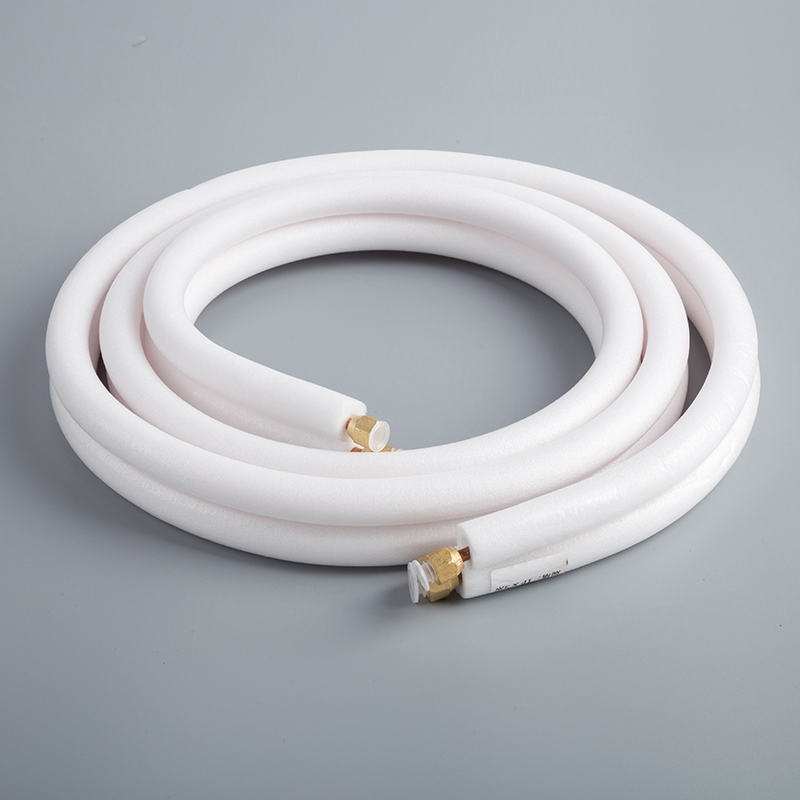
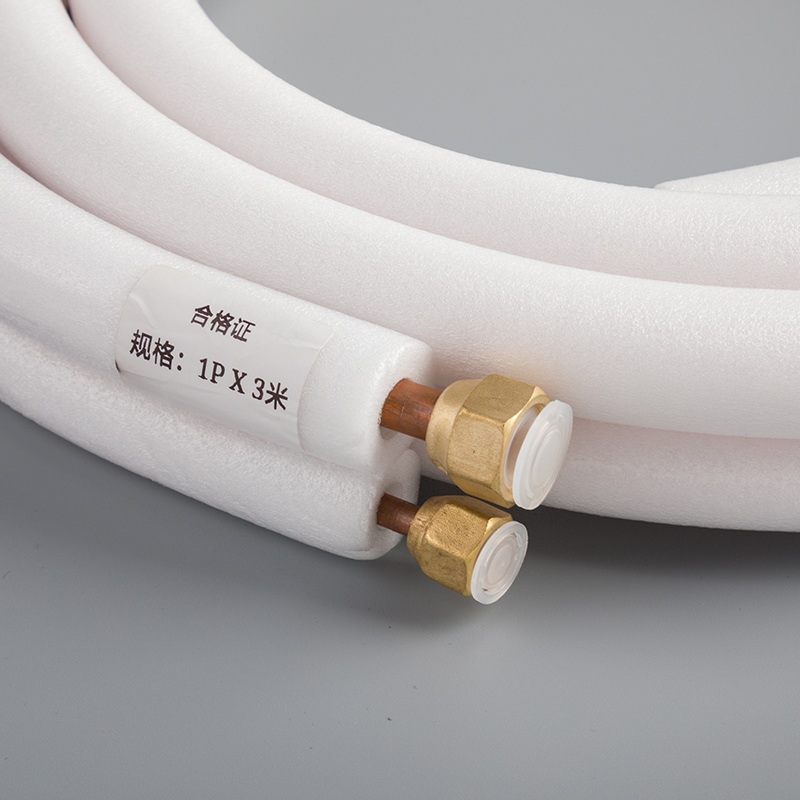
Bending mini split copper pipes might seem simple, but doing it wrong can lead to costly mistakes. Damaged insulation not only reduces efficiency but also risks system failure. Using proper techniques ensures the insulation stays intact, which is crucial for maintaining energy efficiency. Tools like pipe benders and gradual bending methods help you avoid kinks and preserve the pipe’s integrity. For example, the Original Factory 1/4" X 3/8" Pre Insulated Copper Pipe Mini Split Ac Copper Pipe comes with insulation that must remain undamaged to perform effectively. By taking care, you save time, money, and effort during installation.
Key Takeaways
Use specialized tools like pipe benders and spring benders to create smooth, kink-free bends in copper pipes, ensuring insulation remains intact.
Always measure and mark bending points accurately to avoid guesswork and ensure proper alignment during installation.
Inspect insulation for damage before and after bending; repair any tears or compression immediately to maintain system efficiency.
Plan your pipe layout carefully to minimize bends and reduce stress on the pipes, which helps prevent leaks and insulation damage.
Work slowly and methodically, double-checking each step to catch potential errors early and ensure a successful installation.
Keep insulation tape and foam pipe insulation on hand for quick repairs during installation, ensuring long-term protection for your system.
If faced with complex layouts or severe insulation damage, don’t hesitate to seek professional help to ensure proper installation and efficiency.
Tools and Materials for Bending Mini Split Copper Pipes
When it comes to bending mini split copper pipes, having the right tools and materials makes all the difference. Using proper equipment ensures clean bends, protects the insulation, and prevents costly mistakes. Let’s dive into the essentials you’ll need.
Essential Tools for Bending
To achieve smooth, kink-free bends, you’ll need reliable tools designed specifically for copper pipes. Here are the must-haves:
Pipe bender for clean, kink-free bends
A pipe bender is your go-to tool for creating precise bends without damaging the pipe. It applies even pressure, which helps prevent kinks or deformities. This tool is especially useful for maintaining the integrity of soft copper tubing, which is prone to bending errors.
Spring bender for tight spaces
For those hard-to-reach areas, a spring bender works wonders. It allows you to make freeform bends while keeping the pipe’s shape intact. This tool is ideal for tighter angles where a standard pipe bender might not fit. Plus, it reduces the risk of creating weak points in the pipe.
Tube cutter for precise cuts
Before bending, you’ll often need to cut the pipe to the desired length. A tube cutter ensures clean, straight cuts without crushing the pipe. This precision is crucial for maintaining the pipe’s functionality and making the bending process smoother.
Materials to Protect Insulation
Protecting the insulation on your copper pipes is just as important as the bending process itself. Damaged insulation can lead to energy loss and reduced system efficiency. Here’s what you’ll need:
Foam pipe insulation for added protection
Foam pipe insulation acts as a protective barrier around your copper pipes. It cushions the pipe during bending and prevents damage to the insulation layer. You can find it in tubular sleeves or spiral wraps, both of which are easy to apply.
Insulation tape to secure and repair insulation
Insulation tape is a versatile material that helps secure foam insulation in place. It’s also handy for repairing minor tears or gaps in the insulation. By using this tape, you ensure the insulation stays intact and effective.
Heat-resistant gloves for safe handling
Handling copper pipes during bending can expose you to sharp edges or high temperatures. Heat-resistant gloves protect your hands while giving you a better grip on the pipe. They’re an essential safety tool for any installation project.
Specialized Tools for Mini Split AC Installation
Mini split systems often require specialized tools to handle their unique copper linesets. These tools make the bending process easier and more efficient.
Mini split line set bender kit
A mini split line set bender kit is specifically designed for bending copper pipes used in mini split systems. It ensures smooth, gradual bends without removing or damaging the insulation. This tool is perfect for maintaining the pipe’s integrity while working on complex layouts.
EasyBend Kink-Free Bending Kit
The EasyBend Kink-Free Bending Kit takes the guesswork out of bending copper pipes. It’s engineered to prevent kinking, even when working with tight angles. This kit is a game-changer for anyone looking to achieve professional results with minimal effort.
By equipping yourself with these tools and materials, you’ll be well-prepared to bend mini split copper pipes like a pro. Each item plays a crucial role in ensuring the process is smooth, efficient, and free from insulation damage.
Step-by-Step Guide to Bending Mini Split Copper Pipes
Bending mini split copper pipes requires precision and care. Following the right steps ensures you avoid damaging the insulation and maintain the efficiency of your system. Let’s break it down into manageable steps.
Preparing the Pipe
Before you start bending, preparation is key. Proper prep work sets the foundation for a smooth process.
Measure and mark the bending points accurately
Start by measuring the pipe carefully. Use a measuring tape to determine the exact length and location of each bend. Mark these points with a marker or tape. Accurate markings help you avoid guesswork and ensure the bends align perfectly with your layout. This step is crucial when you install a ductless mini split, as improper bends can disrupt the system's efficiency.
Inspect the insulation for pre-existing damage
Take a close look at the insulation covering the copper pipe. Check for any tears, compression, or wear. Damaged insulation can compromise the pipe’s performance and lead to energy loss. If you notice any issues, repair them using insulation tape before proceeding. This ensures the pipe remains protected throughout the bending process.
Using a Pipe Bender for Gradual Bends
A pipe bender is your best friend when it comes to creating smooth, kink-free bends. It applies even pressure, which helps maintain the pipe’s shape and insulation integrity.
Position the pipe in the bender correctly
Place the pipe into the bender, aligning it with the marked bending points. Make sure the pipe sits snugly in the groove of the bender. Proper positioning prevents uneven bends and reduces the risk of kinking. Follow the installation instructions provided with your pipe bender for optimal results.
Apply steady pressure to avoid kinking
Once the pipe is in place, apply consistent pressure to the bender’s handle. Move slowly and steadily to create a gradual bend. Avoid sudden movements, as they can cause the pipe to buckle or kink. Gradual bending not only protects the pipe but also preserves the insulation, ensuring your mini split AC system functions efficiently.
Alternative Methods for Bending
If you don’t have a pipe bender or need to work in tight spaces, alternative methods can help you achieve the desired bends.
Using a spring bender for tighter angles
A spring bender is ideal for creating bends in confined areas. Slide the spring over the pipe and use your hands to bend it gently. The spring provides support, preventing the pipe from collapsing or kinking. This method works well for minor adjustments during a ductless mini split installation.
Manual bending for minor adjustments
For small tweaks, manual bending can be effective. Hold the pipe firmly and bend it slowly with your hands. Be cautious and apply even pressure to avoid damaging the insulation. While this method doesn’t require tools, it’s best suited for minor adjustments rather than major bends.
By following these steps, you’ll ensure your mini split copper pipes are bent accurately and safely. Proper preparation, the right tools, and careful techniques make all the difference in achieving a successful installation.
Maintaining Insulation Integrity
Maintaining the integrity of the insulation on your mini split copper pipes is essential for ensuring the efficiency and longevity of your system. Even the slightest damage can lead to energy loss or reduced performance. Let’s explore how you can keep the insulation in top shape during and after the bending process.
Check for compression or tears after bending
After bending the pipe, take a moment to inspect the insulation carefully. Look for any signs of compression, tears, or buckling. These issues often occur when the pipe is bent too sharply or handled improperly. Damaged insulation can compromise the pipe’s ability to retain energy efficiency, which may lead to higher energy costs or system inefficiencies.
Pro Tip: Improper handling during bending can cause local buckling of the pipe, especially if the insulation is thick or under strain. Always use gradual bends and follow the installation instructions provided with your tools to minimize stress on the insulation.
Run your fingers along the insulation to feel for any irregularities. If you notice any damage, address it immediately to prevent further issues. This simple step ensures that your system remains efficient and reliable.
Reapply insulation tape as needed
If you find minor tears or gaps in the insulation, don’t worry—you can fix them easily with insulation tape. Wrap the tape tightly around the damaged area, ensuring full coverage. This not only repairs the tear but also reinforces the insulation, helping it withstand future stress.
For larger areas of damage, consider replacing the insulation entirely. Foam pipe insulation is a great option for this purpose. It provides excellent protection and is easy to install. Follow the instructions on the packaging to ensure proper application.
Quick Reminder: Always keep insulation tape and foam pipe insulation on hand during your installation project. These materials are invaluable for quick fixes and maintaining the overall integrity of your system.
By regularly checking for damage and making necessary repairs, you’ll extend the life of your mini split system and avoid costly repairs down the line. Proper care and attention to detail go a long way in ensuring a successful installation.
Common Mistakes to Avoid During Bending
Mistakes during the bending process can lead to damaged pipes, compromised insulation, and inefficient systems. By understanding these common errors, you can avoid unnecessary setbacks and ensure a smooth mini split AC installation.
Over-Bending the Pipe
Recognizing and preventing over-bending
Over-bending happens when you push the pipe beyond its natural flexibility. This can cause the copper to weaken or even crack, leading to leaks and reduced efficiency. Insulation may also compress or tear, exposing the pipe to external elements.
To prevent over-bending, always follow the instructions provided with your tools. Use a pipe bender or spring bender to guide the process. These tools help you create gradual bends without stressing the pipe. If you're working manually, bend the pipe slowly and check its shape frequently. Avoid forcing it into sharp angles, as this increases the risk of damage.
Quick Tip: When you install a ductless mini split, plan your pipe layout carefully. Mark the bending points and ensure the angles are achievable without over-stretching the pipe.
Using Improper Tools
Risks of makeshift tools damaging insulation
Using the wrong tools—or worse, makeshift ones—can spell disaster for your pipes and insulation. For example, bending pipes over a table edge or using pliers might seem convenient, but these methods often result in kinks, dents, or torn insulation. Damaged insulation leads to heat loss, condensation, and even freezing in extreme conditions.
Invest in proper tools like a pipe bender or a mini split line set bender kit. These tools are designed to apply even pressure, ensuring clean bends while protecting the insulation. Follow the installation instructions that come with these tools to get the best results. Proper equipment not only saves time but also prevents costly repairs down the line.
Did You Know? Poorly made pipe supports or improper handling can cause insulation to buckle, leading to energy loss and reduced system efficiency.
Ignoring Insulation Damage
Consequences of damaged insulation on system efficiency
Ignoring insulation damage is one of the most common mistakes during a mini split AC installation. Even small tears or compression can have significant consequences. Damaged insulation allows heat to escape, reducing the system's efficiency. It can also lead to condensation, which may cause corrosion or freezing in colder climates.
After bending the pipes, inspect the insulation thoroughly. Look for signs of wear, tears, or buckling. If you notice any issues, address them immediately. Use insulation tape to repair minor damage or replace the insulation entirely if needed. Keeping the insulation intact ensures your system operates efficiently and lasts longer.
Pro Tip: Always keep extra insulation materials and tape on hand when you install a ductless mini split. Quick fixes during the process can save you from bigger problems later.
By avoiding these common mistakes, you’ll protect your pipes, maintain insulation integrity, and ensure a successful installation. Taking the time to do it right pays off in the long run.
Troubleshooting and Repairing Damaged Insulation
Damaged insulation on your mini split copper pipes can lead to energy loss, reduced efficiency, and even system failure. Identifying and addressing these issues promptly ensures your AC system operates at its best. Let’s explore how you can spot damage, make repairs, and prevent future problems.
Identifying Insulation Damage
Before you can fix insulation issues, you need to know what to look for. Damaged insulation often shows clear signs that something isn’t right.
Signs of wear, tears, or compression
Inspect the insulation closely. Look for visible tears, flattened areas, or worn-out sections. These signs often appear after improper handling or bending. Compression can occur when pipes are bent too sharply, causing the insulation to lose its protective properties. Run your fingers along the surface to feel for irregularities. If you notice any gaps or exposed copper, it’s time to take action.
Quick Tip: Regularly checking your insulation during installation or maintenance can save you from costly repairs later.
Repairing Insulation
Once you’ve identified the damage, the next step is to repair it. The method you choose depends on the severity of the issue.
Using foam insulation tape for minor repairs
For small tears or gaps, foam insulation tape works wonders. Wrap the tape tightly around the damaged area, ensuring complete coverage. This quick fix restores the insulation’s protective barrier and prevents further wear. Foam tape is easy to use and provides a durable seal, making it an essential tool for any AC installation project.
Replacing insulation for severe damage
If the damage is extensive, replacing the insulation is the best option. Remove the old, damaged insulation carefully to avoid harming the copper pipe. Then, apply new foam pipe insulation. Follow the manufacturer’s instructions to ensure a snug fit and proper coverage. Replacing insulation might take a bit more effort, but it guarantees long-term protection for your AC system.
Pro Tip: When replacing insulation, choose materials with multiple layers for added durability. Triple-layer insulation offers excellent protection and withstands bending without breaking.
Preventing Future Damage
Prevention is always better than repair. Taking a few simple steps can help you avoid insulation damage altogether.
Proper storage and handling of copper pipes
Store your copper pipes in a dry, safe place to prevent accidental damage. Avoid stacking heavy objects on top of them, as this can compress the insulation. When handling the pipes, use heat-resistant gloves to maintain a firm grip and reduce the risk of tearing the insulation.
Reinforcing insulation with additional layers
For extra protection, consider adding an additional layer of insulation. This reinforcement helps the pipes withstand bending and external pressure. It’s especially useful in areas where pipes are exposed to harsh conditions or frequent handling. Follow the instructions provided with the insulation materials to apply them correctly.
Did You Know? Bending copper pipes instead of joining multiple fittings reduces high-risk failure points. Fewer joints mean less chance of leaks or insulation damage.
By identifying damage early, repairing it effectively, and taking preventive measures, you can keep your AC system running smoothly. Proper care and attention to detail ensure your insulation stays intact, saving you time and money in the long run.
Tips for a Successful Mini Split AC Installation
Installing a mini split AC system can feel overwhelming, but with the right approach, you can make the process smooth and efficient. Let’s explore some practical tips to help you achieve success.
Planning the Pipe Layout
Proper planning is the foundation of a successful installation. Before you start bending pipes, take time to map out the layout.
Mapping out bends to minimize stress on pipes
Visualize the path your copper pipes will take. Identify where bends are necessary and mark those points clearly. This step helps you avoid unnecessary stress on the pipes, which can lead to kinks or insulation damage. Use a measuring tape to ensure accuracy and keep the bends as gradual as possible.
Pro Tip: Fewer bends mean less strain on the pipes and insulation. Plan a direct route whenever possible to reduce the risk of leaks or inefficiencies.
By carefully mapping out the layout, you’ll save time and prevent costly mistakes during the installation process.
Working Slowly and Carefully
Rushing through the installation can lead to errors that are difficult to fix later. Taking your time ensures each step is done correctly.
Benefits of double-checking each step
Double-checking your work might seem tedious, but it’s worth the effort. After marking the bending points, confirm their accuracy before proceeding. When using tools like a pipe bender, ensure the pipe is positioned correctly. Inspect the insulation after each bend to catch any damage early.
Quick Reminder: Mistakes like over-bending or misaligned pipes can compromise the system’s efficiency. Slowing down allows you to spot and fix issues before they escalate.
Working carefully not only improves the quality of your installation but also enhances safety by reducing the risk of accidents.
Testing the System Post-Installation
Once the installation is complete, testing the system is crucial. This step ensures everything is functioning as it should.
Checking for leaks and insulation integrity
Turn on the system and listen for unusual sounds, which could indicate leaks. Inspect the pipes for any signs of condensation or exposed copper. Damaged insulation can lead to energy loss and reduced performance. If you notice any issues, address them immediately by repairing or replacing the insulation.
Did You Know? Regular maintenance checks after installation can extend the lifespan of your mini split AC system and improve its efficiency.
Testing the system gives you peace of mind, knowing your installation is both effective and reliable.
By planning the layout, working carefully, and testing thoroughly, you’ll set yourself up for a successful mini split AC installation. These steps not only ensure efficiency but also help you avoid unnecessary repairs in the future.
When to Seek Professional Help
Sometimes, bending mini split copper pipes or maintaining insulation integrity can feel overwhelming. Certain situations demand expertise that goes beyond DIY skills. Knowing when to call a professional can save you time, money, and frustration. Let’s explore when it’s best to seek help and how professionals can make a difference.
Recognizing Complex Situations
Some challenges during installation are too intricate to handle on your own. Recognizing these situations early can prevent costly mistakes.
Handling intricate pipe layouts
If your pipe layout involves multiple bends or tight angles, it’s easy to make errors. Complex layouts often require precise measurements and advanced tools. A professional has the experience to navigate these tricky setups. They can ensure the pipes are bent correctly without damaging the insulation or compromising the system’s efficiency.
Pro Tip: If you’re unsure about the layout or feel stuck, don’t hesitate to consult an expert. It’s better to get it right the first time than to deal with repairs later.
Addressing severe insulation damage
Severe insulation damage can lead to energy loss and reduced system performance. If you notice large tears, exposed copper, or compressed insulation that you can’t fix with tape, it’s time to call a professional. They can replace the damaged insulation and reinforce it to prevent future issues. Their expertise ensures your system stays efficient and safe.
Quick Reminder: Damaged insulation not only affects performance but also poses safety risks. Always prioritize fixing it promptly.
Benefits of Professional Assistance
Hiring a professional might seem like an added expense, but the benefits far outweigh the costs. Here’s why their help is invaluable.
Ensuring proper installation and system efficiency
Professionals bring specialized tools and knowledge to the table. They know how to bend pipes without kinking them and how to protect insulation during the process. Their expertise ensures your mini split AC system operates at peak efficiency. Proper installation also reduces the risk of leaks, energy loss, and future repairs.
Did You Know? A poorly installed system can increase energy bills and shorten the lifespan of your AC unit. Professionals help you avoid these pitfalls.
By seeking professional help when needed, you’ll ensure a smooth installation and long-lasting performance. Whether it’s handling complex layouts or repairing insulation, their expertise guarantees the job gets done right.
Bending mini split copper pipes without damaging insulation requires the right tools and techniques. By using specialized equipment like pipe benders and insulation tape, you protect the system’s efficiency and avoid costly mistakes. Careful planning and attention to detail ensure smooth bends and maintain insulation integrity. Always measure accurately, work steadily, and inspect for damage after each step. Following these guidelines saves time and effort during installation. If you encounter complex layouts or severe insulation issues, don’t hesitate to seek professional help. A well-executed installation guarantees long-term performance and peace of mind.
FAQ
How do I bend mini split copper pipes without damaging the insulation?
To bend mini split copper pipes without harming the insulation, use specialized tools like a pipe bender or a mini split line set bender kit. These tools apply even pressure, ensuring smooth bends while keeping the insulation intact. Always make gradual bends and avoid sharp angles to prevent kinking or tearing the insulation. Inspect the insulation after each bend to check for any damage.
Pro Tip: Avoid makeshift methods like bending pipes over table edges. These can cause kinks and compromise the insulation.
Can I bend copper pipes manually without tools?
Yes, you can bend copper pipes manually for minor adjustments, but it requires caution. Hold the pipe firmly and apply even pressure to create a gradual bend. However, this method increases the risk of damaging the insulation or kinking the pipe. For precise and safe results, it’s better to use tools like a spring bender or pipe bender.
Quick Reminder: Manual bending works best for small tweaks. For larger bends, always rely on proper tools.
What should I do if the insulation gets damaged during bending?
If the insulation gets damaged, repair it immediately to maintain the system’s efficiency. Use foam insulation tape to cover minor tears or gaps. For severe damage, replace the insulation entirely with foam pipe insulation. This ensures the copper pipe remains protected and energy efficiency is not compromised.
Did You Know? Damaged insulation can lead to energy loss, condensation, and even freezing in colder climates.
Why is it important to use a pipe bender for mini split installations?
A pipe bender ensures clean, kink-free bends, which are essential for maintaining the integrity of both the copper pipe and its insulation. It applies even pressure, preventing weak points or deformities. Using a pipe bender also reduces the risk of over-bending, which can weaken the pipe and expose the insulation to damage.
Fun Fact: A DIY enthusiast once shared how using the wrong tools led to costly mistakes during their mini split installation. With the right tools, they later completed the job efficiently and saved money.
Can I reuse damaged insulation by taping it back together?
You can repair minor damage with insulation tape, but reusing severely damaged insulation is not recommended. Taping over large tears or compressed areas won’t provide the same level of protection. Replacing the insulation ensures the pipe stays properly insulated and prevents energy loss.
Pro Tip: Always keep extra insulation materials on hand for quick fixes during installation.
What are the risks of using improper tools for bending copper pipes?
Using improper tools, like pliers or table edges, can cause kinks, dents, or tears in the insulation. These damages reduce the system’s efficiency and may lead to leaks or condensation. Proper tools, such as a mini split line set bender kit, ensure smooth bends and protect the insulation.
Quick Tip: Investing in the right tools saves you time, money, and frustration in the long run.
How can I prevent over-bending the copper pipes?
To avoid over-bending, measure and mark the bending points accurately before starting. Use a pipe bender or spring bender to guide the process. Apply steady, even pressure and avoid forcing the pipe into sharp angles. Gradual bends help maintain the pipe’s shape and protect the insulation.
Did You Know? Over-bending weakens the copper and can lead to cracks, leaks, or insulation damage.
Is it worth hiring a professional for mini split installations?
Hiring a professional can be beneficial for complex layouts or severe insulation damage. Professionals have the expertise and tools to ensure proper installation, which reduces the risk of errors and improves system efficiency. However, with the right tools and knowledge, you can handle simpler installations yourself and save money.
Personal Experience: One DIYer shared how they initially struggled with a mini split installation but gained valuable experience. They now feel confident enough to install a unit in a weekend for a fraction of the cost.
How do I know if my insulation is damaged?
Inspect the insulation for visible signs like tears, compression, or exposed copper. Run your fingers along the surface to feel for irregularities. Damaged insulation often appears flattened or worn out after improper handling or bending. Address any issues immediately to prevent energy loss or reduced system performance.
Quick Reminder: Regularly checking the insulation during installation helps catch problems early and saves you from costly repairs later.
What’s the best way to store copper pipes to protect the insulation?
Store copper pipes in a dry, safe place away from heavy objects that could compress the insulation. Use foam sleeves or additional layers of insulation for extra protection. Proper storage prevents accidental damage and ensures the pipes are ready for use when needed.
Pro Tip: Reinforcing the insulation with extra layers during storage adds durability and reduces the risk of damage.
See Also
Simple Steps to Repair a Broken Copper Pipe
Five Simple Methods for Connecting Compression Fittings
Essential Soldering Techniques for 1 1/2 Inch Copper

© Copyright 2024 Dongguan Baoyuan Refrigeration Parts Co.,Ltd - All Rights Reserved.