Step-by-Step Guide to Installing Compression Fittings


In the realm of plumbing, compression fittings play a pivotal role. These fittings are essential components that ensure secure connections in various piping systems. From residential plumbing to industrial applications, compression fittings offer a reliable and leak-free solution. Understanding the significance of these fittings is crucial for any plumbing enthusiast or professional. This tutorial blog post aims to unravel the mysteries surrounding compression fittings, shedding light on their uses, importance, and the tools required for successful installation and removal.
Understanding Compression Fittings
What are Compression Fittings?
Definition and components
Compression fittings, commonly used in plumbing and electrical conduit systems, serve as connectors for joining two tubes or thin-walled pipes. These fittings consist of a compression nut or screw, a sleeve/ferrule, and the compression fitting body. The ferrule, often made of softer metal or plastic, gets compressed between the nut and the fitting body to create a secure connection.
Types of compression fittings
Compression fittings come in various types tailored to specific applications. Manufacturers produce different designs to accommodate diverse pipe materials and sizes. The installation process may vary based on the manufacturer's specifications, emphasizing nut rotation rather than torque for assembly and disassembly. This versatility makes compression fittings suitable for a wide range of piping systems.
How Compression Fittings Work
Basic principles
The fundamental principle behind compression fittings lies in their ability to create a watertight seal by compressing the ferrule against a pipe or tube. When tightened, the nut applies clamping force that deforms the ferrule, causing it to cling tightly to the tube surface. This mechanism ensures a leak-free connection that is essential for maintaining system integrity.
Advantages and disadvantages
One significant advantage of compression fittings is their ease of assembly and disassembly compared to other types of connectors. They provide a reliable solution for joining dissimilar materials like PVC and copper pipes due to their compatibility with various materials. However, it's important to note that the installation process can vary depending on the specific fitting type and manufacturer guidelines.
By understanding the components and functionality of compression fittings, users can appreciate their versatility in creating secure connections across different piping systems.
Tools and Materials Needed
Essential Tools
Wrenches: A vital tool for tightening compression fittings securely.
Pipe cutters: Essential for accurately cutting pipes to the required length.
Measuring tape: Used to measure and ensure precise pipe lengths.
Required Materials
Compression fittings: The key component for creating leak-free connections between pipes.
Pipes or tubes: Provide the pathways for fluids within the plumbing system.
Sealing tape: Ensures a tight seal and prevents leaks in the connection.
Step-by-Step Installation Process
Preparing the Pipes
To kick off the installation process, measuring and cutting the pipes accurately is crucial. Precision in this step ensures that the pipes fit perfectly for a seamless connection. Remember, accuracy is key to a successful compression fitting installation.
Once the pipes are cut to size, the next step involves deburring and cleaning the pipe ends. Removing any rough edges or debris from the pipe ends guarantees a smooth assembly process. This meticulous preparation sets the stage for a secure and leak-free connection.
Assembling the Compression Fitting
Moving on to assembling the compression fitting, start by inserting the pipe into the fitting with precision. Ensuring that the pipe is correctly positioned within the fitting sets a solid foundation for a tight seal. Attention to detail at this stage pays off in preventing potential leaks down the line.
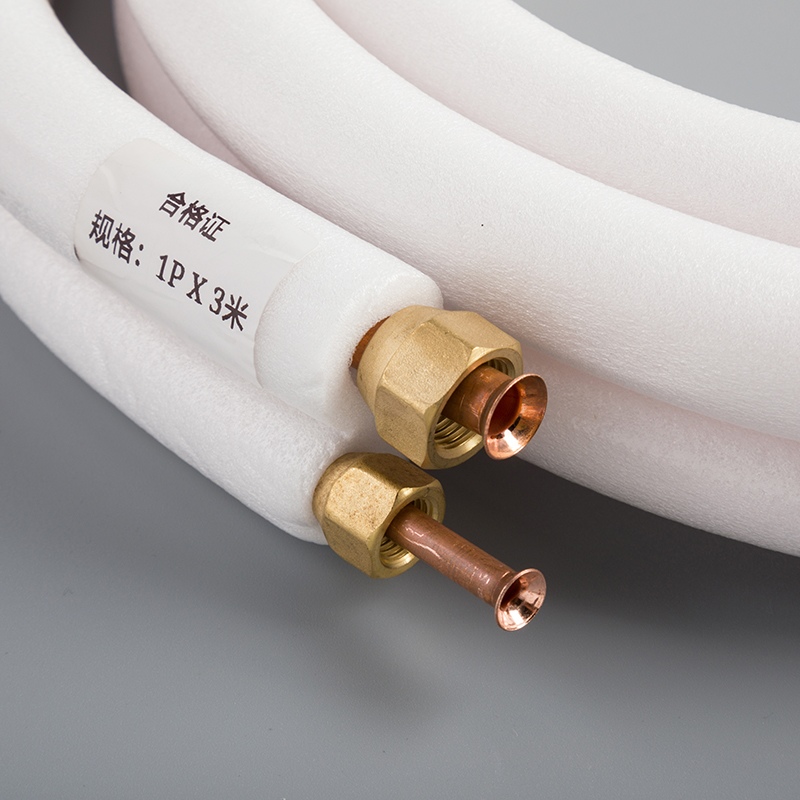
Next, sliding the compression fitting olive over the pipe is essential. The brass ring plays a critical role in creating a watertight seal when compressed against the pipe surface. Proper placement of the olive sets up optimal conditions for a secure connection that withstands pressure and usage.
The final step in assembling involves tightening the compression nut securely. Using appropriate tools, apply controlled force to tighten the nut over the threaded head of the fitting. Listen for subtle cues like a squeaking noise, indicating that you've reached an optimal level of tightness without risking damage.
Testing Connection
With assembly complete, it's time to test your connection thoroughly. Begin by checking for leaks along all joints and connections. A meticulous inspection ensures that your compression fitting is properly sealed and ready for operation.
While testing, pay attention to any squeaking noise that may indicate areas needing adjustment. Fine-tuning your fittings based on these auditory cues can make all the difference in achieving an optimal seal without compromising integrity.
If adjustments are needed, don't hesitate to make them promptly. Adjusting if necessary ensures that your compression fittings perform at their best capacity, providing reliable connections within your plumbing system.
Troubleshooting Common Issues
When facing leaks in compression fittings, identifying the source is paramount to swift resolution. Begin by inspecting all joints meticulously to pinpoint the exact location of the leak. Once identified, apply appropriate solutions and fixes promptly to prevent further issues. Utilizing sealing tape or adjusting the compression nut may resolve minor leaks efficiently.
Fitting Misalignment
Causes of fitting misalignment can vary from improper assembly to external factors affecting the connection. Corrective measures involve carefully disassembling the fitting, realigning the components, and reassembling them accurately. Ensuring a snug fit between pipes and fittings eliminates misalignment issues and guarantees a secure connection.
Over-tightening
Recognizing signs of over-tightening is crucial in maintaining the integrity of compression fittings. Look out for visible deformations on the ferrule or excessive pressure marks on the pipe surface. To implement effective preventive measures, exercise caution when tightening fittings, ensuring a firm but not excessive grip. Regular inspections can help detect early signs of over-tightening before damage occurs.
Maintenance and Best Practices
Regular Inspections
What to look for
Check for any signs of leaks around the compression fittings.
Inspect the condition of the ferrule for any visible damage or wear.
Ensure that the compression nut is securely fastened without any looseness.
Frequency of inspections
Conduct visual inspections weekly to detect any early signs of leaks.
Perform a thorough inspection monthly, focusing on all compression fittings in the system.
Long-term Care
Preventive measures
Apply a thin layer of lubricant on the threads before assembling to prevent seizing over time.
Avoid excessive force when tightening to prevent damage to the ferrule and fitting body.
Replacement guidelines
When replacing compression fittings:
Always use new ferrules to ensure a proper seal.
Follow manufacturer guidelines for torque specifications during installation.
By adhering to regular maintenance practices and implementing preventive measures, users can prolong the lifespan of their compression fittings and maintain efficient plumbing systems. Remember, proactive care is key to avoiding unexpected issues and ensuring long-term reliability in your piping infrastructure.
Highlight the importance of precision in each step to ensure a leak-free connection.
Stress the significance of proper installation techniques for long-term reliability.
Encourage adherence to the comprehensive guide for successful compression fitting installations.
Welcome readers to share their experiences, queries, and insights for a collaborative learning environment.
By following these steps diligently, users can master compression fitting installations with confidence and expertise. Remember, attention to detail is key in achieving flawless connections that stand the test of time. Let's build a community of knowledge-sharing and problem-solving together!
See Also
Simple Guide for Installing Compression Fittings on Curved Copper Tubes
Key Advice for Utilizing 1/4 Copper Tubing Connectors
Becoming Proficient in Copper Tubing Connectors: An In-Depth Manual
Ensuring Safe Installation of Copper Tubing Coils in Your Residence

© Copyright 2024 Dongguan Baoyuan Refrigeration Parts Co.,Ltd - All Rights Reserved.