Effective Ways to Insulate Copper Pipes for AC Systems

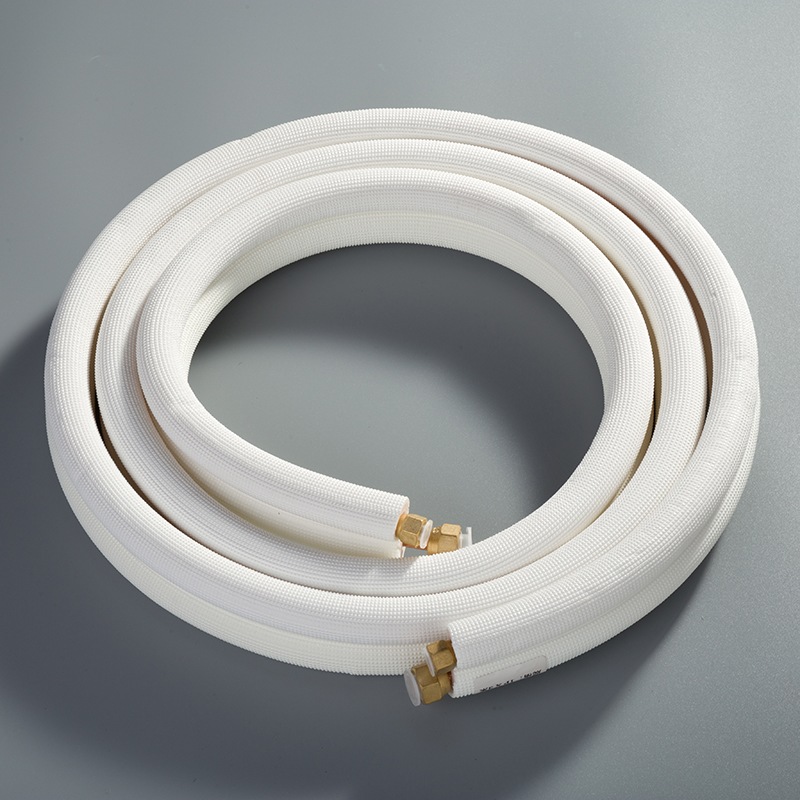
Ever seen water dripping from AC pipes or felt your cooling system isn’t working well? Learning how to insulate copper pipe for air conditioner can fix this issue. Wrapping copper pipes stops water drops and protects your home from damage. It also saves energy, lowering your bills. Plus, it keeps pipes strong and reduces noise from refrigerant moving. Knowing how to insulate copper pipe for air conditioner helps keep your cooling system working great.
Key Takeaways
Wrapping copper pipes stops water drops, keeping your home safe from damage and mold.
Good insulation helps your AC work better, saving money on energy and making it last longer.
Use foam or rubber to cover pipes because they block moisture and keep heat in.
Make sure the insulation fits snugly to stop gaps that waste energy.
Hire an expert if the job is hard or pipes are broken to do it right.
Why Insulating Copper Pipes is Important
Stopping Water Drops and Damage
Have you seen water drops on your AC pipes? That’s called condensation, and it can cause big problems. When warm air touches cold copper pipes, moisture forms. This can lead to water damage, mold, or rust over time. Insulation stops this by blocking air from touching the pipes.
Here’s why insulation works so well:
It stops warm air from touching cold pipes.
It lowers the chance of water forming on pipes.
It keeps pipe temperatures steady, reducing condensation.
Did you know? Experts at NACE say good insulation stops trapped moisture. This prevents rust and water damage. Using factory-made insulation with tight seams gives the best protection.
By insulating copper pipes, you stop condensation and protect your home. This also saves you from expensive repairs later.
Saving Energy and Cutting Costs
Insulating AC pipes doesn’t just protect them—it helps your system work better. Without insulation, pipes lose energy to the air around them. This makes your AC work harder, raising your energy bills.
Insulation acts like a shield. It keeps the cold refrigerant inside the pipes from warming up. This makes your AC more efficient and saves energy. Over time, you’ll see lower utility bills. A more efficient system also lasts longer with less wear and tear.
Think of it like this: insulation is like a warm jacket for your pipes. It keeps the cold in and heat out, helping your AC work its best.
Protecting Pipes from Damage
Copper pipes are strong but not unbreakable. Over time, they can get damaged or rust, especially in tough conditions. Insulation adds a protective layer. It shields pipes from hits and harsh environments.
Case Study Insight: Studies show insulated copper pipes last longer and resist damage better. For example, insulated pipes handle tough conditions and stay durable.
By insulating pipes, you make them last longer and work better. It’s an easy way to avoid costly fixes or replacements later.
Reducing noise from refrigerant flow
Have you heard hissing or gurgling sounds from your AC? These noises come from refrigerant moving through the copper pipes. While normal, the sounds can be annoying in quiet places like bedrooms. The solution? Adding insulation to your pipes can make them quieter.
Uninsulated pipes let vibrations and temperature changes make sounds louder. Insulation works as a sound blocker, reducing noise from your AC. Here’s how it helps:
Absorbs Vibrations: Foam or rubber insulation soaks up pipe vibrations. This lowers the sound traveling through the pipes.
Blocks Noise Escape: Insulation adds a layer between pipes and air. This layer stops sound from spreading into your home.
Stops Temperature Changes: Sudden pipe temperature shifts can cause popping sounds. Insulation keeps temperatures steady, stopping these noises.
Tip: If you dislike noise, pick thicker insulation. Thicker materials block more sound and make your AC quieter.
Why a Quieter AC System Matters
A quieter AC isn’t just nice—it improves your home life. Imagine relaxing or sleeping without loud refrigerant sounds. Insulating copper pipes keeps your home cool and peaceful.
If noisy pipes bother you, try insulation. It’s an easy fix with big results!
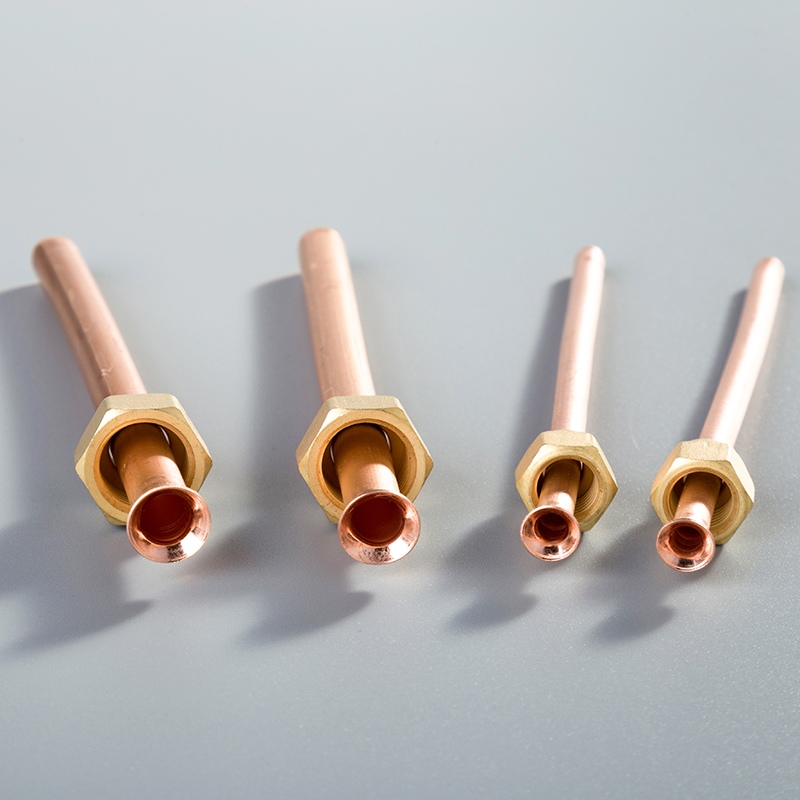
Materials and Tools for Insulating Copper Pipes
Common Insulation Materials Like Foam and Rubber
Not all materials work the same for insulating copper pipes. You need something easy to use and effective. Foam and rubber are popular choices for good reasons.
Here’s why they’re great:
Moisture Resistance: Rubber and polyethylene foams keep water out. This stops rust and condensation.
Thermal Insulation: Closed-cell materials, like elastomeric foam, keep pipes at the right temperature.
Durability: These materials last long and handle wear well.
Check this table to compare materials:
Insulation Material | Thermal Conductivity (k-value) | Moisture Gain (grams) |
|---|---|---|
Phenolic Foam | 1.50 | 17.3 |
Unicellular Rubber | 2.00 | 0.05 |
Polyurethane Foam | 1.50 | 3.00 |
Mineral Fiber | 2.00 | 58.0 |
Cellular Glass | 2.50 | 0.0008 |
Closed-cell Elastomeric | 0.245 @ 75°F | - |
Tools Needed for the Job, Like Tape and Knife
You don’t need fancy tools to insulate pipes. A few simple items will do:
Adhesive or Sealant: This keeps the insulation in place.
Utility Knife: Use it to cut insulation neatly.
Measuring Tape: Measure pipes for a perfect fit.
Mitre Box: It helps cut insulation for corners and bends.
These tools make the job easier and faster.
Picking the Right Insulation Thickness
Choosing the correct thickness is as important as the material. The thickness depends on pipe size and insulation needs.
Here’s a quick guide:
Pipe Size | Insulation Thickness |
|---|---|
5/8 | 1" |
5/8 | 2" |
1" | 1" |
1" | 2" |
For a better idea, check this chart:
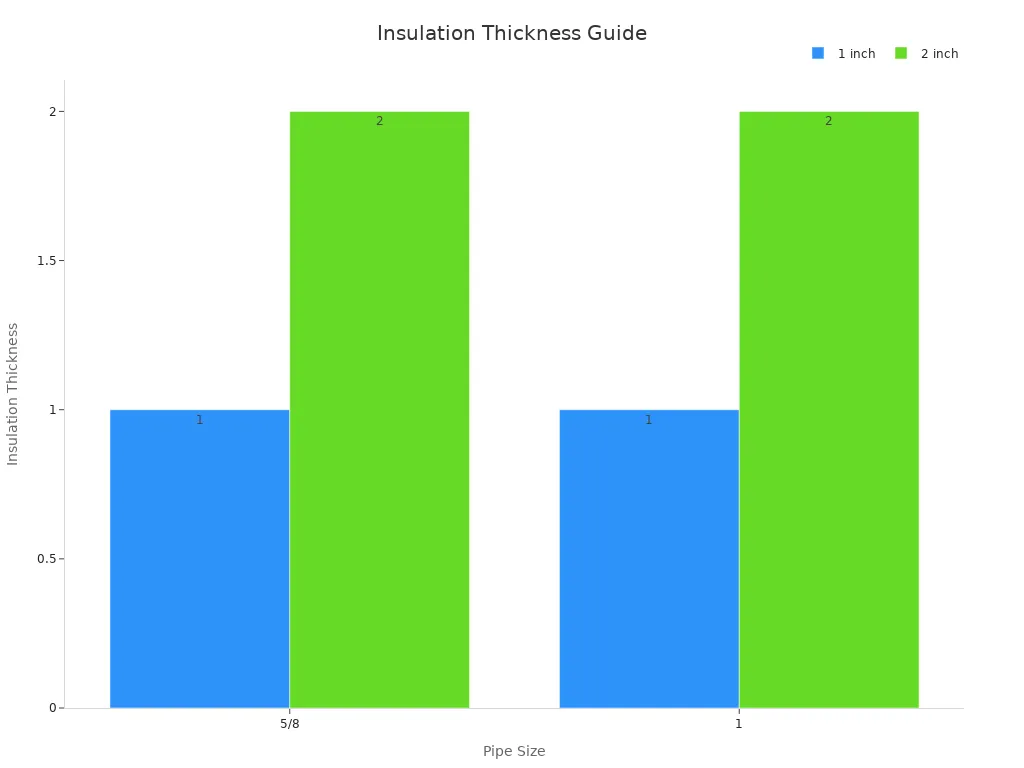
Picking the right thickness keeps pipes insulated well. This saves energy and prevents damage.
Tip: Not sure about thickness? Choose a thicker option. It’s safer to over-insulate than under-insulate!
How to Insulate Copper Pipe for Air Conditioner
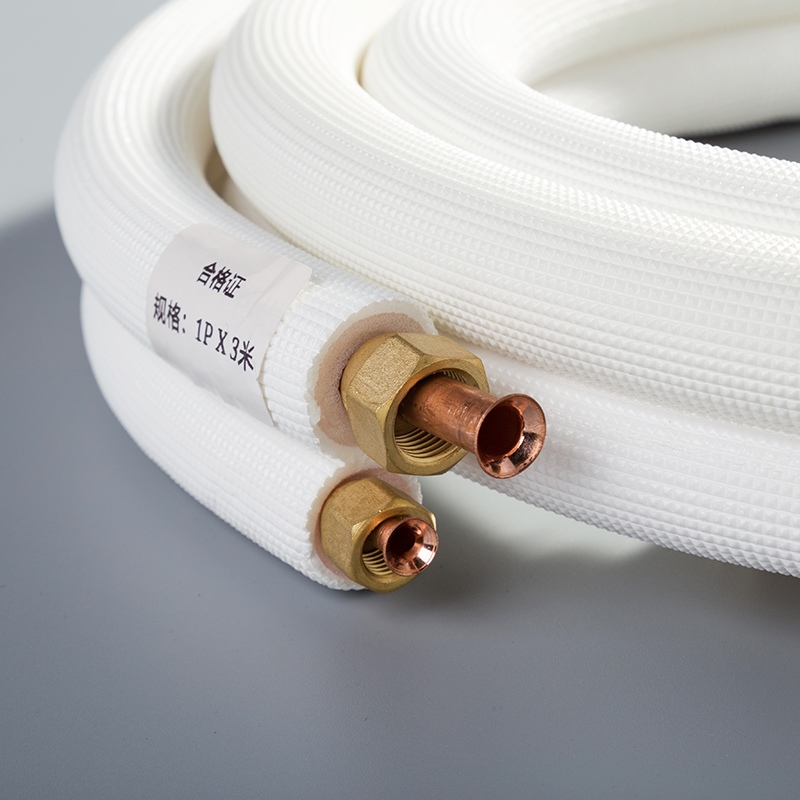
Getting the pipes ready: cleaning and measuring
Before insulating, you need to prepare the copper pipes. Clean pipes help insulation stick better and last longer. Wipe the pipes with a damp cloth to remove dirt. If there’s tough grime, use mild soap and rinse it off. Make sure the pipes are dry before moving forward.
Next, measure the pipes’ length and width. Use a measuring tape to get exact sizes. This helps you cut the insulation to fit perfectly. Don’t forget to measure bends or corners in the pipes. These spots need extra care for a snug fit.
Tip: Write down measurements on the insulation material. This saves time and avoids cutting mistakes.
Cutting and placing the insulation material
After measuring, cut the insulation to the right size. Use a utility knife for clean cuts. Foam or rubber insulation often has pre-slit designs. These make it easy to wrap around the pipes. For corners, use a mitre box to cut at an angle. This helps the insulation fit tightly without gaps.
Place the insulation around the pipes carefully. Press it gently to make sure it wraps fully. For straight sections, slide the insulation over the pipe. For corners, match the angled cuts for a smooth connection.
Note: Check the fit before securing the insulation. A tight fit stops condensation and keeps pipes efficient.
Securing the insulation with tape or glue
Once the insulation is on, secure it in place. Use tape or adhesive to stop it from moving or loosening. Seal the seams where the insulation meets. Wrap tape tightly around the pipe to cover the seam. If using adhesive, spread it evenly and press firmly to stick.
Studies show proper installation makes insulation last longer. For example:
Using good adhesive reduces insulation problems over time.
A boat company improved quality by switching to better adhesive. This cut tape issues and boosted efficiency.
Securing insulation correctly keeps it working well for years.
Pro Tip: Use weatherproof tape or adhesive for outdoor pipes. This protects insulation from bad weather and makes it last longer.
Checking and Closing Gaps for Best Performance
After securing insulation on your copper pipes, there’s more to do. To make it work well, check for gaps or loose spots. Even tiny holes can let in air or water, making insulation less effective. Follow these steps to ensure your insulation is sealed tightly.
Step 1: Search for Gaps and Overlaps
Carefully look at the entire insulated pipe. Check where two insulation pieces meet. Are there any spaces or gaps? Pay extra attention to corners, bends, and joints. These spots often have small openings. If layers of insulation don’t sit flat, fix those areas too.
Tip: Use a flashlight to find small gaps. Shine it along seams to see if light or air passes through.
Step 2: Close the Seams
Once you find gaps, seal them up. Use weatherproof tape or glue to cover seams. Wrap tape tightly around the pipe, overlapping slightly for a snug fit. If using glue, spread it evenly on the edges and press firmly. This keeps moisture out and holds the insulation in place.
Step 3: Secure Loose Ends
Sometimes, insulation ends can loosen, especially with vibrations or temperature changes. Check these ends and secure them with extra tape or glue. If insulation has moved, adjust it back before sealing.
Step 4: Test for Air Leaks
After sealing, run your hand along the pipe. Do you feel cool air or drafts? These show where air might be leaking. Recheck those spots and add more tape or glue if needed. A well-sealed pipe should feel smooth and even.
Why Closing Gaps is Important
Sealing gaps isn’t just about neatness. It helps insulation work better. Openings let warm air touch cold pipes, causing condensation and reducing efficiency. By sealing every gap, you help your AC system work better and save energy.
Did you know? Sealed insulation can boost energy efficiency by up to 30%. This means lower bills and a longer-lasting cooling system.
Checking and sealing gaps is key to insulating copper pipes for air conditioners. It ensures your effort pays off with better performance and fewer problems later. Take your time to do it right for a quieter, more efficient AC system.
When to Hire a Professional
Difficult installations or hard-to-reach spots
Insulating copper pipes isn’t always easy. Pipes in tight places, like walls or ceilings, can be hard to reach. Pipes with many bends or odd shapes can also be tricky. These jobs need skill and care to avoid mistakes.
Hiring a pro makes sure it’s done correctly. Experts have the right tools and know-how for tough jobs. They can work in tight spaces without harming pipes or insulation. This saves you time and effort. Instead of struggling, let a professional handle it.
Tip: Unsure about reaching certain pipes? Call a pro. They’ll check the area and suggest the best fix.
Damaged or worn-out pipes
Before insulating, check pipes for problems. Look for cracks, rust, or leaks. If left alone, these issues can get worse. Covering damaged pipes with insulation hides the problem but doesn’t solve it. It might even make repairs harder later.
A professional can inspect and fix pipes before adding insulation. They’ll make sure everything is in good shape first. This step avoids future issues and keeps your AC working well.
Did you know? Fixing pipe damage early saves money. It also helps your system last longer.
Following local building rules
Local rules often say how to insulate pipes. These rules include insulation thickness, protection, and exceptions for some systems. Following them keeps your setup safe and up to code.
Here’s a quick guide to common rules:
Rule Type | Details |
|---|---|
General Rules | Thickness and protection for different pipe systems. |
Exceptions | Special thickness for heat pump vapor lines; no insulation for liquid lines. |
Protection Guidelines | Protect insulation from sunlight, water, and damage. |
Professionals know these rules well. They’ll make sure your insulation meets all standards. This avoids fines and keeps your system efficient.
Pro Tip: Unsure about local rules? Ask a pro. They’ll handle it so you don’t have to worry.
Hiring a professional saves time and stress. For tricky jobs, damaged pipes, or rule compliance, experts ensure everything is done right.
Adding insulation to your copper pipes is a big improvement. It stops water drops, avoiding damage and mold problems. It also helps your AC work better by keeping the refrigerant cold. This saves energy and lowers your bills while making your AC last longer.
Insulation acts like armor for your pipes. It guards them from harm and keeps your cooling system running well. Whether you do it yourself or hire help, insulating pipes keeps your home cool and your AC dependable.
FAQ
What happens if I don’t insulate my AC copper pipes?
If you skip insulation, pipes can sweat and cause problems. Water damage, mold, and rust may happen over time. Your AC will also work harder, raising energy costs. This can make your cooling system wear out faster.
Tip: Add insulation early to avoid repairs and keep your AC efficient.
How do I choose the right insulation material?
Choose foam or rubber because they block moisture and last long. Closed-cell elastomeric foam is excellent for keeping pipes cool. Always match the material’s thickness to your pipe size for the best fit.
Pro Tip: Use weatherproof insulation for outdoor pipes to protect from rain and sun.
Can I reuse old insulation?
It’s not a good idea to reuse old insulation. Worn materials might not work well and could hold moisture. Always replace old insulation with new, high-quality options for better results.
How often should I inspect insulated pipes?
Check your insulated pipes once a year. Look for cracks, gaps, or damage. Regular checks help you fix small issues and keep your AC working well.
Did you know? Yearly maintenance can help your AC last longer.
Is insulating copper pipes a DIY-friendly task?
Yes, most homeowners can do it with simple tools. But for tricky areas or complex setups, hiring a pro is a smart choice. They’ll ensure proper installation and follow local rules.
Emoji Tip: 🛠️ Not sure? Call a pro to save time and effort!
See Also
Enhance Your AC Efficiency Using Insulated Copper Pipes
Find The Perfect Insulation Solution For Copper Pipes
Reasons To Opt For Copper Pipes In AC Systems

© Copyright 2024 Dongguan Baoyuan Refrigeration Parts Co.,Ltd - All Rights Reserved.