How to Install Copper Pipes for Air Conditioners

Installing an air conditioner tube copper pipe may seem simple, but proper installation is crucial for optimal performance. Ensuring the air conditioner tube copper pipe is installed correctly helps your system operate efficiently and extends its lifespan. However, errors such as kinks or pinched sections in the air conditioner tube copper pipe can result in refrigerant leaks, pressure imbalances, and reduced cooling efficiency. Additionally, using subpar materials for your air conditioner tube copper pipe can lead to frequent malfunctions. By prioritizing a leak-free and well-insulated air conditioner tube copper pipe setup, you can avoid these issues and enjoy a dependable, energy-efficient cooling system.
Key Takeaways
Installing copper pipes correctly helps air conditioners work well and last long. Do not bend or pinch pipes to stop leaks.
Get tools like a pipe cutter, flaring tool, and vacuum pump first. The right tools make the job easier and faster.
Measure and mark pipe lengths carefully to avoid wasting material. Check your measurements twice for accurate cuts and good connections.
Cover copper pipes with insulation to save energy. Pick the right insulation and seal it tightly for best results.
Check for leaks after installing the pipes. Use soapy water or a pressure gauge to make sure there are no leaks before adding refrigerant.
Tools and Materials for Installing Air Conditioner Copper Pipes
Before you start installing copper pipes for your air conditioner, it’s important to gather the right tools and materials. Having the proper equipment ensures a smooth installation process and helps you avoid common mistakes.
Essential Tools
Here’s a list of tools you’ll need to get the job done:
Pipe cutter: This tool is designed to cut copper pipes with precision. It ensures clean edges, which are crucial for secure connections.
Flaring tool: You’ll use this to create flares at the ends of the pipes. These flares help form tight, leak-proof connections.
Torque wrench: This tool helps you tighten fittings to the correct specifications without over-tightening, which could damage the pipes.
Vacuum pump: Removing air and moisture from the system is essential. A vacuum pump ensures the system is ready for refrigerant without any contaminants.
Brazing torch: This is used for soldering copper pipes together. It creates strong, durable joints that can withstand pressure and temperature changes.
Required Materials
Now that you know the tools, let’s talk about the materials you’ll need:
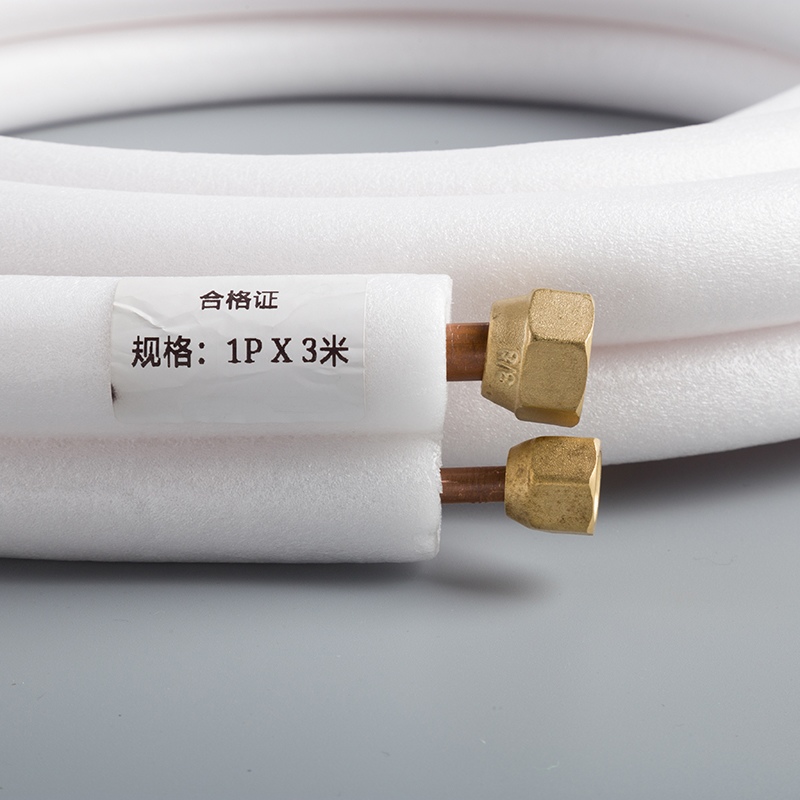
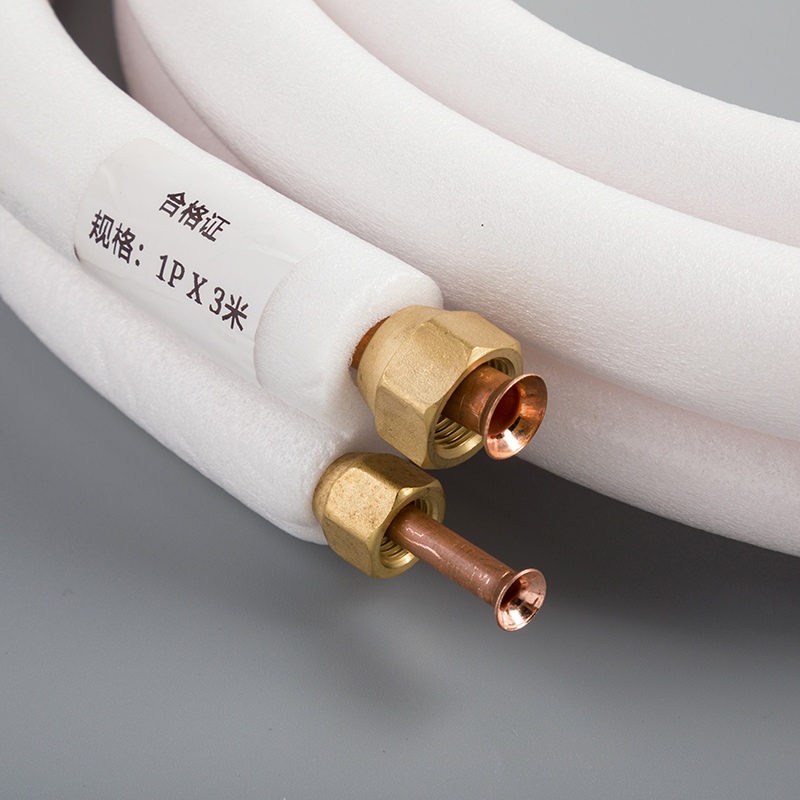
Copper pipes suitable for air conditioners: High-quality copper pipes are a must. Look for pipes that meet industry standards, have good thermal conductivity, and resist corrosion. For most residential systems, Type L pipes are a great choice as they balance cost and durability.
Insulation sleeves: These prevent condensation and energy loss. Foam sleeves are lightweight and easy to install, while rubber wraps work well in humid areas. For maximum thermal resistance, fiberglass insulation is a solid option.
Refrigerant: This is the lifeblood of your air conditioning system. Make sure you have the correct type and amount for your unit.
Pipe fittings: These are essential for connecting pipes securely. Choose fittings that match the size and type of your copper pipes.
Sealant or tape: Use these to seal joints and prevent leaks. A good sealant ensures your system remains airtight and efficient.
By gathering these tools and materials needed for the installation, you’ll set yourself up for success. With the right preparation, you can avoid unnecessary delays and ensure your air conditioning system operates smoothly.
Preparation for Installation of Air Conditioner Copper Pipes
Before you start installing copper pipes, it’s important to prepare properly. This step ensures a smooth installation process and helps avoid costly mistakes. Let’s break it down into three key parts.
Measuring and Marking
Measure the distance between indoor and outdoor units.
Grab a measuring tape and determine the exact distance between your air conditioner’s indoor and outdoor units. This measurement will guide you in cutting the copper pipes to the right length. Be precise—guesswork can lead to wasted materials or improper connections.
Mark the required pipe lengths for installation.
Once you’ve measured, use a marker or pencil to clearly mark the lengths on the copper pipes. This step ensures you cut the pipes accurately and avoid errors during installation.
Tip: Double-check your measurements before marking to save time and effort later.
Cutting and Preparing Pipes
Use a pipe cutter to cut copper pipes to the correct lengths.
Using a pipe cutter, carefully cut the copper pipes along the marked lines. This tool gives you clean, straight edges, which are essential for secure connections. Avoid using saws or other tools that might leave jagged edges.
Deburr edges for smooth and secure connections.
After cutting, use a deburring tool to smooth out the edges of the pipes. This step prevents leaks and ensures the pipes fit snugly into the fittings.
Note: Skipping this step can lead to poor connections and potential refrigerant leaks.
Preparing the Installation Site
Clear the area of obstructions and ensure proper ventilation.
Start by choosing the right location for both the indoor and outdoor units. For the indoor unit, pick a spot that’s accessible and close to the area you want to cool. For the outdoor unit, make sure the area has good ventilation. Remove any obstacles like furniture, debris, or plants to create a safe and open workspace.
Securely mount the indoor and outdoor units.
Once the area is clear, mount the units securely. Use a level to ensure they’re straight, as uneven mounting can affect performance. If you need to drill holes in the wall for the pipes, mark the drill points carefully and use the correct drill bit for a smooth fit.
Pro Tip: Properly mounted units not only look better but also reduce vibrations and noise during operation.
By following these preparation steps, you’ll set yourself up for a hassle-free installation. Taking the time to measure, cut, and prepare ensures your air conditioning system works efficiently and lasts longer.
Step-by-Step Guide to Install Air Conditioning Copper Pipes
Connecting the Pipes
Attach copper pipes to the indoor and outdoor units.
Attaching the pipes is one of the most critical installation steps. Follow these steps to ensure a leak-proof connection:
Align the copper pipes carefully with the indoor and outdoor units. Proper alignment ensures a seamless connection.
Secure the pipes using flare nuts. Start by tightening them by hand to hold the pipes in place.
For the outdoor unit, align the pipes to allow smooth airflow. Tighten the flare nuts diligently to secure the connection.
Use a torque wrench to tighten the nuts further, ensuring they are snug but not over-tightened.
Create a vacuum in the pipes using a vacuum pump to remove air and moisture.
Inspect all connections with a leak detector or soapy water to confirm there are no leaks.
Tip: Visually check every connection point for gaps or visible leaks before proceeding.
Use a flaring tool to create leak-proof connections.
A flaring tool is essential for creating secure connections. It’s a quick and easy method that doesn’t require extensive training.
“The flaring method is the most commonly used method in the industry because it is fast and easy to do. There are many great tools to help the installer create flares, and it typically does not take much training to get started.”
Securing the Pipes
Fasten pipes to walls or ceilings using brackets or clamps.
Once the pipes are connected, secure them to the walls or ceilings. Use brackets or clamps to hold them in place. Position the brackets every 4-6 feet to prevent sagging. This step keeps the pipes stable and reduces the risk of damage over time.
Ensure pipes are supported every 4-6 feet to prevent sagging.
Proper support is crucial for maintaining the integrity of the pipes. Without adequate support, the pipes may sag, leading to stress on the connections and potential leaks.
Pro Tip: Use adjustable clamps for flexibility during installation.
Insulating the Pipes
Cover pipes with insulation sleeves to prevent energy loss.
Insulating the pipes is vital for maintaining energy efficiency. Choose the right insulation based on your environment:
Foam insulation is lightweight and flexible, making it easy to install.
Fiberglass insulation offers excellent thermal resistance.
Mineral wool insulation provides superior thermal and acoustic insulation.
Seal insulation with tape or adhesive for durability.
After covering the pipes, seal the insulation to ensure it stays in place. Use one of the following options:
Duct Tape: Ideal for securing foam sleeves and covering seams.
Armaflex 520 Adhesive: Provides a long-lasting bond and resists moisture and temperature changes.
Note: Avoid compressing the insulation, as this can reduce its effectiveness.
By following these steps, you’ll successfully install air conditioning copper pipes. Properly attaching the pipes, securing them, and insulating them ensures your system operates efficiently and lasts longer.
Testing the Air Conditioner Tube Copper Pipe System
Once you've installed the copper pipes, it's time to test the system to ensure everything is working perfectly. This step is crucial for identifying leaks and confirming the air conditioner is ready to operate efficiently.
Leak Testing
Use a vacuum pump to remove air and moisture.
Using a vacuum pump is essential for testing the system for leaks and ensuring it’s free of air and moisture. Follow these steps to get it done right:
Install a dryer near the evaporator to protect the system from rust and debris.
Purge the system with dry nitrogen to remove any moisture.
Perform a standing pressure test with nitrogen to check for leaks.
Attach a micron gauge to the vacuum pump to monitor the vacuum level. Aim for 100 microns or less.
Use fresh vacuum pump oil to improve efficiency.
Pull a vacuum until the system reaches 1000 microns. This should take less than 15 minutes for most residential systems.
Continue running the vacuum pump until the system drops below 200 microns. Ideally, aim for 50-100 microns.
If moisture remains, repeat the process with a nitrogen sweep to eliminate it.
Tip: Always double-check your connections before starting to avoid unnecessary delays.
Check for leaks with a pressure gauge or soapy water.
After using a vacuum pump, inspect the system for leaks. Apply soapy water to the joints and watch for bubbles, which indicate escaping refrigerant. Alternatively, use a pressure gauge to monitor for pressure drops. Both methods are effective for checking for leaks and ensuring a sealed system.
Functionality Testing
Charge the system with refrigerant.
Once you're confident there are no leaks, it’s time to add refrigerant. The type of refrigerant depends on your air conditioner model. Common options include:
R-410A: Widely used in newer systems and environmentally friendly.
R-32: Gaining popularity for its lower environmental impact.
R-134a: Safe and commonly used in HVAC systems.
Make sure to follow the manufacturer’s guidelines for the correct type and amount of refrigerant.
Turn on the air conditioner and monitor performance.
Finally, power up the air conditioner and observe its performance. Check if the cooling is consistent and the system operates without unusual noises. Monitor the temperature and airflow to confirm everything is functioning as expected.
Pro Tip: If you notice any irregularities, turn off the system and recheck the connections or consult a professional.
By carefully testing the system for leaks and functionality, you can ensure your air conditioner runs smoothly and efficiently.
Safety Precautions During Installation
When installing copper pipes for your air conditioner, safety should always come first. Handling tools and refrigerants can pose risks, but following a few precautions can keep you safe and make the process smoother.
Handling Tools and Materials
Wear safety gloves and goggles when cutting or brazing pipes.
Protecting your hands and eyes is essential when working with tools like pipe cutters and brazing torches. Gloves shield your hands from sharp edges and burns, while goggles prevent debris or sparks from injuring your eyes.
Did you know? Fumes from contaminated metals or improper flux application during brazing can harm your health. Overheating materials can also release excessive fumes and damage the pipes. Always work in a well-ventilated area to minimize exposure.
Follow manufacturer instructions for all tools and equipment.
Using tools correctly reduces the risk of accidents. Before starting, inspect your tools for damage and read the manufacturer’s manual. A clean workspace also helps prevent slips or mishaps.
Here are some best practices to keep in mind:
Use the right tool for each task.
Maintain a tidy workspace to avoid tripping hazards.
Lift heavy items safely by bending your knees and keeping your back straight.
If a load feels too heavy, don’t hesitate to ask for help or use mechanical aids like carts.
Working with Refrigerant
Avoid direct contact with refrigerant to prevent frostbite.
Refrigerants can cause severe skin injuries if they come into contact with your skin. Some refrigerants may even lead to chemical burns or irritation. Always wear gloves and handle refrigerants with care to avoid accidents.
Warning: Inhaling refrigerant vapors can damage your lungs and make breathing difficult. If you feel lightheaded or short of breath, step away and get fresh air immediately.
Ensure proper ventilation when handling refrigerant.
Refrigerants can release harmful vapors, especially in enclosed spaces. Always work in a well-ventilated area to avoid inhaling these fumes. If possible, use a fan or open windows to improve airflow.
By following these safety tips, you can protect yourself and complete the installation confidently. Safety isn’t just a precaution—it’s a priority!
Proper installation of air conditioner copper pipes is essential for both efficiency and safety. By following the steps outlined in this guide, you can avoid common installation problems and solutions like refrigerant leaks, poor insulation, or improper connections. A well-installed system offers long-term benefits, including enhanced energy efficiency, reduced repair costs, and a longer lifespan for your air conditioner.
If you’re unsure about any step, don’t hesitate to consult a professional. Investing time and effort into a leak-free and well-insulated setup ensures your air conditioner performs at its best while saving you money in the long run.
Remember: A properly installed system can extend your AC’s lifespan by up to 20% and deliver annual energy savings of 10-15%.
FAQ
1. Can I install copper pipes for my air conditioner without professional help?
Yes, you can! If you have the right tools and follow the steps carefully, it’s doable. However, if you’re unsure or lack experience, hiring a professional ensures safety and efficiency.
2. How do I choose the right copper pipes for my air conditioner?
Pick high-quality pipes labeled for HVAC use. Type L pipes are a great choice for most residential systems. They’re durable, corrosion-resistant, and offer excellent thermal conductivity.
3. What’s the best way to check for leaks in the system?
Use soapy water or a pressure gauge. Apply soapy water to joints and watch for bubbles. A pressure gauge can also detect drops, indicating leaks.
Tip: Always test for leaks before adding refrigerant to avoid wasting it.
4. Do I need to insulate the copper pipes?
Absolutely! Insulation prevents energy loss and condensation. Use foam or fiberglass sleeves and seal them with tape or adhesive for long-lasting results.
5. What safety precautions should I take during installation?
Wear gloves and goggles when cutting or brazing pipes. Work in a well-ventilated area, especially when handling refrigerants. Follow all tool instructions to avoid accidents.
Reminder: Safety first! Protect yourself and your workspace.
See Also
The Benefits of Selecting Copper Pipes for AC Systems
Simple Guide to Professionally Installing Copper AC Tubes
The Impact of Pure Copper Pipes on AC Efficiency

© Copyright 2024 Dongguan Baoyuan Refrigeration Parts Co.,Ltd - All Rights Reserved.