How to Install Copper Pipes for Split AC Systems

Properly setting up a copper pipe for split air conditioner systems helps them work well and safely. Following clear steps prevents errors that might cause problems or expensive fixes.
It lowers setup and future repair costs.
It helps the AC system last longer.
Installing a copper pipe for split air conditioner units the right way provides steady cooling and reduces wasted energy.
Key Takeaways
Installing copper pipes correctly improves AC performance and efficiency.
Use proper tools, like a pipe cutter and flare nuts, for tight, leak-free connections.
Cover copper pipes with insulation to stop energy loss and keep refrigerant cool.
Check for leaks with dry nitrogen before finishing the setup.
Doing these steps can lower repair costs and make your AC last longer.
Tools and Materials for Installing Copper Pipes
Important Tools for the Job
To set up copper piping for your split AC, you need proper tools. These tools help you work accurately and avoid leaks or weak spots. Here’s a list of must-have tools:
Tubing Cutter: This tool cuts pipes neatly for strong, leak-free joints.
Pipe Deburring Tool: It smooths rough edges after cutting for better fitting.
Propane Torch: Use this to heat pipe joints for soldering. Adjust the flame as needed.
Copper Pipe Crimping Tool: This tool secures joints tightly without soldering.
Copper Pipe Swaging Tool: It widens pipe ends for easy, seamless connections.
Copper Pipe Pressing Tool: Quickly and firmly locks fittings in place.
CopperKey or Prep Tools: These clean pipe surfaces for stronger connections.
Flux and Solder: These materials seal joints to prevent leaks.
Emery Cloth and Wire Brushes: Clean pipes before soldering for better bonding.
Having these tools ready will make your work easier and faster.
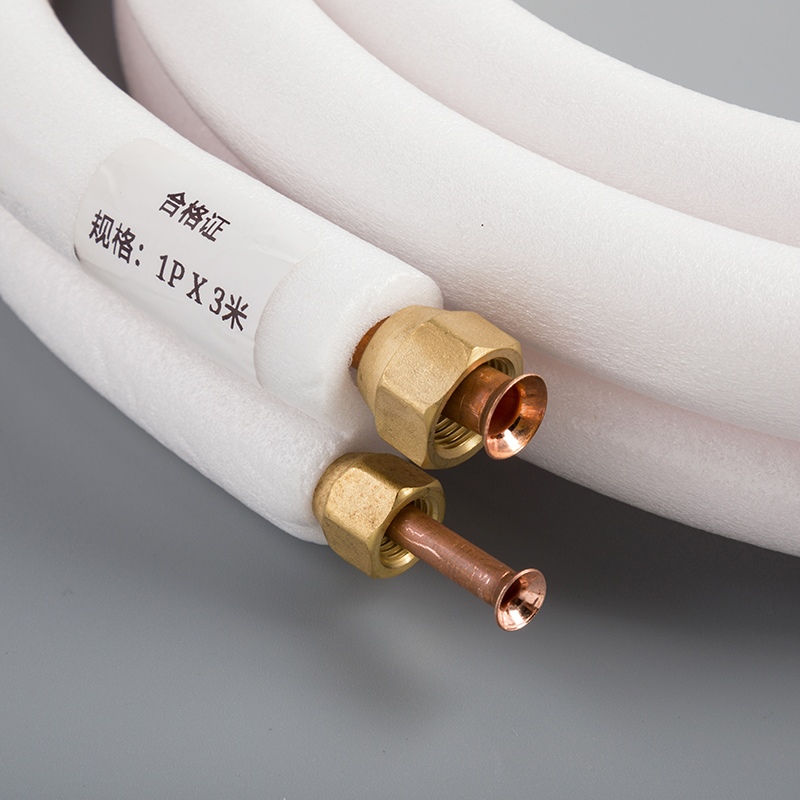
Materials Like Copper Pipes, Insulation, and Flare Nuts
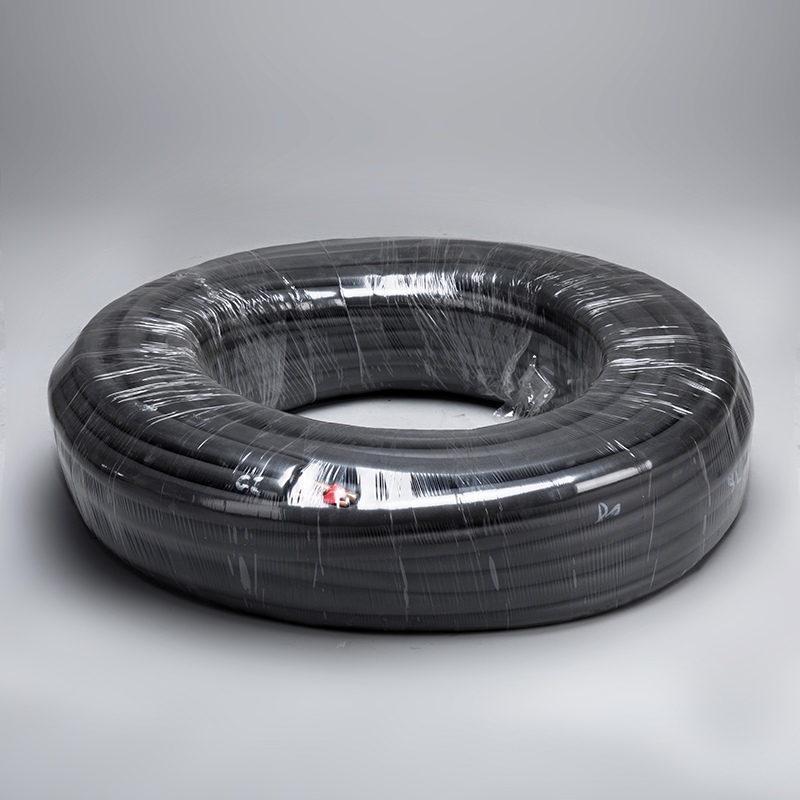
Besides tools, you’ll need materials to finish the job. Copper pipes are the most important. They carry refrigerant between the indoor and outdoor units. Pick high-quality pipes for long-lasting performance.
You’ll also need pipe insulation. Insulation stops energy loss and keeps refrigerant at the right temperature. Foam insulation is a good choice because it’s simple to use and works well.
Flare nuts are small but important. They connect pipes securely to the AC units. Make sure they fit properly to avoid leaks.
With the right tools and materials, your installation will go smoothly and work well.
Getting the Area Ready and Installing the Indoor Unit
Picking the Best Spots for Indoor and Outdoor Units
Choosing the right place for your split AC is important. First, measure the room to check if the AC fits. Multiply the room's square footage by 35 to find the needed BTUs. For instance, a 300-square-foot room needs an AC with 10,500 BTUs.
Place the indoor unit high and in the center of the wall. This helps cool air spread evenly in the room. Stay away from heat sources like ovens or sunny spots, as they can affect cooling. For the outdoor unit, pick a spot with good airflow and no blockages like walls or plants. Shade it to keep it cool and working well.
Think about other things like windows, insulation, and how many people live there. These details help you choose the best spots for cooling.
Getting the Space Ready for Installation
Before putting up the indoor unit, prepare the area carefully. Turn off the power in the work zone to stay safe. Wear gloves and safety glasses for protection.
Clear the wall where the indoor unit will go. Take down things like pictures or shelves and clean the wall for a strong fit. For the outdoor unit, check the ground if you’re placing it there. Avoid sharp objects that might harm the copper pipes.
If you need to drill holes for the pipes, check the wall first. Make sure there are no wires or pipes inside. Use a stud finder to pick safe spots to drill. This keeps the pipes secure and avoids damage.
By preparing the area and setting up the indoor unit properly, your split AC will work better and avoid problems.
Measuring, Cutting, and Drilling for Copper Pipes
Measuring the Right Length of Copper Pipes
Measuring correctly is the first step for copper pipe setup. Good measurements make sure pipes fit well between AC units. This avoids waste and extra work. Use a measuring tape to find the distance between the units. Remember to include bends and curves in your measurement.
Copper pipes come in different types and lengths. The table below shows common options to help you pick the right one:
Type of Copper Pipe | Standard Specification | Lengths Available |
|---|---|---|
Threadless Copper Pipe (TP) | ASTM B 302 | 20 ft for sizes ¼" to 10", 15 ft for 12" |
Copper Drainage Tube (DWV) | ASTM B 306 | Standard length 20 ft, other lengths by agreement |
Welded Copper Tube | ASTM B 447 | Specified by the purchaser |
Add a few extra inches to your measurement. This helps if you make mistakes or need adjustments later.
Cutting Copper Pipes the Right Way
Cutting pipes neatly is important for a good fit. Use a cutting wheel for smooth edges and clean cuts. This tool makes cutting easy and reduces extra work. You can also use a saw, but it leaves rough edges that need smoothing.
The table below explains cutting methods and their benefits:
Cutting Technique | Description |
|---|---|
Sawing | Uses hand or power saws for straight cuts but needs deburring. |
Cutting Wheel | Scores and cuts pipes cleanly, leaving smooth edges. |
Deburring | Removes sharp edges to stop damage during assembly. |
Always smooth the edges after cutting. This stops sharp edges from harming insulation or causing leaks.
Drilling Holes for Pipe Setup
Drilling holes is needed to pass pipes through walls. Mark the spots where pipes will go. Use a stud finder to avoid hitting wires or hidden objects.
Follow these tips for proper drilling and alignment:
Guideline Description | Details |
|---|---|
Backfill Requirements | Use loose dirt without rocks or frozen chunks for support. |
Tunneling and Jacking | Protect pipes from damage during and after installation. |
Stabilization of Trench | Replace weak soil with strong material for better support. |
Drill slowly to avoid cracking walls or making crooked holes. Once done, attach the pipes securely to the AC units.
Connecting Copper Pipes for Split Air Conditioner
Connecting Pipes to the Indoor Unit
Follow these steps to connect copper pipes to the indoor unit:
Measure and Cut the Pipes: Use a tape to measure the pipe length. Cut the pipes with a tubing cutter for smooth edges. Remove sharp edges using a deburring tool.
Flare or Braze the Pipe Ends: Use a flaring tool to widen pipe ends for tight seals. You can also braze the ends for a stronger connection.
Attach the Pipes to the Indoor Unit: Line up the pipe ends with the indoor unit ports. Secure them with flare nuts. Tighten carefully to avoid damage.
Insulate the Pipes: Cover the pipes with foam insulation to stop energy loss. Make sure the insulation covers the entire pipe length.
Secure the Line Set: Use clamps or brackets to hold the pipes in place. Avoid sharp bends or kinks to keep refrigerant flowing smoothly.
Tip: Purge pipes with dry nitrogen during brazing. This stops oxidation and keeps the system working well.
Connecting Pipes to the Outdoor Unit
Follow these steps to connect copper pipes to the outdoor unit:
Prepare the Outdoor Unit: Place the outdoor unit on a flat surface with good airflow. Keep it level and clear of plants or debris.
Verify Pipe Compatibility: Check if the pipes meet the AC's requirements. Seamless Type ACR copper tubing is best for refrigerant piping.
Standard Reference
Description
1107.5.3 Copper Tube
Seamless Type ACR copper tubing per ASTM B 280 is ideal for refrigerant piping.
Type K or L Copper Tube
May be used if approved, following ASTM B 88 standards.
Annealed Copper Tube
Suitable for sizes smaller than 2 inches, with restrictions on larger sizes.
Connect the Pipes to the Condenser: Align the pipe ends with the outdoor unit ports. Secure them with flare nuts. Tighten with a wrench for a firm seal.
Perform a Leak Test: Pressurize the system with dry nitrogen to check for leaks. Fix any issues before moving forward.
Vacuum the System: Use a vacuum pump to remove air and moisture from the system. This step improves the AC's performance.
Insulate and Secure the Pipes: Wrap the pipes with insulation to stop energy loss. Use clamps to hold the pipes in place. Avoid sharp bends or kinks.
Note: Insulation and secure connections prevent leaks and keep the AC efficient.
By following these steps, you can connect copper pipes to both units. This ensures your AC works reliably for years.
Securing, Insulating, and Testing the Pipes
Securing Pipes with Flare Nuts
Attaching copper pipes correctly is key for a working AC. Flare nuts are small but important parts of this process. They connect pipes to the indoor and outdoor units tightly. To attach pipes, line up the pipe ends with the unit ports. Then, use flare nuts to secure them. Tighten the nuts gently with a wrench. If you tighten too much, threads can break. If too loose, leaks might happen.
Flare nuts made for copper pipes, like SECO45 gaskets, work well. These gaskets follow ASTM B152 and ASE Standard J513_201912 rules. They are strong and stop leaks. Leaks can waste refrigerant, raise energy costs, and harm the environment. Securing pipes properly avoids these problems. It keeps your AC efficient and eco-friendly.
Insulating Pipes to Prevent Energy Loss
Covering copper pipes with insulation helps the AC work better. Without insulation, refrigerant can lose or gain heat. This lowers the cooling power of the system. Foam insulation is easy to use and works great. Wrap it around the pipes without leaving gaps. Use tape or clamps to hold it in place.
Good insulation materials meet safety rules like ANSI/UL 224 and CSA C22.2 No. 198.1. These rules check if the insulation is safe, strong, and fire-resistant. Insulation stops energy loss and shields pipes from moisture and temperature changes.
Testing for Leaks Using a Vacuum Pump
Checking for leaks is the last step to finish the job. Leaks can hurt your AC’s performance and waste refrigerant. To test, fill the system with dry nitrogen and watch for pressure drops. If there are no leaks, use a vacuum pump next.
The vacuum pump removes air and moisture from the pipes. This step is very important for keeping the refrigerant working well. Moisture can freeze and block refrigerant flow. Air can lower cooling power. After vacuuming, check for pressure changes again. This ensures the pipes are sealed and ready to use.
By securing, insulating, and testing the pipes, your AC will work well and last longer. Doing the job right improves performance and saves money over time.
Setting up copper pipes for your split AC needs careful steps. First, measure and cut the pipes to the right size. Then, attach them tightly to both the indoor and outdoor units. Cover the pipes with insulation to stop energy loss. Check for leaks to make sure the system works well.
Tip: Installing the pipes correctly makes your AC cool better. It also helps your AC last longer and saves money on repairs. Following these steps carefully ensures a safe and energy-saving system for many years.
FAQ
What kind of copper pipe works best for split ACs?
Choose seamless Type ACR copper tubing. It follows ASTM B 280 rules and is great for refrigerant flow. This type lasts long and avoids leaks.
Tip: Always check your AC manual for pipe compatibility.
How can you stop leaks in copper pipe connections?
Tighten flare nuts carefully and use a flaring tool for tight seals. Don’t over-tighten, as it can cause damage.
Note: Use dry nitrogen to test for leaks before vacuuming.
Why do copper pipes need insulation?
Insulation stops energy loss and keeps refrigerant at the right temperature. It also shields pipes from moisture and heat changes.
Emoji Reminder: 🛡️ Insulation = Saves Energy + Protects Pipes!
Can old copper pipes be reused for a new AC?
Reusing old pipes is not a good idea. Leftover dirt or damage can harm the new system. Always pick new, good-quality pipes for better results.
How do you check copper pipes for leaks?
Fill the pipes with dry nitrogen and watch for pressure drops. If no leaks are found, use a vacuum pump to remove air and moisture.
Pro Tip: A leak-free system cools better and saves energy costs.
See Also
Simple Guide to Professionally Installing Copper AC Tubes
Reasons to Opt for Copper Pipes in Your AC System
Unveil the Benefits of Pure Copper Pipes for AC

© Copyright 2024 Dongguan Baoyuan Refrigeration Parts Co.,Ltd - All Rights Reserved.