A Beginner's Guide to Installing Copper Pipes for Mitsubishi AC Systems

Copper pipes, specifically the Mitsubishi air conditioner copper pipe, play a crucial role in Mitsubishi air conditioners, ensuring efficient cooling and long-lasting performance. Their durability and ability to handle refrigerants make them a preferred choice for HVAC systems. Unlike other materials, the Mitsubishi air conditioner copper pipe resists corrosion and offers superior thermal energy transfer, which enhances the cooling process. Additionally, copper is an environmentally friendly option due to its recyclability. While the Mitsubishi air conditioner copper pipe may have higher upfront costs compared to alternatives like PEX or CPVC, their reliability and efficiency make them a worthwhile investment for your air conditioning system.
Key Takeaways
Copper pipes are strong and work well for Mitsubishi ACs. They don’t rust and help cool better, making them a good choice.
Get tools like a pipe cutter, flaring tool, and vacuum pump first. Being ready makes the installation easier.
Always stay safe by wearing safety gear and checking for dangers. A safe area helps you do the job right.
Measure and cut copper pipes carefully to avoid wasting them. Use a pipe cutter for neat cuts and remove sharp edges for tight fits.
Cover pipes with insulation to stop water drops and save energy. Good insulation helps your AC last longer.
Tools and Materials for Mitsubishi Air Conditioner Copper Pipe Installation

Before starting your installation project, gathering the right tools and materials is essential. This ensures a smooth process and helps you achieve a reliable and efficient setup.
Essential Tools
Pipe Cutter
A pipe cutter is a must-have tool for cutting copper pipes to the desired length. It provides clean and precise cuts, which are crucial for a proper fit and connection.
Flaring Tool
You will need a flaring tool to create flared ends on the pipes. This step ensures a secure and leak-free connection between the pipes and the AC system.
Torque Wrench
A torque wrench helps you tighten connections to the correct specifications. Over-tightening or under-tightening can lead to leaks or damage.
Vacuum Pump
A vacuum pump removes air and moisture from the system before adding refrigerant. This step is critical for maintaining the efficiency and longevity of your AC system.
Leak Detector
A leak detector helps you identify any refrigerant leaks in the system. Early detection prevents performance issues and ensures safety.
Required Materials
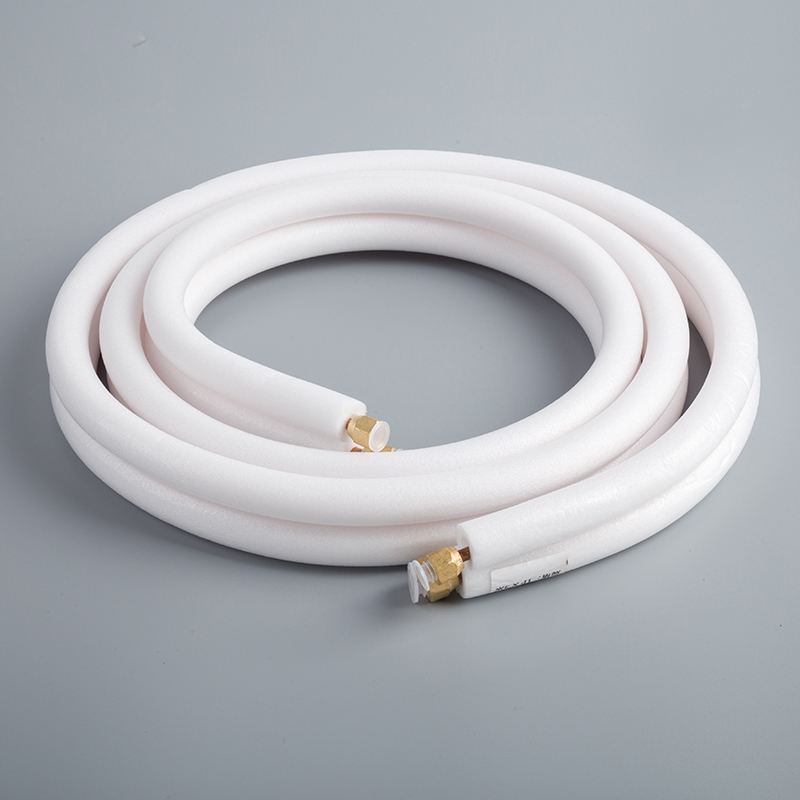
Copper or Copper Alloy Seamless Pipes
Copper pipes are the backbone of your project. They are durable, easy to install, and compatible with refrigerants. Their high thermal conductivity enhances cooling efficiency. Additionally, copper pipes resist corrosion and withstand high pressure, making them ideal for air conditioning systems.
Property | Description |
|---|---|
Resistance to high pressure | Copper coils can withstand high pressures, ensuring the normal operation of air conditioning systems. |
Corrosion resistance | Copper is not prone to corrosion, contributing to the long service life of the system. |
Thermal conductivity | Copper alloy tubes have superior thermal conductivity compared to aluminum, enhancing heat exchange efficiency. |
Welding performance | Copper tubes exhibit better welding performance, making installations more reliable. |
Mechanical strength | Copper's mechanical strength ensures durability and efficiency in air conditioning systems. |
Long service life | Copper hoses are stable and durable, suitable for long-term use in HVAC applications. |
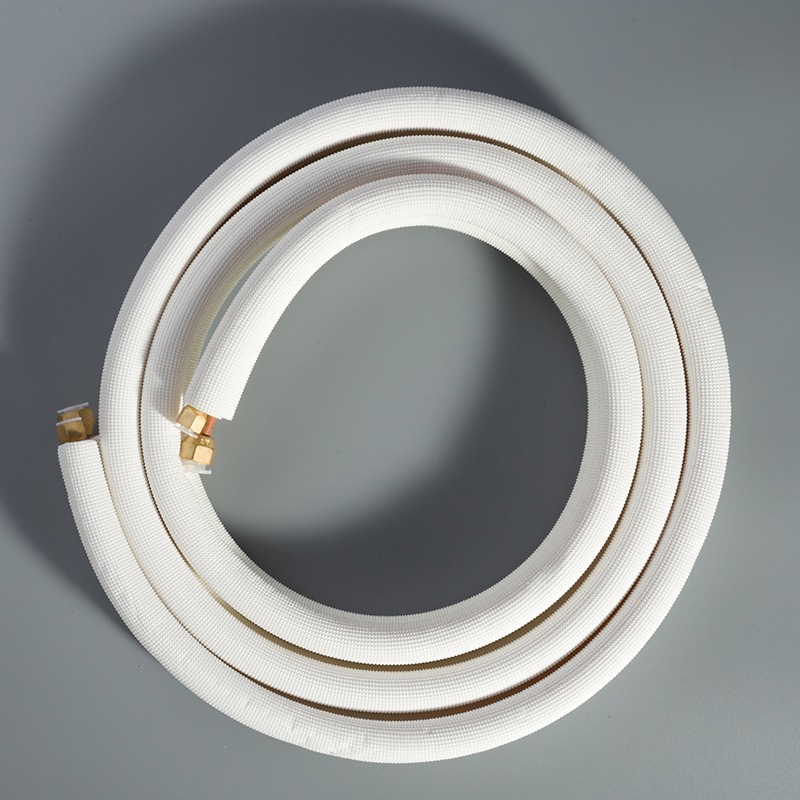
Insulation Material
Proper insulation prevents condensation and improves energy efficiency. Closed-cell elastomeric pipe insulation is a popular choice due to its flexibility, low thermal conductivity, and vapor-retarder properties. Other options include polyethylene foam and rubber foam, both of which offer excellent moisture resistance.
Insulation Material | Key Features |
|---|---|
Polyethylene Foam | Excellent moisture resistance |
Rubber Foam | Good for moisture control |
Closed-cell Insulation | Superior thermal insulation |
Fiberglass | Effective thermal insulation |
Refrigerant
Refrigerant is the lifeblood of your AC system. Ensure you use the type recommended by Mitsubishi for optimal performance.
Pipe Fittings
Pipe fittings connect the copper pipes to the indoor and outdoor units. Choose high-quality fittings to avoid leaks and ensure a secure connection.
Electrical Tape
Electrical tape secures insulation material and protects connections. It also helps organize wires and pipes for a neat installation.
Tip: Always double-check your tools and materials before starting the project. This preparation saves time and prevents unnecessary delays.
Preparing to Install a Split System Air Conditioner
Safety Precautions
Before you begin, prioritize safety to avoid accidents and ensure a smooth installation process. Follow these essential precautions:
Inspect the installation site for hazards like protruding nails or unstable surfaces. Address these issues to create a safe workspace.
Wear personal protective equipment, including gloves and safety goggles, to protect yourself from sharp edges and debris.
Ensure proper ventilation in the workspace to prevent the buildup of harmful fumes.
Turn off the power supply to the air conditioning system to eliminate the risk of electric shock.
Adhere to local regulations, such as Australian laws, regarding air conditioning installation. These standards ensure compliance and safety.
Tip: Always double-check your workspace for potential risks before starting. A safe environment leads to a successful project.
Initial Setup
Proper preparation is key when you install a split system air conditioner. Start by measuring the distance between the indoor and outdoor units. Accurate measurements help you determine the required length of copper pipes and insulation material.
Next, plan the pipe route carefully to avoid obstructions. Avoid running lines over building main columns and beams. This approach prevents structural issues and makes future maintenance easier. Considering long-term implications during this stage ensures flexibility for modifications and reduces potential conflicts.
Finally, gather all the necessary tools and materials in one place. Having everything within reach saves time and keeps the process organized. Whether you are setting up the indoor unit or connecting the outdoor components, preparation ensures efficiency and reduces errors.
Note: Double-check your measurements and tools before proceeding to the next steps. This small effort can save you from costly mistakes later.
Step-by-Step Guide to Install Mitsubishi Air Conditioner Copper Pipe
Measuring and Cutting Copper Pipes
Measure the required length of copper pipes
Start by measuring the distance between the indoor and outdoor units. Use a measuring tape to determine the exact length of copper pipes needed. Accurate measurements prevent material wastage and ensure a proper fit.
Use a pipe cutter for clean, precise cuts
Cut the copper pipes to the measured length using a pipe cutter. This tool ensures a straight and clean cut, which is essential for secure connections. Rotate the cutter around the pipe evenly to avoid uneven edges.
Remove burrs from the cut cross-section
After cutting, inspect the pipe ends for burrs. Burrs can interfere with connections and cause leaks. Use a deburring tool to remove them effectively. You can also smooth the edges with sandpaper or a metal nail file. Always wear protective gear, such as goggles and a facemask, to avoid injury from copper dust or shards.
Tip: Shine an LED flashlight on the pipe ends to ensure all burrs are removed before proceeding.
Bending and Connecting Pipes
Use a pipe bending tool to avoid damage
When bending the copper pipes, use a pipe bending tool to maintain their structural integrity. Gradual bends prevent kinks or crimps, which can restrict refrigerant flow.
Ensure the bending radius is appropriate
Check the bending radius to match the installation requirements. Overbending can weaken the pipe, while underbending may result in improper alignment. Double-check your measurements and markings before bending.
Connect pipes to the indoor and outdoor units
Attach the pipes to the indoor and outdoor units using soldering or compression fittings. Clean the pipe ends thoroughly to remove debris or oxidation. Secure the connections with a torque wrench to ensure they are tight but not over-tightened. After connecting, conduct a pressure test to check for leaks.
Note: When installing the outdoor condenser, ensure the pipes are properly aligned to avoid stress on the connections.
Securing and Insulating Pipes
Secure pipes with brackets or clamps
Use stainless steel hose clamps or copper riser clamps to secure the pipes. Attach L-brackets to the wall and fasten the clamps to the brackets. Place protective material between the clamps and pipes to prevent corrosion.
Wrap pipes with insulation material to prevent condensation
Cover the pipes with insulation material, such as closed-cell elastomeric foam, to prevent condensation and improve energy efficiency. Proper insulation also protects the pipes from extreme temperatures and extends their lifespan.
Benefit | Description |
|---|---|
Energy Efficiency | Reduces heat loss or gain, cutting utility costs by maintaining fluid temperatures with less energy. |
Condensation Control | Prevents moisture formation, reducing corrosion and mold in fluctuating temperatures. |
Durability and Longevity | Extends lifespan of pipes by protecting against extreme temperatures and corrosive environments. |
Tip: Use electrical tape to secure the insulation material and ensure a neat finish.
Testing and Finalizing the Installation
Checking for Leaks
Use a vacuum pump to remove air from the system
Before adding refrigerant, you must remove air and moisture from the system. Attach a vacuum pump to the service port of the air conditioner. Run the pump until the pressure gauge reads below 500 microns. This step ensures the system is free of contaminants that could reduce efficiency or damage the compressor.
Tip: Monitor the gauge closely during this process. A steady reading indicates the system is properly evacuated.
Apply a leak detector to all connections
After vacuuming, inspect all connections for leaks. Use a leak detector to check for escaping refrigerant. Spray a soapy water solution on the connections and watch for bubbles, which indicate leaks. Alternatively, employ advanced methods like tracer dyes or acoustic listening devices for hidden leaks.
Other reliable methods for detecting leaks include:
Visual inspections for dampness or discoloration.
Monitoring refrigerant levels for unusual drops.
Using blocking plugs for targeted pressure testing.
Note: Address any leaks immediately to prevent performance issues and ensure safety.
Testing the System
Turn on the AC system and monitor performance
Power on the air conditioner and set it to cooling mode. Observe the system as it starts. Check if the indoor unit blows cool air and the outdoor condenser operates without interruptions.
Ensure proper cooling and no unusual noises
Evaluate the cooling performance by measuring the room temperature. Mitsubishi air conditioners use advanced technologies like high-efficiency inverter compressors and flat-tube heat exchangers to deliver consistent cooling. Ensure the system operates quietly, as unusual noises may indicate loose components or improper installation.
Technology | Description |
|---|---|
High-efficiency Inverter Compressors | Designed for improved efficiency and minimal environmental impact. |
Flat-tube Heat Exchanger | Reduces airflow resistance and enhances heat exchange performance. |
Move Eye mirA.I.+ | Adjusts operation automatically based on room temperature changes. |
Tip: If the system fails to cool effectively, recheck the connections and refrigerant levels.
Final Adjustments
Tighten any loose connections
Inspect all connections one last time. Use a torque wrench to tighten any loose fittings. Avoid over-tightening, as this can damage the pipes or threads.
Secure all pipes and fittings
Ensure all pipes are firmly secured with brackets or clamps. Double-check the insulation to confirm it is intact and properly wrapped. This step prevents condensation and protects the pipes from external damage.
Reminder: Completing the project with attention to detail ensures long-term efficiency and reliability.
Installing copper pipes for Mitsubishi air conditioners involves several essential steps to ensure efficiency and reliability. Start by assessing and preparing materials, then measure and cut pipes accurately. Wrap insulation tightly around the pipes, seal all seams, and secure them with tape or fasteners. Proper techniques prevent issues like moisture accumulation and energy loss.
For long-term maintenance, inspect insulation regularly and replace damaged sections. Ensure seams remain sealed to avoid moisture penetration. Upgrading to high-quality insulation materials can also enhance durability and performance. These practices keep your system running smoothly and extend its lifespan.
FAQ
What type of copper pipe is best for Mitsubishi air conditioners?
You should use copper or copper alloy seamless pipes. These pipes resist corrosion, handle high pressure, and ensure efficient air cooling. Their durability and thermal conductivity make them ideal for both indoor and outdoor installations.
How do you prevent condensation on copper pipes?
Wrap the pipes with insulation material like closed-cell elastomeric foam. This prevents condensation and improves energy efficiency. Proper insulation also protects the pipes from extreme air temperatures and extends their lifespan, especially for indoor setups.
Can you install copper pipes without professional help?
Yes, you can install copper pipes yourself by following a detailed guide. Ensure you have the right tools, materials, and safety precautions. Pay attention to pipe connections and insulation, especially for indoor units, to avoid air leaks or performance issues.
How do you check for leaks in the system?
Use a vacuum pump to remove air and moisture from the system. Then, apply a leak detector or soapy water to all connections. Watch for bubbles or unusual air pressure drops. Address leaks immediately to maintain efficiency and safety.
Why is insulation important for copper pipes?
Insulation prevents heat loss, condensation, and energy waste. It also protects pipes from air temperature fluctuations. For indoor installations, insulation ensures the system operates efficiently and avoids moisture-related issues like mold or corrosion.
See Also
Simple Guide to Professionally Installing AC Copper Tubes
Unveil the Benefits of Using Copper Pipes in AC
A Comprehensive DIY Manual for Repairing AC Copper Tubes

© Copyright 2024 Dongguan Baoyuan Refrigeration Parts Co.,Ltd - All Rights Reserved.