How to Install Refrigerant Line Sets for Mini Split ACs

Installing Refrigerant Line Sets for Mini Split ACs requires careful attention. These copper tubes connect the indoor and outdoor units to ensure optimal comfort. A proper setup isn’t just about completing the task—it’s about executing it effectively. Maintaining correct refrigerant levels and ensuring tight seals are essential to prevent leaks. Cutting and shaping the Refrigerant Line Sets for Mini Split ACs with precision will enhance their longevity. The placement of these lines is crucial, as it directly impacts the system's efficiency. Adhering to the correct procedures will help your mini split operate efficiently and extend its lifespan for years to come.
Key Takeaways
Use the correct tools for the job. Important tools are a pipe cutter, flaring tool, and vacuum pump. These tools help make tight connections and stop leaks.
Get the refrigerant lines ready. Cut them to the right length and cover them with insulation sleeves to save energy and stop condensation.
Always look for leaks after setting up. Put soapy water on the connections to spot leaks. Fix leaks and seal tightly before adding insulation.
Remove air and moisture from the refrigerant lines with a vacuum pump. This step keeps the system working well and lasting longer.
Be safe when working with refrigerant. Wear safety gear and check for leaks often to stay safe and protect the environment.
Tools and Materials for Installation

Installing a ductless mini split is easier with the right tools. This section lists the must-haves, optional extras, and helpful tips for a smooth setup.
Essential Tools for Refrigerant Line Sets
You’ll need specific tools to install the refrigerant line set. These tools help connect the indoor and outdoor units securely. Here’s what you’ll need:
Gauge manifold and hoses: Use ones that work with R-410A refrigerant. For R-32, adjust superheat and subcooling values.
Vacuum pump: Pick one approved for A2L refrigerants to remove air and moisture safely.
Sniff detector: Finds refrigerant leaks, especially for R-32. Avoid torch-type detectors, as they don’t work with A2L refrigerants.
Pipe cutter: Cuts copper refrigerant lines to the correct size.
Flaring tool: Makes the ends of copper pipes flare for tight seals.
Torque wrench: Tightens connections to the right level without over-tightening.
These tools are key for avoiding leaks and ensuring the system works well.
Materials Needed for Ductless Mini Split Air Conditioner Installation
The materials are just as important as the tools. They help the mini split run efficiently and last longer. Here’s what you’ll need:
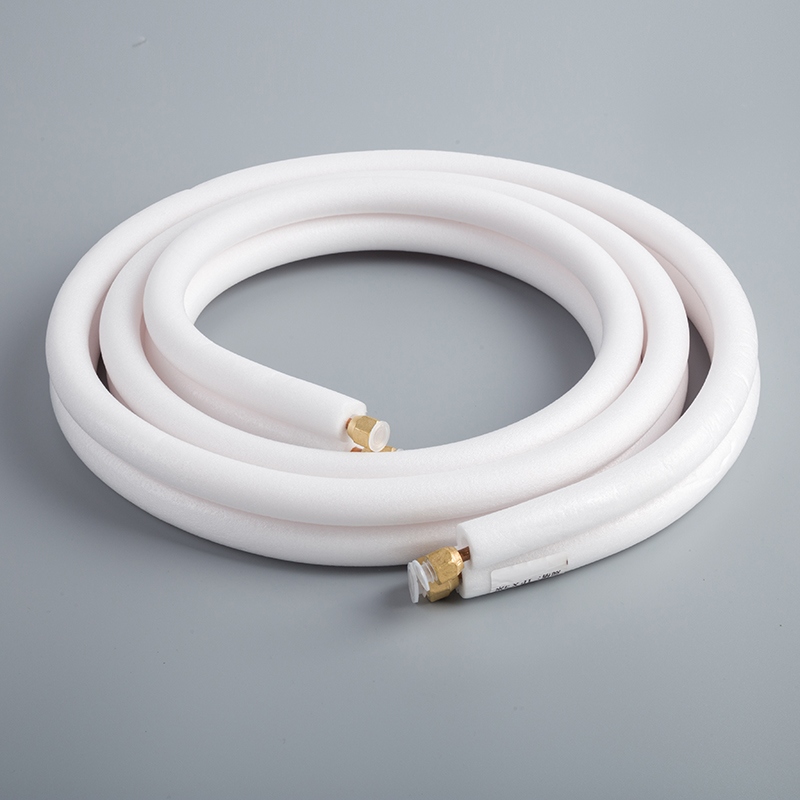
Refrigerant line set: Copper tubing moves refrigerant between the indoor and outdoor units.
Insulation sleeves: Wrap these around refrigerant lines to stop energy loss and condensation.
Wall sleeve: Protects refrigerant lines as they go through the wall.
Drain hose: Connects to the indoor unit to remove condensation.
Electrical wiring: Links the indoor and outdoor units to the power source.
Mounting brackets or pad: Keeps the outdoor unit stable and secure.
Having these materials ready will save time and make installation easier.
Optional Accessories for a Professional Finish
Want a polished look? These extras can improve the appearance and function of your system:
Line set cover kit: Hides refrigerant lines and drain hose for a neat look.
Surge protector: Shields your mini split from power surges that could cause damage.
Wi-Fi module: Lets you control the system remotely with a smartphone app.
These extras aren’t required but can make your mini split better overall.
Tip: Check your tools and materials before starting. This avoids extra trips to the store and keeps your project on track.
Step-by-Step Installation Guide

Getting the Line Set Ready and Drilling the Wall
First, pick the best spots for your indoor and outdoor units. Where you place them affects how well your mini split works. After deciding, get the refrigerant line set ready and drill the wall.
Cut the Line Set: Use a pipe cutter to trim the copper lines. Avoid sharp bends or tight curves, as they block refrigerant flow and lower efficiency.
Add Insulation Sleeves: Slide insulation sleeves onto the refrigerant lines. This stops energy loss and prevents condensation. Make sure they fit snugly but aren’t too tight.
Mark and Drill the Hole: Use a wall sleeve to mark where the lines will go through. Drill a hole slightly bigger than the sleeve’s size. This makes installation easier and protects the lines.
Insert the Wall Sleeve: Put the sleeve into the hole to shield the lines and wires from sharp edges.
Tip: Measure twice before drilling. A wrong hole can make things harder.
Connecting the Indoor Unit to the Line Set
With the wall ready, connect the refrigerant lines to the indoor unit. Be precise to avoid leaks and ensure a secure fit.
Find the Connection Points: Look for the ports on the indoor unit. They are usually labeled for easy use.
Flare the Copper Pipes: Use a flaring tool to make flared ends on the pipes. This helps create a tight seal when connecting the lines.
Attach the Lines: Match the flared ends to the ports on the unit. Tighten them with a torque wrench as per the manufacturer’s instructions. Don’t over-tighten, as it can cause damage.
Connect the Drain Hose: Attach the drain hose to the indoor unit to remove water. Make sure it slopes downward so water doesn’t collect.
Note: Check for leaks before adding insulation. It’s easier to fix problems now.
Connecting the Outdoor Unit to the Line Set
The last step is linking the refrigerant line set to the outdoor unit. Doing this right keeps the system working well.
Place the Outdoor Unit: Set the unit on a stable surface like a pad or brackets. Make sure it’s level to avoid problems.
Attach the Refrigerant Lines: Connect the flared ends of the copper pipes to the outdoor unit’s ports. Tighten them with a torque wrench, following the manufacturer’s directions.
Wrap the Lines: Cover the exposed refrigerant lines with weatherproof tape. This protects them from weather and saves energy.
Test for Leaks: Do a pressure test to check for leaks in the connections. This step is key for keeping the system running well.
Tip: Don’t squish the insulation when wrapping the lines. It won’t work as well if crimped.
By following these steps, you’ll install your ductless mini split air conditioner easily. Take your time and be careful with the connections. A little extra effort now can save you trouble later.
Vacuuming the Refrigerant Lines
Vacuuming the refrigerant lines is an important part of installation. It clears out air, moisture, and dirt from the system. This helps your mini split work well and last longer. Skipping this step can cause poor performance or even damage. Follow these steps to vacuum the lines correctly:
Turn Off Your AC Unit: Make sure the system is off before starting. This keeps you safe and avoids accidents.
Remove the Service Valve Caps: Find the service valves on the outdoor unit. Unscrew the caps carefully and put them somewhere safe.
Hook Up the Refrigerant Manifold Gauge Set: Connect the gauge set to the service valves. Tighten the connections to stop leaks.
Check the Vacuum Pump Oil Level: Look at the pump’s oil level before using it. If it’s low, the pump won’t work as well.
Connect the Vacuum Pump: Attach the pump to the center valve of the gauge set. Make sure all connections are secure.
Monitor the Gauge Readout: Turn on the pump and watch the gauge. Let it run until the pressure reaches about 500 microns, or the level the manufacturer recommends.
Disconnect the Pump: When done, turn off the pump and remove it carefully. Put the service valve caps back on to seal the system.
Tip: Always read the instructions for your vacuum pump and gauge set. This helps you avoid mistakes and get the best results.
Vacuuming the refrigerant lines prepares your mini split to work smoothly and efficiently.
Testing the System for Leaks and Performance
After vacuuming, check for leaks and test the system. This step makes sure your installation is airtight and ready to use.
Perform a Pressure Test: Use nitrogen to pressurize the refrigerant lines. Watch the gauge to see if the pressure stays steady. If it does, your connections are good.
Inspect for Leaks: Apply soapy water to the connections. If bubbles appear, there’s a leak. Tighten the connections and test again if needed.
Release the Refrigerant: Slowly open the service valves on the outdoor unit. This lets the refrigerant flow into the system.
Run the System: Turn on the mini split and let it run. Check both the indoor and outdoor units to make sure they’re working properly.
Measure Performance: Use a thermometer to check the air temperature at the indoor unit. Compare it to the manufacturer’s guidelines to confirm it’s cooling or heating correctly.
Note: Fix any problems you find during testing right away. It’s easier to solve issues now than later.
Testing ensures your mini split is ready to provide reliable comfort. Take your time to do it right.
Safety Tips for Installing Refrigerant Line Sets
Handling Refrigerant and Tools Safely
Safety is very important when using refrigerant and tools. If handled wrong, refrigerant can harm your health and the environment. Follow these tips to stay safe:
Wear gloves and goggles to protect yourself from harmful chemicals.
Check for leaks often. Even small leaks can be dangerous and lower system efficiency.
Use tools like a gauge manifold and vacuum pump carefully. Always follow the instructions from the manufacturer.
Did you know handling refrigerant properly helps reduce carbon dioxide emissions? Preventing leaks protects both you and the planet.
Tip: Don’t overfill refrigerant cylinders. Keep them at 80% full to avoid pressure problems.
Preventing Damage to the Line Set
The refrigerant line set is fragile and needs careful handling. Damage during installation can cause expensive repairs or make the system work poorly. Here’s how to avoid problems:
Support the pipes well to stop movement and vibration damage.
Keep tools and vehicles away from the line set to avoid bending or breaking it.
Leave enough slack in the line set. If it’s too tight, it can get damaged.
Bad connections, like poorly joined pipes, can also cause leaks. Take your time to make sure every connection is tight and correct.
Note: Double-check where you place the line set. Bad placement can lower the system’s efficiency.
Electrical Safety During Installation
Electrical work can be dangerous, but you can stay safe by following simple steps.
Turn off the power before starting any electrical work.
Use tools with insulation to avoid electric shocks.
Check all connections twice to make sure they are secure and meet the manufacturer’s rules.
Store refrigerant cylinders upright with valves on top. This keeps them stable and reduces accidents.
Reminder: Read the system’s manual before starting your installation. It helps you avoid mistakes.
By focusing on safety, you’ll protect yourself and help your mini split system work well for years.
Troubleshooting Issues During Installation
Finding and Fixing Refrigerant Leaks
Leaks in refrigerant can make your mini split work poorly. Early fixes are important to avoid bigger problems. Signs of leaks include less cooling or heating, hissing noises, or frost on the lines. Use these methods to fix leaks:
Solution | What It Does |
|---|---|
Training and Certification | Learn or hire experts to handle refrigerant safely. |
Leak Detection Systems | Catch leaks early to avoid expensive repairs. |
Record Keeping | Track repairs and refrigerant use for better management. |
To check for leaks, use a sniff detector or soapy water. If bubbles appear, tighten connections or replace broken parts. Always handle refrigerant with care to stay safe and protect the environment.
Tip: Regular check-ups can stop leaks before they happen. A little effort now saves big problems later.
Fixing Poor Cooling or Heating
If your mini split isn’t working well, there could be several reasons. Below are common causes and how often they happen:
Problem | How Often It Happens | Source |
|---|---|---|
Wrong Size Unit | 37% | U.S. Department of Energy (2022) |
Skipped Maintenance | 45% | 2023 Industry Report |
Low Refrigerant Levels | 20% | 2023 Industry Report |
A wrong-sized unit may not match the room size. Check the unit’s capacity and placement. Skipping maintenance, like cleaning filters or drain hoses, lowers efficiency. Clean these parts often. If refrigerant is low, refill it carefully following safety rules.
Reminder: Place your mini split where air flows well and nothing blocks it. Good placement helps it work better.
Solving Connection Problems Between Units
Bad connections between indoor and outdoor units can cause issues. Problems may involve wiring, refrigerant lines, or placement. Here’s what to check:
Important Area | What to Do |
|---|---|
Wiring | Make sure all wires are secure and meet safety rules. |
Dedicated Circuit | Use a separate circuit for the outdoor unit’s power needs. |
Correct Cable | Ensure the indoor unit connects to the outdoor unit with the right cable. |
Also, tightly connect and insulate refrigerant lines to stop leaks. Place the outdoor unit in a shaded spot for better performance. If unsure, ask an HVAC expert for help.
Note: DIY setups are possible, but electrical tasks may need a licensed electrician for safety.
Fixing these problems will keep your mini split working well and efficiently.
Setting up refrigerant line sets for mini split ACs can be simple. Using the right tools and following clear steps makes it easier. Proper installation helps your system work better and last longer. It also keeps your home comfortable and safe.
Here’s why installing correctly matters:
Benefit | What It Means |
|---|---|
Better Comfort | Good installation improves air quality and keeps your home cozy. |
Saves Energy | Right-sized lines cool better and use less electricity. |
Safer Setup | Following safety rules lowers risks during installation. |
Longer Equipment Life | Careful planning helps your system run well for years. |
Helps the Environment | Efficient systems cost less and reduce pollution. |
Real-life examples show why these steps are important:
A factory had compressor problems because the refrigerant lines were too small.
Another plant faced safety issues from skipping HVAC safety rules.
Take your time, follow the guide, and enjoy your mini split system’s comfort!
FAQ
What is a refrigerant line set, and why is it important?
A refrigerant line set has copper pipes that move refrigerant between the indoor and outdoor units of your mini split. It’s important because it keeps the system working well by allowing proper refrigerant flow. Without it, your mini split won’t heat or cool correctly.
Can I install a mini split refrigerant line set myself?
Yes, you can! If you know how to use tools and follow safety rules, you can install it yourself. But for jobs like electrical wiring or handling refrigerant, it’s safer to hire a licensed expert. They’ll make sure everything meets local safety codes.
How do I know if my refrigerant lines are leaking?
Watch for these signs:
Your mini split isn’t cooling or heating as it should.
You hear hissing sounds near the connections.
Frost or ice forms on the pipes.
Tip: Put soapy water on the connections. If bubbles show up, there’s a leak!
Do I need to vacuum the refrigerant lines?
Yes! Vacuuming clears out air, moisture, and dirt from the lines. If you skip this step, your mini split might not work well or could get damaged. Use a vacuum pump to keep the system running smoothly.
What tools are essential for installing refrigerant line sets?
Here’s a simple list:
Pipe cutter
Flaring tool
Torque wrench
Vacuum pump
Manifold gauge set
Reminder: Check your tools before starting to avoid delays.
See Also
Simple Guide to Professionally Install AC Copper Tubing
The Ultimate DIY Manual for Repairing AC Copper Tubes
Five Strategies to Reduce Costs on AC Copper Tubing


