Installing Split AC with White PE Insulated Copper Pipes

When you install a split air conditioner, utilizing a White PE Air Conditioning Insulated Copper Pipe with Split Air Conditioner Installation Kit can significantly enhance energy efficiency. These pipes not only improve the system's performance but also offer protection against environmental damage. Copper pipes, renowned for their superior thermal conductivity, efficiently transfer heat, making them ideal for air conditioning systems. Proper insulation minimizes heat loss, ensuring your system operates at peak efficiency. The installation process is crucial in this regard. A well-executed installation ensures that your air conditioner performs optimally, saving you energy and money in the long run. Choose a White PE Air Conditioning Insulated Copper Pipe with Split Air Conditioner Installation Kit for the best results.
Key Takeaways
Choose the right location for both indoor and outdoor units to maximize airflow and efficiency.
Gather all necessary tools and materials before starting the installation to ensure a smooth process.
Properly mount the indoor unit on a sturdy wall and ensure it is level to prevent operational issues.
Use white PE insulated copper pipes to minimize energy loss and enhance the efficiency of your AC system.
Test the system after installation for leaks and performance to ensure everything is functioning correctly.
Regular maintenance, including cleaning filters and inspecting insulation, is essential for keeping your AC running efficiently.
Consider hiring a professional for installation to ensure optimal performance and adherence to safety standards.
Preparing for Installation
Selecting the Right Location
Choosing the right spot for your split AC is crucial. You want to ensure both the indoor and outdoor units are placed optimally for performance and convenience.
Considerations for Indoor Unit Placement
When deciding where to put the indoor unit, think about airflow and accessibility. Place it high on a wall to allow cool air to circulate effectively. Avoid spots near heat sources like ovens or direct sunlight, as these can affect performance. Make sure you have easy access for cleaning and maintenance.
Considerations for Outdoor Unit Placement
For the outdoor unit, stability and ventilation are key. It should sit on a level surface, like a concrete pad or a plastic condenser pad, which you can find online for around $50. If space is tight, consider using condenser wall brackets, available for about $45. Keep the unit away from dusty or hot areas to prevent overheating and ensure it’s accessible for servicing.
Gathering Necessary Tools and Materials
Before you start, gather all the tools and materials you’ll need. Having everything on hand will make the installation smoother and help avoid unnecessary delays.
List of Required Tools
Here’s a list of essential tools for the job:
Torque wrench: Ensures you tighten bolts to the correct specification.
Vacuum pump: Removes air and moisture from the system.
Gauge set: Helps monitor pressure levels.
Proper drill: For creating holes in walls or brackets.
Screwdrivers and wrenches: Basic tools for assembly and adjustments.
These tools are vital for precision and safety during installation.
List of Required Materials
You’ll also need some materials to complete the setup:
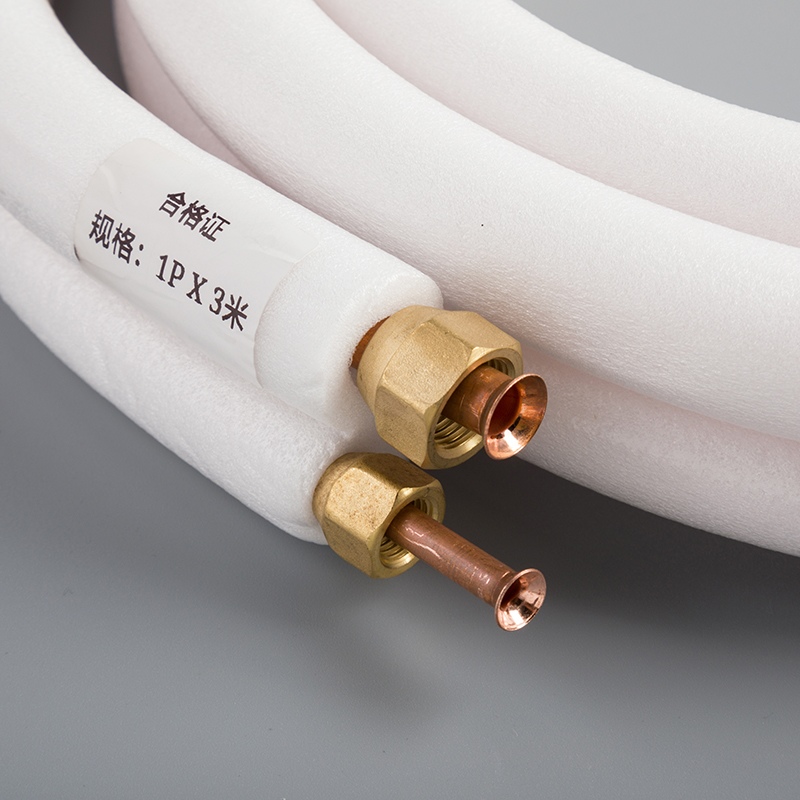
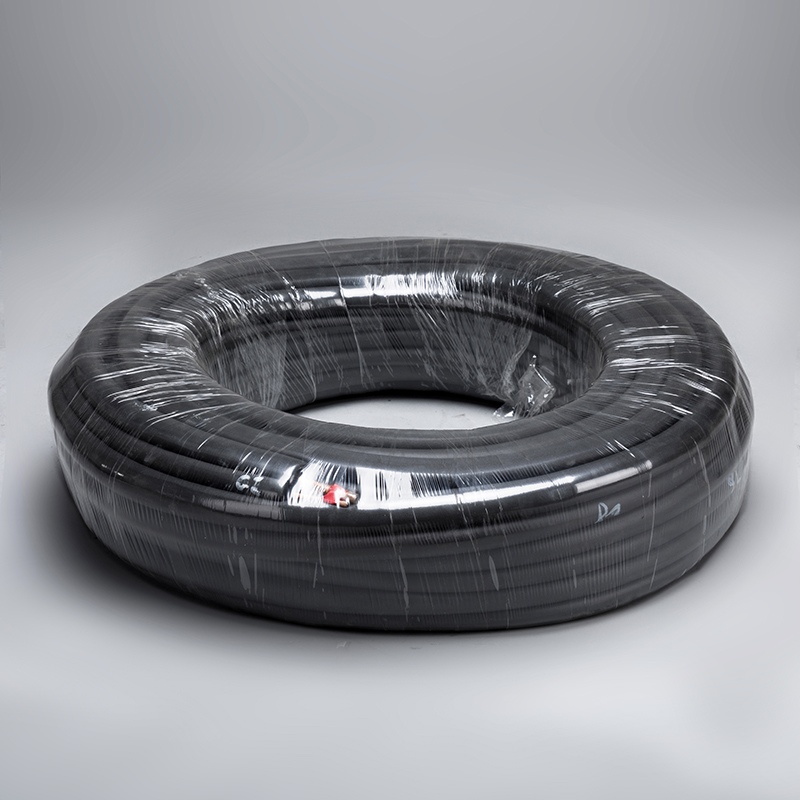
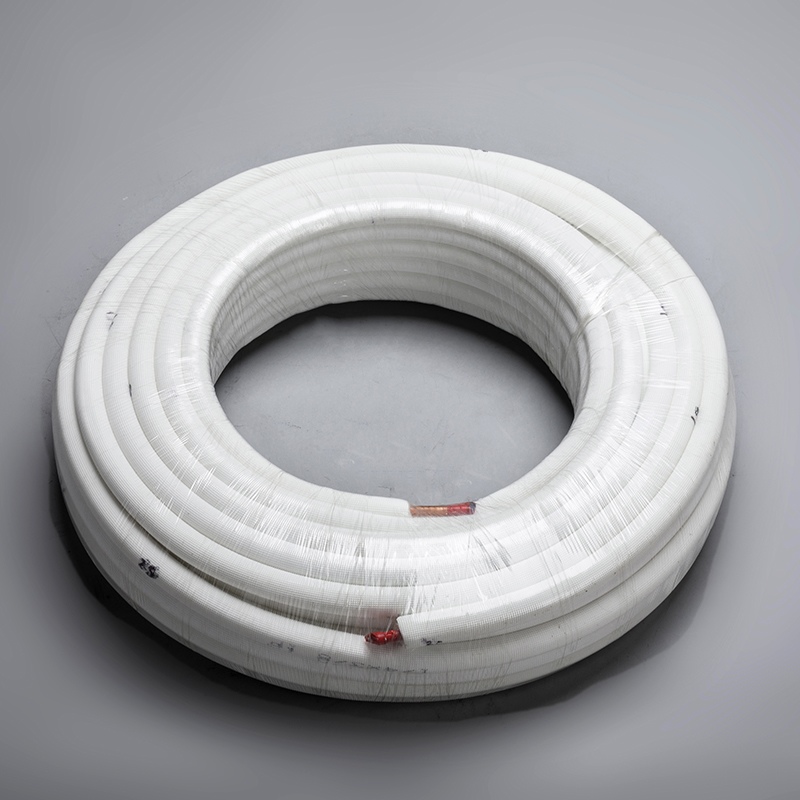
White PE Insulated Copper Pipes: For efficient refrigerant flow and insulation.
Condenser pad or wall brackets: To support the outdoor unit.
Electrical wiring and connectors: For powering the units.
Mounting brackets: To secure the indoor unit.
Sealant or caulk: To seal any gaps or holes.
Having these materials ready will ensure a seamless installation process.
Installing the Indoor Unit
Mounting the Indoor Unit
Mounting the indoor unit correctly is crucial for optimal performance and longevity. Follow these steps to ensure a secure and efficient installation.
Steps for Secure Mounting
Choose the Right Wall: Select a sturdy wall that can support the weight of the indoor unit. Avoid walls that are exposed to direct sunlight or heat sources.
Mark the Position: Use a level to mark the position where you want to mount the indoor unit. Ensure the marks are straight to avoid any misalignment.
Drill Holes: Drill holes into the wall at the marked positions. Use appropriate anchors to ensure the unit is securely attached.
Attach the Mounting Plate: Secure the mounting plate to the wall using screws. Double-check that it is level before proceeding.
Hang the Indoor Unit: Carefully hang the indoor unit onto the mounting plate. Make sure it clicks into place and is firmly secured.
Ensuring Proper Alignment
Proper alignment of the indoor unit is essential for efficient airflow and operation. Here’s how you can ensure it:
Check the Level: After mounting, use a level to confirm that the indoor unit is perfectly horizontal. An uneven unit can lead to water leakage and reduced efficiency.
Adjust if Necessary: If the unit is not level, adjust the mounting plate or reposition the unit until it is aligned correctly.
Verify Clearance: Ensure there is adequate clearance around the indoor unit for proper airflow. This prevents overheating and ensures efficient cooling.
Wiring the Indoor Unit
Wiring the indoor unit involves connecting electrical components safely and securely. Follow these guidelines to ensure a safe installation.
Connecting Electrical Components
Turn Off Power: Before starting, turn off the power supply to avoid any electrical hazards.
Locate the Terminal Block: Open the front panel of the indoor unit to access the terminal block where the wires will be connected.
Connect the Wires: Follow the manufacturer’s instructions to connect the wires to the terminal block. Ensure each wire is connected to the correct terminal.
Secure the Connections: Tighten all connections to prevent any loose wires, which could cause malfunctions or safety issues.
Safety Precautions
Use Proper Tools: Always use insulated tools when working with electrical components to prevent electric shocks.
Double-Check Connections: Verify all connections are secure and correct before turning the power back on.
Consult a Professional: If you’re unsure about any step, consult a professional. As HVAC professionals say, "Adhering to expert guidelines can make all the difference."
By following these steps, you ensure that your indoor unit is installed securely and operates efficiently. Proper installation not only enhances performance but also extends the lifespan of your air conditioning system.
Installing the Outdoor Unit
When it comes to installing the outdoor unit of your split AC, getting the positioning right is crucial. This step ensures that your system runs efficiently and lasts longer. Let's dive into how you can position and connect the outdoor unit effectively.
Positioning the Outdoor Unit
Ensuring Stability and Accessibility
You want your outdoor unit to sit on a flat, stable surface. A concrete pad works great for this purpose. It provides a solid base that prevents vibrations and keeps the unit level. Make sure the unit is easily accessible for maintenance. You don't want to struggle every time you need to clean or service it. Keep it within reach but away from high-traffic areas to avoid accidental damage.
Considerations for Noise Reduction
Nobody likes a noisy air conditioner. To minimize noise, place the outdoor unit away from windows and doors. This reduces the sound that enters your home. Also, consider using anti-vibration pads. These pads absorb vibrations and reduce noise levels. If possible, position the unit in a shaded area. This not only helps with noise but also improves efficiency by keeping the unit cooler.
Connecting the Outdoor Unit
Once you've positioned the outdoor unit, it's time to connect it. This involves both electrical connections and refrigerant line connections.
Electrical Connections
First, ensure the power is off. Safety first! Locate the electrical panel on the outdoor unit. You'll find terminals where you need to connect the wires. Follow the manufacturer's instructions carefully. Each wire has a specific terminal. Secure the connections tightly to prevent any loose wires. Loose connections can lead to malfunctions or even safety hazards.
Refrigerant Line Connections
Connecting the refrigerant lines is a critical step. These lines carry the refrigerant between the indoor and outdoor units. Start by attaching the lines to the appropriate ports on the outdoor unit. Use a wrench to tighten the connections securely. Make sure there are no leaks. Leaks can reduce efficiency and harm the environment. Once connected, insulate the lines properly. This prevents energy loss and keeps the system running efficiently.
By following these steps, you ensure that your outdoor unit is installed correctly. Proper installation not only enhances performance but also extends the lifespan of your air conditioning system. Remember, if you're unsure about any step, consulting a professional is always a good idea.
Insulating the Copper Pipes
When you're installing a split AC, insulating the copper pipes is a crucial step. This process helps in maintaining the efficiency of your air conditioning system. Let's explore how to select and apply insulation effectively.
Selecting White PE Insulated Copper Pipes
Choosing the right materials for your AC installation can make a big difference. The white PE air conditioning insulated copper pipe with split air conditioner installation kit is a top choice for many reasons.
Benefits of Using PE Insulation
PE insulation offers several advantages. It acts as a barrier against heat loss, keeping your AC lines cool and efficient. This type of insulation is also lightweight and flexible, making it easy to work with during installation. Plus, it provides excellent protection against environmental factors like moisture and UV rays. According to studies, materials like PEX, which is similar to PE, are better insulators than traditional copper. This means your system will maintain its performance over time.
Choosing the Right Pipe Size
Selecting the correct pipe size is essential for optimal performance. You need to measure the length and diameter of the copper pipes accurately. This ensures that the insulation fits snugly and performs effectively. The white PE air conditioning insulated copper pipe with split air conditioner installation kit typically includes various sizes to accommodate different systems. Make sure you choose the size that matches your AC unit's specifications.
Applying Insulation to Copper Pipes
Once you've selected the right materials, it's time to insulate the AC lines. Proper application ensures that your system runs efficiently and lasts longer.
Step-by-Step Insulation Process
Measure and Cut: Start by measuring the length of the copper pipes. Cut the insulation to match these measurements. Ensure you have enough material to cover the entire length of the pipes.
Slide the Insulation: Carefully slide the insulation over the copper pipes. Make sure it covers the entire length without any gaps.
Seal the Ends: Use adhesive or tape to seal the ends of the insulation. This prevents air and moisture from entering, which could reduce efficiency.
Secure the Insulation: Check that the insulation is secure and doesn't move. You might need to use additional tape or clips to keep it in place.
Ensuring a Tight Seal
A tight seal is crucial for effective insulation. You want to make sure there are no gaps or loose areas. This prevents energy loss and keeps your system running smoothly. Regularly inspect the insulation for any signs of wear or damage. If you notice any issues, address them promptly to maintain efficiency.
By following these steps, you ensure that your copper pipes are well-insulated. This not only enhances the performance of your AC system but also extends its lifespan. Remember, the white PE air conditioning insulated copper pipe with split air conditioner installation kit is designed to make this process easier and more effective.
Finalizing the Installation
You're almost at the finish line with your split AC installation. Now, it's time to ensure everything works perfectly. This final step involves testing the system and troubleshooting any issues that might arise.
Testing the System
Testing your AC system is crucial. It ensures that everything functions as it should and that your installation efforts pay off.
Checking for Leaks
Start by checking for leaks. Leaks can significantly impact the efficiency of your AC system. Here's how you can do it:
Inspect the Connections: Look at all the connections, especially where the refrigerant lines meet the indoor and outdoor units. Use a leak detector or soapy water to spot any leaks. If bubbles form, you have a leak.
Tighten Connections: If you find any leaks, tighten the connections. Use a wrench to ensure they're secure. This step is vital for maintaining the efficiency of your system.
Recheck: After tightening, recheck the connections. Make sure no leaks remain. This process might seem tedious, but it's essential for optimal performance.
Verifying System Performance
Once you've checked for leaks, verify the system's performance. You want to ensure your AC cools effectively and operates smoothly.
Turn On the System: Power up your AC and set it to a comfortable temperature. Let it run for a while to stabilize.
Monitor the Cooling: Check if the indoor unit blows cool air consistently. The temperature should drop to your desired setting without fluctuations.
Listen for Unusual Noises: Pay attention to any strange noises. Rattling or buzzing sounds might indicate loose parts or installation errors.
Check the Thermostat: Ensure the thermostat accurately reflects the room temperature. If not, recalibrate it according to the manufacturer's instructions.
Troubleshooting Common Issues
Even with careful installation, issues can arise. Knowing how to troubleshoot common problems can save you time and frustration.
Addressing Installation Errors
Sometimes, errors occur during installation. Here's how to address them:
Review the Installation Steps: Go over each step of the installation process. Ensure you followed all instructions correctly. Small oversights can lead to bigger issues.
Check the Wiring: Inspect the wiring connections. Loose or incorrect wiring can cause malfunctions. Tighten any loose wires and ensure they're in the right terminals.
Consult the Manual: Refer to the installation manual for guidance. It often contains troubleshooting tips specific to your model.
Ensuring Optimal Operation
To keep your AC running optimally, regular checks are necessary:
Clean the Filters: Dirty filters can restrict airflow and reduce efficiency. Clean or replace them regularly to maintain performance.
Inspect the Insulation: Check the insulation on the copper pipes. Ensure it's intact and covers the pipes completely. This prevents energy loss and keeps your system efficient.
Schedule Professional Maintenance: Consider hiring a professional for regular maintenance. They can spot potential issues early and ensure your system runs smoothly.
By following these steps, you ensure your split AC installation is successful. Proper testing and troubleshooting not only enhance performance but also extend the lifespan of your system. Remember, a well-maintained AC keeps your home comfortable and energy-efficient.
Maintenance Tips
Keeping your split AC in top shape requires regular maintenance. This ensures it runs efficiently and lasts longer. Let's dive into some essential maintenance practices you should follow.
Regular Maintenance Practices
Regular upkeep of your AC system is crucial. It helps prevent issues and keeps your unit running smoothly.
Cleaning Filters and Coils
Cleaning the filters and coils is a must. Over time, dust and debris can clog the filters, reducing airflow and efficiency. Here's how you can clean them:
Remove the Filters: Slide out the mesh filters from the indoor unit. These filters trap dust, pet hair, and other particles.
Rinse with Water: Use warm water to rinse the filters. If they're very dirty, add a mild detergent. Make sure to rinse thoroughly.
Air Dry Completely: Let the filters air dry before putting them back. This prevents mold and mildew growth.
Clean the Coils: Use a soft brush or vacuum attachment to remove dust from the coils. This step ensures efficient heat exchange.
Pro Tip: Replace disposable pleated filters every three months for optimal performance.
Inspecting Insulation and Connections
Regular inspection of insulation and connections is vital. It ensures your system operates efficiently without energy loss.
Check Insulation: Look for any wear or damage on the insulated copper pipes. Replace any damaged insulation to maintain efficiency.
Inspect Connections: Ensure all electrical and refrigerant connections are secure. Loose connections can lead to malfunctions.
Seasonal Maintenance Checks
Seasonal checks prepare your AC for different weather conditions. This keeps your system ready for peak performance.
Preparing for Summer Use
Before the summer heat hits, make sure your AC is ready to cool your home effectively.
Test the System: Turn on the AC and let it run for a while. Check if it cools the room efficiently.
Clean the Outdoor Unit: Remove any leaves or debris around the outdoor unit. This ensures proper airflow and prevents overheating.
Check the Thermostat: Ensure the thermostat works correctly and maintains the desired temperature.
Winterizing the System
When winter approaches, it's time to prepare your AC for the colder months.
Turn Off the Power: Shut off the power to the outdoor unit to prevent damage during winter.
Cover the Outdoor Unit: Use a weatherproof cover to protect the unit from snow and ice.
Inspect for Damage: Check for any signs of wear or damage. Address any issues before they worsen.
By following these maintenance tips, you ensure your split AC remains efficient and reliable. Regular cleaning and inspections not only enhance performance but also extend the lifespan of your system. Remember, a well-maintained AC keeps your home comfortable year-round.
You've now got the essential steps for installing a split AC with white PE insulated copper pipes. These pipes boost energy efficiency and protect against environmental damage. Proper installation ensures your system runs smoothly and effectively.
Remember: Choosing the right location for your units is crucial for maximizing airflow and energy efficiency.
Consider hiring a professional for the best results. They stay updated with evolving technologies and can offer sustainable solutions. This way, you ensure your AC system performs at its best, keeping your home comfortable and your energy bills low.
FAQ
What are the important guidelines for installation of a split system air conditioner?
Installing a split system air conditioner requires careful planning and execution. Here are six important guidelines to follow:
Choose the Right Location: Ensure both indoor and outdoor units are placed in optimal spots for performance and convenience.
Gather Necessary Tools and Materials: Have all tools and materials ready before starting the installation.
Secure Mounting: Properly mount the indoor unit on a sturdy wall and ensure it's level.
Connect Electrical Components Safely: Follow the manufacturer's instructions for wiring and secure all connections.
Insulate Copper Pipes: Use white PE insulated copper pipes to prevent energy loss and improve efficiency.
Test the System: Check for leaks and verify the system's performance after installation.
What is the step-by-step guide for wall-mounted split AC installation?
If you're unsure about installing a wall-mounted split system air conditioner, follow this step-by-step guide:
Select the Wall: Choose a wall that can support the unit's weight and isn't exposed to direct sunlight.
Mark and Drill: Mark the position for the mounting plate and drill holes for secure attachment.
Mount the Indoor Unit: Attach the unit to the mounting plate and ensure it's level.
Connect the Pipes: Attach the copper pipes and ensure proper insulation to maintain efficiency.
Wire the Unit: Connect the electrical components following the manufacturer's instructions.
Position the Outdoor Unit: Place it on a stable surface and connect the refrigerant lines.
What are the safety tips for split AC installation?
Safety should always be a priority when installing a split system air conditioner. Here are five safety tips you can't miss:
Turn Off Power: Always turn off the power supply before starting any electrical work.
Use Insulated Tools: Prevent electric shocks by using insulated tools.
Secure Connections: Ensure all electrical and pipe connections are tight and secure.
Check for Leaks: Use soapy water or a leak detector to check for refrigerant leaks.
Consult a Professional: If unsure, consult a professional to avoid risks and ensure a safe installation.
What are the expert tips for efficient AC installation?
For an efficient split system air conditioner installation, consider these expert tips:
Proper Placement: Position the indoor and outdoor units for optimal airflow and accessibility.
Use Quality Materials: Choose high-quality insulated copper pipes and reliable mounting brackets.
Ensure Tight Seals: Apply insulation carefully to prevent energy loss and maintain system efficiency.
Regular Maintenance: Schedule regular maintenance checks to keep the system running smoothly.
What are the advantages of wall-mounted AC units?
Wall-mounted split system air conditioners offer several advantages:
Space-Saving: Installed high on walls, they free up floor space, making them ideal for small homes and offices.
Unobstructed Views: No appliance blocks your view, allowing you to open windows for fresh air.
Higher Safety Quotient: Difficult to dismantle, they offer enhanced safety compared to other types.
Are mini-split systems easier to install than central air conditioning systems?
Yes, mini-split systems are much easier to install than central air conditioning systems. They require less invasive installation, as they don't need extensive ductwork. This makes them a popular choice for homeowners looking for a straightforward and efficient cooling solution.
See Also
Transforming HVAC Systems with Insulated Copper Pipe Coils
The Impact of Pure Copper Pipes on Air Conditioning
Enhance Air Conditioner Performance Using Copper Pipe Insulation

© Copyright 2024 Dongguan Baoyuan Refrigeration Parts Co.,Ltd - All Rights Reserved.