Step-by-step Guide to Insulating AC Lines

Guide: Step-by-step guide to insulating AC refrigerant lines
Insulating AC lines is crucial for enhancing the efficiency of your HVAC system. Proper insulation not only reduces energy bills by up to 30% but also prevents heat gain or loss in the refrigerants. This process plays a vital role in maintaining optimal performance and improving air quality by minimizing water leaks that can lead to mold growth. Understanding the significance of insulating AC lines sets the foundation for a successful cooling system operation.
Preparation Steps
Identifying the Correct AC Line
Insulating AC lines starts with identifying the correct line to work on. There are different types of AC lines, each serving a specific function within the HVAC system. Locating these AC lines is essential before proceeding with the insulation process.
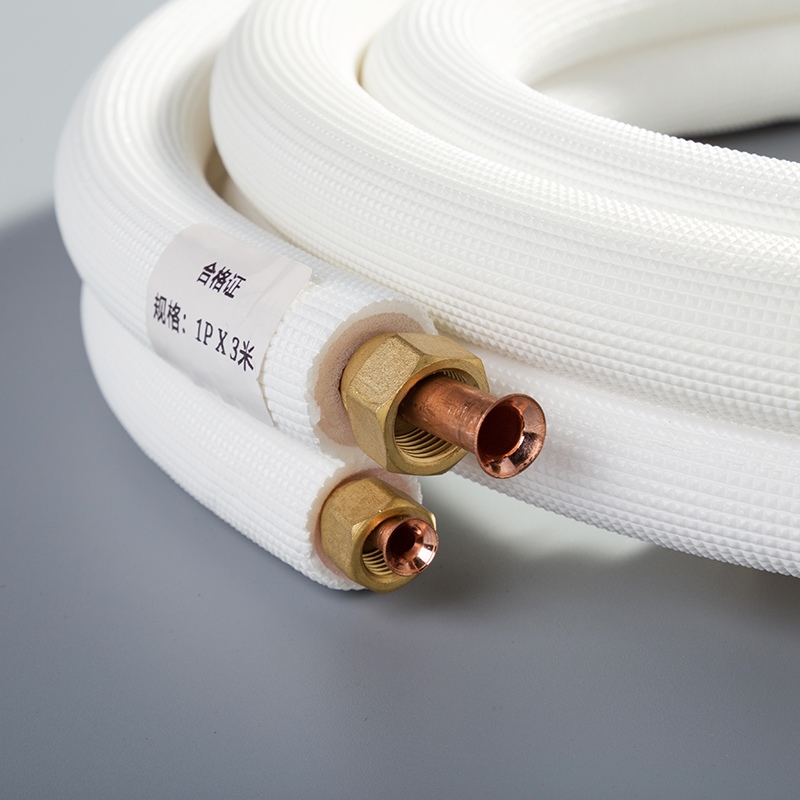
Measuring the Copper Pipes
To ensure you purchase the right insulation size, measuring the copper pipes accurately is crucial. Utilize tools specifically designed for this task to obtain precise measurements. Following a step-by-step measurement process guarantees that you acquire the appropriate insulation material for your AC refrigerant lines.
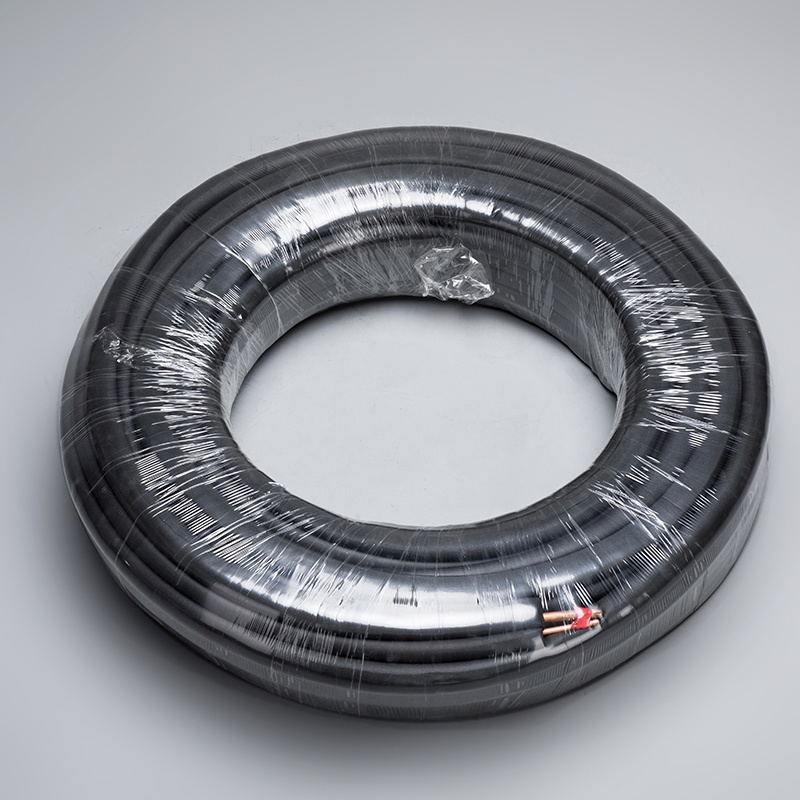
Purchasing the Appropriate Insulation Material
Selecting the right insulation material is vital for insulating your AC refrigerant lines effectively. Various types of insulation materials are available, each offering unique benefits and characteristics. Consider factors such as temperature resistance and durability when choosing insulation to optimize your HVAC system's performance.
Insulation Process
Turning Off the AC Unit for Safety
Licensed HVAC technicians emphasize the importance of safety precautions when working on air conditioning units. Turning off the AC unit before starting any maintenance tasks is crucial to prevent accidents and ensure personal safety. Always follow the manufacturer's instructions on how to properly turn off the AC unit to avoid any electrical mishaps.
Removing Old Insulation
When it comes to removing old insulation, having the right tools for the job makes the process smoother and more efficient. Utilize tools such as utility knives or scrapers to carefully strip away the existing insulation material. Following a step-by-step removal process ensures that all remnants are cleared, preparing the copper pipes for new insulation.
Cleaning the Pipes
To maintain optimal performance, cleaning the pipes before installing new insulation is essential. Gather cleaning materials like mild detergent, water, and a soft brush to remove any dirt or debris from the copper pipes effectively. Thoroughly cleaning the pipes ensures a clean surface for proper adhesion of the new insulation material.
Cutting New Insulation Material
When it comes to measuring and marking the insulation, precision is key. Using a measuring tape, ensure accurate measurements of the copper pipes before marking the insulation material accordingly. This step guarantees a perfect fit for optimal insulation performance.
For cutting techniques for different materials, adapt your approach based on the type of insulation being used. For foam insulation, a sharp utility knife works best for clean cuts. Fiberglass insulation may require a serrated blade to prevent fraying. Understanding the characteristics of each material is essential for achieving smooth and precise cuts.
Wrapping the Insulation Around the Pipes
To secure the insulation effectively, start by wrapping it snugly around the copper pipes. Begin at one end and work your way along the length, ensuring a tight and uniform wrap. Properly securing the insulation prevents gaps or slippage, maximizing its efficiency.
Ensuring a tight fit is crucial for optimal insulation performance. Press the edges of the insulation together firmly to eliminate any gaps or air pockets. A seamless fit guarantees that heat transfer is minimized, enhancing the overall effectiveness of insulating your AC lines.
Sealing the Insulation
Before proceeding further, peel off the protective tape from the insulation material carefully. Exposing the adhesive side prepares it for proper sealing around the copper pipes. This step ensures a secure bond between the insulation and pipes, preventing any potential air leaks.
For proper sealing techniques, press down firmly on all seams and edges of the insulation material after wrapping it around the pipes. Smooth out any wrinkles or folds to create a uniform surface for maximum coverage and efficiency in insulating your AC lines.
Final Checks and Maintenance
Inspecting the Insulation
To ensure the effectiveness of the insulation job, a thorough inspection is necessary. Inspect the newly installed insulation to guarantee proper coverage and sealing around the copper pipes. Look for any gaps, tears, or loose ends that could compromise its efficiency.
What to look for in a proper insulation job
Uniformity: Check for consistent wrapping without any areas left exposed.
Adhesion: Ensure that the insulation material is securely attached to the copper pipes.
Seams: Inspect all seams and edges for tightness and proper sealing.
No Wrinkles: Smooth out any wrinkles or folds in the insulation for maximum coverage.
Common mistakes to avoid
Gaps: Watch out for gaps between the insulation layers that can lead to heat transfer.
Overlapping: Avoid overlapping insulation as it can create air pockets and reduce efficiency.
Loose Ends: Secure loose ends properly to prevent them from unraveling over time.
Regular Maintenance Tips
Maintaining your AC lines' insulation is essential for long-term performance and energy efficiency. Regular checks help identify any issues early on, preventing potential damage or inefficiencies in your HVAC system.
How often to check the insulation
Monthly Inspection: Conduct a visual check monthly to ensure the integrity of the insulation.
Seasonal Evaluation: Perform a more detailed inspection at least once every season to address any wear or tear.
Signs that insulation needs replacement
Visible Damage: Look for signs of physical damage such as tears, holes, or moisture spots on the insulation.
Reduced Efficiency: If you notice an increase in energy bills or reduced cooling performance, it might be time to replace the insulation.
Insulation Man's dedication to excellence is evident in the testimonials from satisfied customers like Jenny and Greg L. Their commitment to quality insulation services ensures energy efficiency and comfort in every home they work on.
The positive experiences shared by Dominic L. and Mike O. highlight the professionalism and expertise of the Insulation Man team. Their meticulous approach guarantees a warm, cozy environment with low energy bills.
Choosing Insulation Man for your insulation needs, as recommended by various clients, including Anonymous, promises a comfortable, quiet home with significant energy savings. Trust in their expertise for top-notch results!
See Also
Effortless Guide: Mastering AC Copper Tube Installation
Comprehensive Handbook for Repairing AC Copper Tube Holes
Decoding Copper Wire Insulation: Beginner's Essential

© Copyright 2024 Dongguan Baoyuan Refrigeration Parts Co.,Ltd - All Rights Reserved.