Essential Tips for Connecting Copper Pipes

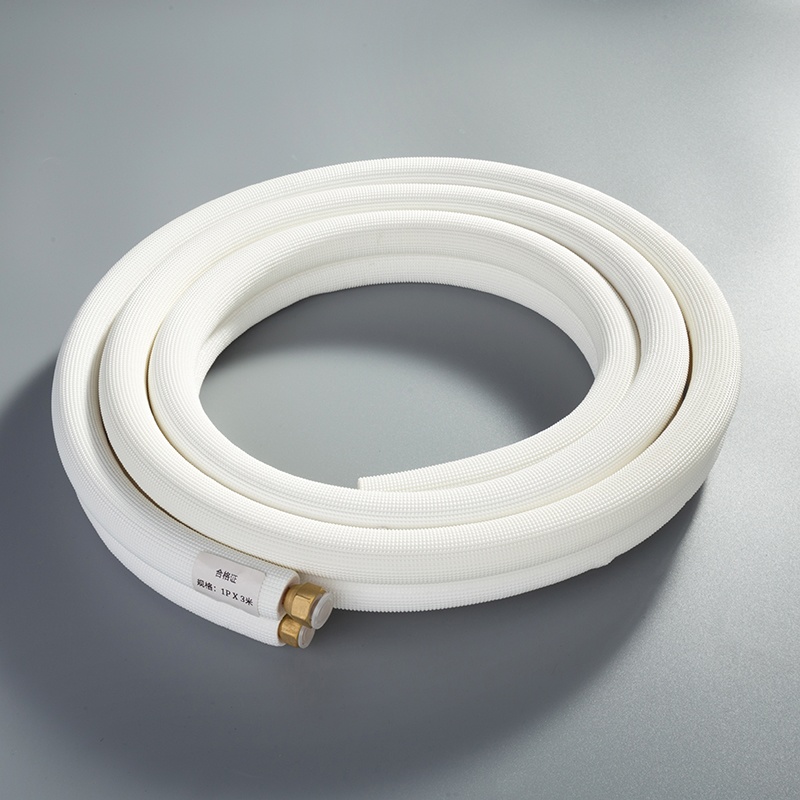
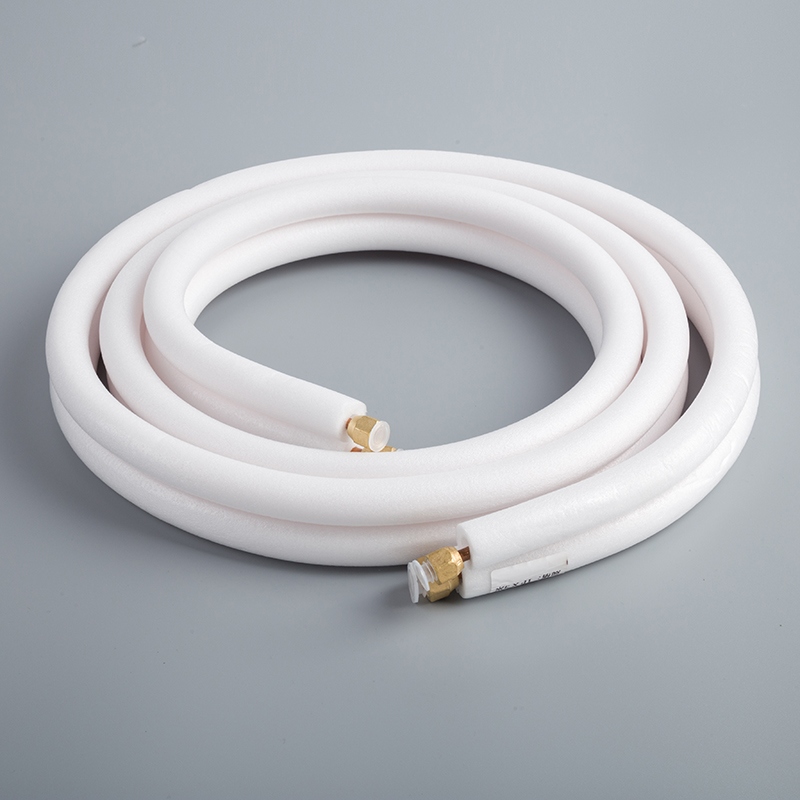
Properly connecting copper pipes is crucial for preventing leaks and ensuring durability. A well-executed connection copper pipe installation can save you from costly repairs and water damage. Copper, known for its reliability, requires careful handling to avoid common issues like pinhole leaks. These leaks often result from water quality problems or improper reaming of tubing ends. By following best practices, you can enhance the longevity of your plumbing system. Remember, a secure connection copper pipe not only prevents leaks but also maintains the integrity of your entire plumbing network.
Key Takeaways
Choose the right tools, such as a pipe cutter, soldering torch, and deburring tool, to ensure clean cuts and secure connections.
Understand the differences between Type K, L, and M copper pipes to select the appropriate type for your specific plumbing needs.
Follow a step-by-step process for soldering, including cutting, deburring, cleaning, applying flux, and heating the joint for a leak-free connection.
Consider using push-to-connect fittings for a quick and easy alternative to soldering, ensuring the pipe is fully inserted for a secure seal.
Prioritize safety by wearing gloves and goggles, ensuring good ventilation, and keeping a fire extinguisher nearby during soldering.
Avoid common mistakes like uneven cuts and insufficient solder application to enhance the durability and reliability of your connections.
Regularly inspect your plumbing system and address any leaks promptly to prevent costly repairs and maintain a healthy water supply.
Selecting the Right Tools and Materials for Copper Pipe Connection
When embarking on a copper pipe installation project, choosing the right tools and materials is crucial. This ensures a seamless and efficient process, minimizing potential issues down the line. Let's explore the essential tools and materials you need for a successful copper pipe connection.
Essential Tools for Soldering Pipes
To achieve a strong and leak-free connection, you must have the right tools for soldering. Here are the key tools you will need:
Pipe Cutter
A Pipe Cutter is indispensable for cutting copper pipes to the desired length. It provides clean and precise cuts, which are essential for a proper fit. Ensure you use a high-quality cutter to avoid uneven edges that could compromise the connection.
Soldering Torch
The Soldering Torch is vital for heating the copper pipes and fittings during the soldering process. It allows you to melt the solder and create a secure bond. Opt for a torch that offers consistent heat output for the best results.
Deburring Tool
After cutting the pipes, use a Deburring Tool to remove any burrs from the edges. Burrs can hinder the fitting process and lead to leaks. A smooth edge ensures a snug fit between the pipe and the fitting.
Choosing the Right Type of Copper Pipe
Copper pipes come in different types, each suited for specific applications. Understanding these differences helps you select the right one for your project.
Type K, L, and M Differences
Type K: Known for its thick walls, Type K copper pipe is ideal for underground installations where durability is paramount.
Type L: With medium wall thickness, Type L is commonly used in residential water supply lines.
Type M: The thinnest among the three, Type M is suitable for low-pressure applications and is often used in interior plumbing.
Applications for Each Type
Choose Type K for outdoor and underground projects. Use Type L for general plumbing needs in homes. Opt for Type M when working on indoor projects with lower pressure requirements.
Necessary Materials for Installation
In addition to tools, certain materials are essential for a successful copper pipe installation.
Flux and Solder
Using flux is crucial in the soldering process. Flux cleans the pipe and fitting surfaces, ensuring the solder adheres properly. Apply flux generously before heating the joint. Choose a high-quality solder that melts easily and forms a strong bond.
Push-to-Connect Fittings
For those seeking an alternative to traditional soldering, push-to-connect fittings like SharkBite fittings offer a convenient solution. These fittings allow you to connect pipes quickly without the need for soldering. Simply cut and deburr the pipe, then push it into the fitting for a secure connection.
By selecting the right tools and materials, you set the foundation for a successful copper pipe installation. Whether you choose traditional soldering or opt for modern push-to-connect fittings, ensure you follow best practices for a durable and leak-free plumbing system.
Step-by-Step Instructions for Soldering Copper Pipe and Other Methods

Mastering the art of connecting copper pipes involves understanding various methods, including soldering and using push-to-connect fittings. Each technique has its own set of steps to ensure secure connections and prevent leaks. Let's delve into these methods to enhance your plumbing skills.
Soldering Copper Pipes
Soldering copper pipe is a fundamental skill in plumbing. It involves joining pipes using a filler metal called solder. Follow these steps to achieve a leak-free joint:
Preparing the Pipes
Cut the Pipe: Use a pipe cutter to cut the copper pipe to the desired length. Ensure the cut is clean and square.
Deburr the Edges: Employ a deburring tool to remove any burrs from the cut edges. This step is crucial to ensure a snug fit and prevent leaks.
Clean the Surfaces: Use a wire brush or sandpaper to clean the outside of the pipe and the inside of the fitting. Clean surfaces allow the solder to adhere properly.
Applying Flux and Solder
Apply Flux: Coat the cleaned surfaces with flux. This substance cleans and prepares the metal for soldering, ensuring a strong bond.
Assemble the Joint: Insert the pipe into the fitting. Ensure it fits snugly and aligns correctly.
Heating and Joining
Heat the Joint: Use a soldering torch to heat the joint evenly. Move the flame around the fitting to distribute heat uniformly.
Apply Solder: Once the flux begins to bubble, touch the solder to the joint. The heat will draw the solder into the joint, creating a secure connection.
Cool and Inspect: Allow the joint to cool naturally. Inspect it for any gaps or weak spots.
Expert Testimony: "Soldering copper pipe is an essential technique in plumbing and pipe fitting projects, enabling the secure joining of copper pipes using a filler metal called solder."
Using Push-to-Connect Fittings
For those who prefer a simpler method, push-to-connect fittings offer a quick and reliable alternative to soldering pipes.
Cutting and Deburring
Cut the Pipe: Use a pipe cutter to achieve a clean cut on the copper pipe.
Deburr the Edges: Smooth out any rough edges with a deburring tool to ensure a proper fit.
Inserting the Pipe into the Fitting
Align the Pipe: Ensure the pipe is straight and aligned with the fitting.
Push to Connect: Firmly push the pipe into the fitting until it clicks into place. This action creates a watertight seal.
Ensuring a Secure Connection
Check the Fit: Tug gently on the pipe to confirm it is securely connected.
Inspect for Leaks: Turn on the water supply and check for any leaks around the fitting.
By following these detailed instructions, you can confidently connect copper pipes using either soldering or push-to-connect methods. Each technique has its advantages, so choose the one that best suits your project needs. Remember, preparation and attention to detail are key to successful installation and secure connections.
Safety Precautions During Copper Pipe Installation

When working with copper pipes, safety should be your top priority. Proper precautions help protect yourself and ensure a smooth installation process. Let's explore the essential safety measures you need to follow.
Personal Protective Equipment (PPE)
Wearing the right personal protective equipment is crucial when handling copper pipes. It helps protect yourself from potential hazards during installation.
Gloves and Goggles
Always wear gloves to protect your hands from sharp edges and hot surfaces. They provide a barrier against cuts and burns. Goggles are equally important. They shield your eyes from flying debris and harmful fumes, especially when soldering. Make sure your goggles fit snugly and offer clear visibility.
Fire Extinguisher
Having a fire extinguisher nearby is essential. Soldering involves open flames, which can pose a fire risk. A fire extinguisher allows you to quickly respond to any accidental fires. Ensure it is easily accessible and in good working condition.
Safe Work Environment
Creating a safe work environment minimizes risks and enhances efficiency. Pay attention to these key aspects.
Ventilation
Good ventilation is vital when working with flux and solder. These materials release fumes that can be harmful if inhaled. Ensure your workspace has adequate airflow. Open windows or use fans to disperse fumes and keep the air fresh.
Fire Safety Measures
Implementing fire safety measures is crucial to keep soldered pipes from melting and prevent accidents. Clear the area of flammable materials before starting your project. Keep a bucket of water or sand nearby as an additional precaution. Always stay alert and never leave the soldering torch unattended.
By following these safety precautions, you can protect yourself and ensure a successful copper pipe installation. Remember, taking the time to prepare and maintain a safe environment is key to soldering safely and effectively.
Common Mistakes to Avoid in Copper Pipe Connection
When working on a connection copper pipe project, avoiding common mistakes can save you time and prevent costly repairs. Understanding these pitfalls ensures a successful and durable installation.
Incorrect Pipe Cutting
Cutting copper pipes accurately is crucial for a proper connection. Mistakes in this step can lead to leaks and weak joints.
Uneven Cuts
Uneven cuts compromise the integrity of the connection copper pipe. Always use a high-quality pipe cutter to achieve straight and clean cuts. This tool helps you maintain precision, ensuring that the pipe fits snugly into the fittings.
Not Deburring
After cutting, deburring the pipe edges is essential. Burrs can obstruct the fitting process and cause leaks. Use a deburring tool to smooth out the edges, allowing for a secure and watertight seal.
Improper Soldering Technique
Soldering is a key technique in connecting copper pipes. Mistakes here can lead to weak joints and potential leaks.
Overheating the Pipe
Overheating the pipe during soldering can damage the copper and weaken the joint. Apply heat evenly and avoid excessive temperatures. This approach ensures the solder flows smoothly and creates a strong bond.
Insufficient Solder Application
Failing to use the proper amount of solder results in weak connections. Ensure you apply enough solder to fill the joint completely. This practice guarantees a permanent connection and prevents leaks.
"My own introduction to soldering copper was a trial of fire and ice. I made a lot of mistakes in the process, but I managed to re-plumb every supply line." - Anonymous
Misuse of Push-to-Connect Fittings
Push-to-connect fittings offer a convenient alternative to traditional soldering. However, improper use can lead to issues.
Not Fully Inserting the Pipe
Ensure you push the pipe fully into the fitting. A partial insertion can result in leaks and an insecure connection. Listen for a click to confirm the pipe is properly seated.
Using Incompatible Pipe Types
Using incompatible pipe types with push-to-connect fittings can cause failures. Always verify that the pipe and fittings are compatible. This step ensures a reliable and leak-free connection copper pipe.
By avoiding these common mistakes, you enhance the durability and reliability of your copper pipe connections. Whether you choose soldering or push-to-connect fittings, attention to detail and proper techniques are key to a successful installation.
In your journey to mastering copper pipe connections, remember these key points. First, select the right tools and materials. This ensures a strong foundation for your project. Second, follow the step-by-step instructions for soldering or using push-to-connect fittings. Proper preparation and attention to detail are crucial. Third, prioritize safety by wearing protective gear and maintaining a safe work environment. Avoid common mistakes like uneven cuts and improper soldering techniques. By adhering to these guidelines, you ensure a secure, leak-free plumbing system. Quality workmanship in plumbing not only prevents costly repairs but also enhances the longevity of your system.
FAQ
What are the common methods for connecting copper pipes?
You can connect copper pipes using several methods, including sweat-soldering, brazing, compression fittings, and push-in-style fittings like SharkBite. Each method has its own advantages and is suitable for different applications. Sweat-soldering is a traditional method that involves heating the pipe and fitting to melt solder, creating a strong bond. Push-in-style fittings offer a quick and convenient alternative without the need for soldering.
Why do copper pipe connections fail?
Copper pipe connections can fail due to various reasons, with installation deficiencies and freezing being the most common causes. Improper installation can lead to leaks and weak joints, while freezing can cause pipes to burst. Other factors include water quality issues and mechanical damage. Ensuring proper installation and maintenance can help prevent these failures.
How can I ensure a leak-free connection when soldering copper pipes?
To achieve a leak-free connection, follow these steps:
Cut the pipe cleanly using a pipe cutter.
Deburr the edges to remove any roughness.
Clean the surfaces of the pipe and fitting thoroughly.
Apply flux to the cleaned surfaces.
Heat the joint evenly with a soldering torch.
Apply solder once the flux bubbles, allowing it to flow into the joint.
Proper preparation and technique are crucial for a successful soldering process.
Are push-to-connect fittings reliable for copper pipes?
Yes, push-to-connect fittings are reliable and provide a secure, leak-free connection when used correctly. They are especially useful for quick installations and repairs. Ensure the pipe is cut cleanly and deburred before inserting it into the fitting. Listen for a click to confirm a proper connection.
What safety precautions should I take when installing copper pipes?
When installing copper pipes, prioritize safety by:
Wearing gloves and goggles to protect against sharp edges and hot surfaces.
Ensuring good ventilation to avoid inhaling harmful fumes.
Keeping a fire extinguisher nearby when soldering.
Clearing the workspace of flammable materials.
These precautions help create a safe working environment and prevent accidents.
How do I choose the right type of copper pipe for my project?
Copper pipes come in different types, each suited for specific applications:
Type K: Thick walls, ideal for underground installations.
Type L: Medium wall thickness, commonly used in residential water supply lines.
Type M: Thinnest, suitable for low-pressure applications indoors.
Select the type based on your project's requirements and pressure needs.
Can I use lead-based solder for copper pipe connections?
No, you should not use lead-based solder for potable water systems due to health risks. The Safe Water Drinking Act restricts solders containing more than 0.2% lead. Use lead-free solder to ensure safety and compliance with regulations.
What are the benefits of using copper press fittings?
Copper press fittings offer a modern and efficient solution for plumbing installations. They provide a secure connection without the need for soldering, reducing installation time and labor. Proper use and installation are crucial for their performance, so follow manufacturer instructions carefully.
How do I prevent copper pipes from freezing?
To prevent copper pipes from freezing, insulate them properly, especially in unheated areas. Keep the thermostat set to a consistent temperature, even when you're away. During extreme cold, allow faucets to drip slightly to keep water moving through the pipes.
What should I do if I encounter a leak in a copper pipe connection?
If you encounter a leak, first turn off the water supply to prevent further damage. Inspect the connection for any visible issues, such as loose fittings or cracks. Depending on the severity, you may need to re-solder the joint or replace the fitting. If unsure, consult a professional plumber for assistance.
See Also
Top 5 Tips for Working with 1/4 Copper Fittings
Beginner's Guide: Easy Steps to Solder Copper Pipes
Soldering Mastery: Simple Tips for 1 1/2 Copper


