Step-by-Step Guide to Installing Air Conditioner Copper Pipes

Installing copper pipes for air conditioners is very important, especially when learning how to install air conditioner copper pipe. It helps your air conditioner work well and last longer. Water in copper pipes must move at the right speed. For cold water systems, the best speed is 5–8 feet per second. Following steps carefully stops leaks and keeps things working. This guide shows how to install air conditioner copper pipe safely and easily.
Key Takeaways
Collect tools like a pipe cutter and pressing tool. These tools help cut and connect copper pipes easily and safely.
Pick the best spot for your air conditioner. Think about room size, sunlight, and insulation for good performance.
Measure and cut copper pipes carefully. Use a tape measure and mark clearly to avoid errors.
Tighten connections well to stop leaks. Use clips or straps to hold pipes and wrap them with insulation to save energy.
Check for leaks with a vacuum pump. This step makes sure your air conditioner works well and keeps refrigerant from leaking.
Tools and Materials for Installing Copper Pipes
When installing air conditioning copper pipes, having the right tools is key. The correct tools make the job easier and safer. Let’s look at what you’ll need.
Important Tools for Installation
You’ll need some basic tools to begin. These tools help you measure, cut, and connect copper pipes properly. Here’s a list:
Pipe Cutter: This tool cuts copper pipes cleanly and smoothly. It works better than a hacksaw, which leaves rough edges.
ProPress Tool: This tool is fast and reliable. It handles high pressure and avoids mistakes compared to soldering.
Tube Bender: Use this to bend copper pipes without damaging them. It keeps water flowing correctly.
Deburring Tool: After cutting, this tool smooths pipe edges for tight connections.
Drill with Hole Saw Attachment: This makes neat holes in walls for pipes to go through.
Vacuum Pump: This tool checks for leaks, ensuring airtight connections.
These tools save time and effort. For example, the ProPress tool is safe and popular with professionals.
Materials Needed for Copper Pipe Installation
Now that you have tools, let’s talk about materials. Good materials are just as important as good tools. Here’s what you’ll need:
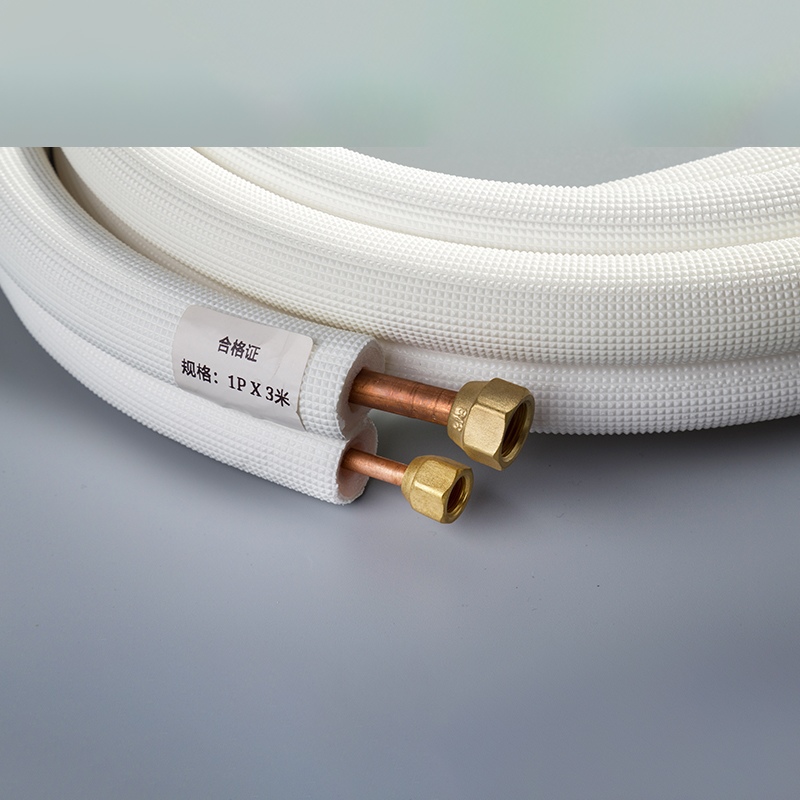
Copper Pipes: These pipes are strong, safe, and last a long time. Choose from types M, L, or K based on your needs.
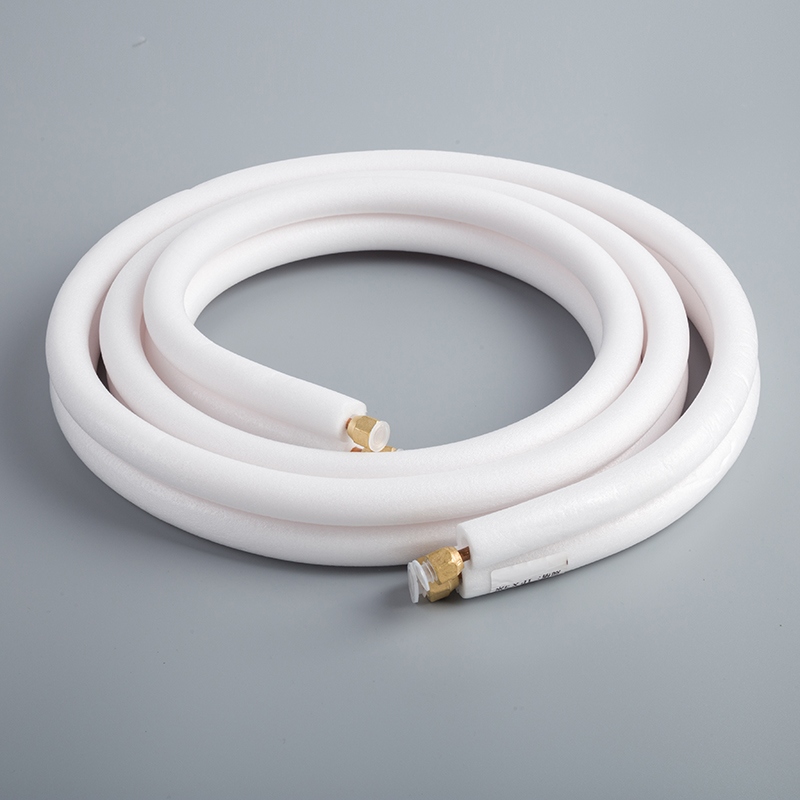
Pipe Insulation: This keeps pipes efficient by reducing heat loss. It also stops condensation, which can cause damage.
Fittings and Connectors: These join pipes together. Make sure they match your copper pipes.
Sealant Tape: This tape seals connections tightly to stop leaks.
Mounting Clips or Straps: These hold pipes in place on walls or surfaces.
Copper pipes are a great choice for any project. They don’t need harmful chemicals, don’t burn, and add value to your home. Most homes already use copper plumbing because it’s reliable and easy to maintain.
By gathering these tools and materials, you’re ready for a smooth installation. With good preparation, you can follow this guide and finish your project like a pro.
Preparing the Site for Installation
Before you start installing copper pipes, it’s important to prepare the site properly. A well-prepared site ensures the installation process goes smoothly and helps your air conditioner work efficiently. Let’s break it down step by step.
Choosing the Right Location
Picking the perfect spot for your air conditioner is crucial. The location affects how well the system performs and how long it lasts. Here are some key factors to consider:
Size of the Room: Make sure the air conditioner matches the room size. A unit that’s too small or too large won’t work efficiently.
Direct Sunlight Exposure: Avoid areas with too much sunlight. Too much heat makes the air conditioner work harder.
Possibility of Installing Ducts: Check if the location allows for ductwork, especially if you’re using a central HVAC system.
Distance From the Breaker Box: Choose a spot close to the breaker box. This reduces energy costs and makes wiring easier.
Range of the Thermostat: Ensure the thermostat can handle the temperature changes in the area.
Home Insulation: Good insulation keeps the cool air inside and helps the system run efficiently.
Take your time to evaluate these factors. A little planning now can save you a lot of trouble later.
Clearing and Setting Up the Area
Once you’ve chosen the location, it’s time to prepare the area. Start by clearing any obstacles. Remove furniture, decorations, or anything else that might get in the way. This gives you enough space to work safely and efficiently.
Next, check the wall or surface where the pipes will go. Make sure it’s clean and sturdy. If the wall has cracks or weak spots, fix them before you begin. A strong surface ensures the pipes stay secure after installation.
Finally, gather all your tools and materials in one place. Having everything within reach saves time and keeps the process organized. You’ll be ready to move on to the next step without interruptions.
Pro Tip: Use a drop cloth or tarp to protect the floor and nearby furniture from dust and debris during the installation process.
How to Measure and Cut Copper Pipes
Measuring and cutting copper pipes correctly is very important. These steps help the pipes fit well and avoid mistakes. Let’s learn how to measure and cut like an expert.
Measuring Pipes the Right Way
Measuring properly is the first step to a good installation. Follow these tips to get it right:
Use Proper Tools: A tape measure works best. Always check your measurements twice to avoid mistakes.
Mark Clearly: After measuring, mark the pipe with a pencil or marker. This shows exactly where to cut.
Keep It Clean: Make sure the pipe is clean before measuring. Dirt can make marking harder.
Pro Tip: Special tools like XRF spectrometry can check copper pipe materials. This is more for professionals but good to know about.
Here’s a simple table to remember key points:
Key Point | Why It’s Important |
|---|---|
Accurate Measurements | Correct measurements prevent errors and save time. |
Advanced Tools | Using good tools makes work faster and more precise. |
Cutting Pipes the Easy Way
After measuring, it’s time to cut the pipes. Cutting them correctly avoids leaks and ensures a good fit. Follow these steps:
Pick the Right Cutter: Use a copper pipe cutter. It cuts smoothly without damaging the pipe.
Prepare the Pipe: Make sure the pipe is clean and dry before cutting. Fix any uneven edges first.
Cut Carefully: Place the cutter on the marked line. Hold the pipe steady and turn the cutter around it. Press gently to avoid crushing the pipe.
Note: Keep the pipe steady while cutting. A shaky pipe can cause uneven cuts and problems later.
Extra tips for easier cutting:
Measure twice and mark clearly.
Keep your cutter sharp for smooth edges.
Take your time—don’t rush the process.
By following these steps, your copper pipes will be ready for a perfect installation.
Making Wall Holes for Copper Pipes
Marking the Wall for Pipe Placement
Before you start drilling, you need to mark the wall where the copper pipes will go. This step ensures the pipes are installed in the right spot without any guesswork. Here’s how you can do it:
Measure the Path: Use a tape measure to determine the exact route for the pipes. Start from the indoor unit and trace the path to the outdoor unit.
Mark the Points: With a pencil or marker, draw clear dots or lines on the wall where the holes will be drilled. Make sure these marks align with the pipe fittings.
Double-Check the Alignment: Step back and check if the marks are straight and properly spaced. This avoids mistakes during drilling.
Pro Tip: If you’re working on a multi-story building, use a laser level to ensure the holes align perfectly across floors.
Taking your time with this step saves you from redoing work later. It also helps the pipes fit snugly during installation.
Drilling Holes Safely
Drilling holes might sound simple, but doing it safely is crucial. You don’t want to damage the wall or hurt yourself. Follow these steps to drill like a pro:
Choose the Right Drill Bit: Use a hole saw attachment that matches the diameter of your copper pipes. This ensures a clean cut.
Secure the Area: Clear the space around you. Remove any items that might get in the way or cause accidents.
Drill Slowly and Steadily: Place the drill on the marked spot and start at a low speed. Apply gentle pressure to avoid cracking the wall.
When drilling, always follow safety protocols. For example:
Evaluate the wall’s condition to prevent damage to the copper tubing.
If you’re working underground, consider OSHA standards for trenching and excavation safety.
Avoid rushing. A steady hand ensures the holes are clean and precise.
Note: Wear safety goggles and gloves to protect yourself from dust and debris.
By marking and drilling carefully, you’ll create perfect holes for your copper pipes. This step sets the foundation for a smooth installation process.
How to Connect Copper Pipes for Air Conditioners
Connecting copper pipes to your air conditioner is very important. It helps the system work well and stay efficient. This step involves linking pipes to both indoor and outdoor units. Let’s go through it step by step.
Attaching Pipes to Indoor Units
Connecting pipes to the indoor unit needs careful attention. Follow these steps:
Check Pipe Sizes: Use the right pipe sizes from the manufacturer. This keeps refrigerant flowing smoothly and avoids system strain.
Clean Pipe Ends: Wipe the ends of the pipes to remove dirt. Clean pipes make stronger connections and prevent leaks.
Flare the Ends: Use a flaring tool to make 45-degree flares. This creates a tight seal for the connection.
Attach Pipes: Line up the flared pipe ends with the unit’s fittings. Tighten them with a wrench, but don’t overtighten to avoid damage.
Pro Tip: Use Flaretite fittings for extra safety. They stop leaks and are highly recommended.
Here’s a table to help you remember key tips:
Best Practice | Why It’s Important |
|---|---|
Ensures smooth refrigerant flow and system efficiency. | |
Flare Connections | Makes tight seals for leak-free connections. |
Insulation | Stops energy loss and keeps pipes working well. |
Pipe Support | Prevents pipes from bending or sagging over time. |
Taking your time here ensures a strong connection and smooth installation.
Connecting Pipes to Outdoor Units
After finishing the indoor unit, connect the pipes to the outdoor unit. Follow these steps:
Align the Pipes: Make sure the pipes line up with the outdoor unit’s fittings. Misaligned pipes can cause leaks or damage.
Clean and Oil: Clean the pipe ends and fittings. Add a little refrigerant oil to the flared ends for a better seal.
Secure the Pipes: Attach the pipes using the flaring method. Tighten carefully to avoid over-compressing the fittings.
Note: Avoid vertical loops in the pipes. These loops can trap oil and lower system efficiency.
Copper pipes are great for air conditioners because they handle high pressure and temperature changes. They are durable and reliable for cooling and heating systems.
Securing Connections Properly
The last step is securing the connections to avoid leaks or problems. Here’s how to do it:
Check Tightness: Inspect all connections to ensure they’re tight. Loose fittings can cause refrigerant leaks and reduce performance.
Use Clips or Straps: Attach pipes to walls or surfaces with clips or straps. This keeps them steady and prevents movement.
Add Insulation: Wrap the pipes with insulation to stop heat loss and condensation. Insulate each refrigerant line separately for better efficiency.
Here’s a comparison of connection methods and their uses:
Connection Method | Benefits | Common Uses |
|---|---|---|
Soldering | Strong and permanent connection | Plumbing systems |
Push-to-connect fittings | Quick and easy, no tools needed | Home plumbing |
Compression fittings | Reusable and simple to install | Various plumbing tasks |
Soldering is a popular way to connect copper pipes. It makes a strong bond but needs care and proper technique. Always clean and prepare the pipe ends before soldering for the best results.
Pro Tip: After securing everything, use a vacuum pump to check for leaks. This ensures the system is airtight and ready to use.
By following these steps, you’ll connect air conditioner copper pipes like a pro. Proper connections help your air conditioner run efficiently and last longer.
Insulating and Securing Copper Pipes
Keeping Pipes in Place
Holding copper pipes securely is very important. It stops them from moving or bending over time. Use mounting clips or straps to keep the pipes steady. These tools are simple to use and help the pipes stay aligned with the air conditioner.
Pick the right fasteners for your job. Mounting clips are great for walls because they hold pipes tightly without harm. For ceilings or floors, straps give extra support. Place fasteners evenly along the pipe to stop bending or pressure on fittings.
Make sure pipes don’t touch other surfaces directly. This reduces vibrations and wear. If pipes cross sharp edges, add padding to protect them. These steps help your pipes stay strong and last longer.
Tip: Rubber-lined clips are better. They lower noise and protect the pipe’s surface.
Wrapping Pipes for Efficiency
Covering pipes with insulation is just as important. It keeps the cooling system working well and saves energy. Without insulation, cooling power is lost, making the air conditioner work harder. This raises energy bills and shortens the system’s life.
Choose the best insulation material for your needs. Foam rubber is flexible and easy to use. Fiberglass resists heat well, while polyethylene foam is light and long-lasting.
Wrap the insulation tightly around the pipes. Cover every part to avoid cooling loss. If old insulation is damaged, remove it first. Worn insulation can lose up to 10 degrees of cooling power. Replacing it improves efficiency a lot.
Note: Wrap each refrigerant line separately to stop condensation and boost efficiency.
After wrapping, secure the insulation with tape or zip ties. This keeps it in place and stops it from slipping. Good insulation saves energy and protects pipes from moisture or heat damage.
Testing for Leaks in Copper Pipes
After connecting and insulating copper pipes, check for leaks. This step ensures your air conditioner works well and avoids refrigerant loss. Let’s learn how to test for leaks.
Using a Vacuum Pump to Find Leaks
A vacuum pump is great for spotting leaks in copper pipes. It creates a vacuum to find even tiny leaks. Follow these steps:
Attach the Pump: Connect the pump to the air conditioner’s service port. Make sure it’s tight to avoid wrong readings.
Make a Vacuum: Turn on the pump until the gauge shows -30 inHg. This removes air and moisture from the system.
Watch the Gauge: Turn off the pump and check the gauge. If the needle moves, there’s a leak.
Pro Tip: Digital vacuum gauges are more accurate. They detect very small leaks easily.
Vacuum pumps are precise tools. Some can find leaks as tiny as 5 * 10^[-13] Pa m³/s. This ensures your system is sealed and ready to use.
Here’s a table showing vacuum pump features:
Feature | Value |
|---|---|
Pump Capacity | 15 m³/h |
Smallest Leak Detectable | 5 * 10^[-13] Pa m³/s |
Speed for Helium | 2.5 l/s |
Sensitivity | 5*E-12 atm. cc/sec helium |
Using a vacuum pump also clears contaminants from the system. This step is key for a successful installation.
Checking Connections for Tightness
Loose connections often cause leaks. Double-check every fitting to avoid problems. Here’s how:
Inspect Closely: Look at all joints and fittings. Make sure they’re tight and aligned.
Add Sealant Tape: Wrap threaded connections with sealant tape. This helps prevent leaks over time.
Use Soapy Water: Mix soap and water, then apply it to connections. Bubbles mean there’s a leak.
Did You Know? Water damage happens more often than theft claims. Testing for leaks can save money and prevent repairs.
Professionals use advanced methods like ultrasonic testing or pipe cameras for detailed checks. Here’s a table comparing techniques:
Method | Purpose |
|---|---|
Ultrasonic Testing | Uses sound to check pipe thickness and find issues. |
CCTV Inspections | Cameras inspect inside pipes for leaks or damage. |
Pipe Sampling | Removes pipe sections for lab tests to find defects. |
Forensic Analysis | Detailed evaluation of pipe condition and recommendations. |
By testing for leaks and securing connections, you’ll keep your air conditioner efficient and long-lasting. This step is essential for a smooth-running system.
Safety Tips for Installing Copper Pipes
Safety is very important when working with copper pipes. Being careful helps avoid accidents and makes the job easier. Here are some tips to stay safe.
Using Tools the Right Way
Using tools correctly keeps you safe from injuries. Follow these simple tips:
Use the right size wrench to stop slipping.
Don’t force small wrenches or bend them sideways.
Pick the correct screwdriver for each job to avoid slips.
Cut away from your body when using knives. Keep blades sharp.
Use blow torches in open spaces. Check them before using.
Tip: Keep tools neat and close by. This prevents dropping or fumbling accidents.
These steps help you use tools safely and like a pro.
Preventing Common Errors
Mistakes can cause problems or cost extra money. Avoid these common errors:
Mistake | How to Fix It |
|---|---|
Crushed Fiber Cables | Use fiber trays or armored cables for better protection. |
No Labels on Cable Runs | Label cables with numbers or codes for easy identification. |
Poor Workspace Organization | Arrange cables neatly to improve efficiency and make work easier. |
Planning ahead helps you avoid these issues. For example, labeling cables makes future repairs faster and easier.
Pro Tip: Check your work often during installation. This catches mistakes early and keeps things safe.
By following these safety tips, you’ll protect yourself and ensure your work is high quality.
Putting copper pipes in your air conditioner is not hard. You now know how to measure, cut, connect, and insulate pipes step by step. Each step is important for making sure your system works well and lasts a long time.
Using this guide helps you avoid mistakes and makes installation easier. If you’re unsure about installing air conditioner copper pipes or face problems, ask a professional for help. They can ensure the job is safe and done right.
Remember: A good installation saves energy, stops leaks, and keeps your air conditioner working great!
FAQ
How can I tell if copper pipes are good for my air conditioner?
Copper pipes are strong and handle high pressure easily. They don’t rust, which makes them perfect for air conditioners. If you want something reliable, copper is a smart choice.
Can I put in copper pipes by myself?
Yes, you can! This guide explains each step clearly. If you follow it carefully, you can do the job well. For tricky setups, it’s better to call a professional.
What tools do I need to install copper pipes?
You’ll need a pipe cutter, tube bender, drill, and vacuum pump. These tools help you cut, bend, and secure the pipes correctly. Using the right tools makes the work safer and faster.
How do I find leaks after installing pipes?
Use a vacuum pump to check for leaks. Watch the gauge—if it moves, there’s a leak. You can also use soapy water on connections. Bubbles mean there’s a problem.
Why should I insulate copper pipes?
Insulation stops heat loss and keeps pipes dry. It helps your air conditioner work better and saves energy. Wrapping pipes tightly with insulation protects them and improves efficiency.
See Also
Proven Methods For Installing Copper Tubes In AC Systems
A Comprehensive DIY Manual For Repairing AC Copper Tubes
The Benefits Of Selecting Copper Pipes For AC Units

© Copyright 2024 Dongguan Baoyuan Refrigeration Parts Co.,Ltd - All Rights Reserved.